Posted on

Nintendo Switch 2 Price Hikes Are Finally Coming

A Nintendo Switch 2 console surrounded by physical game cases Matthieu Tuffet/Shutterstock

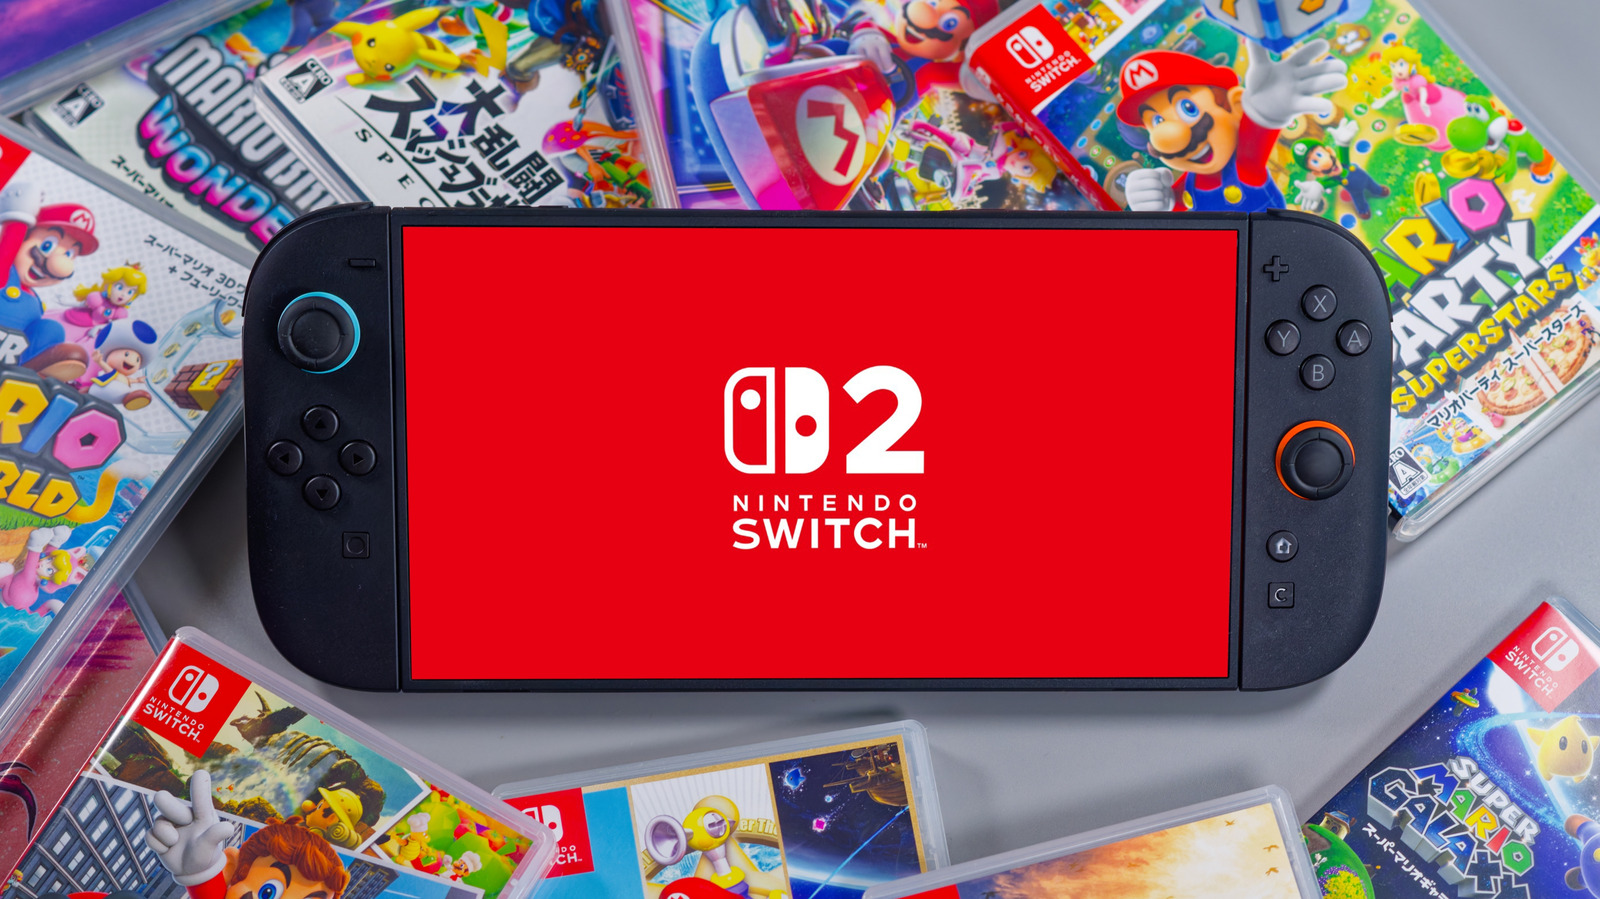
The AI bubble has finally (or possibly) burst, but the fallout isn’t going away anytime soon. Because companies were snatching up RAM left, right, and center to power data centers, other industries that relied on the components felt the burn of chip shortages. As a result, countless gadgets jumped in price, and despite fighting the wave, Nintendo is adding the Switch family of devices to that list.

On May 8, Nintendo announced it will increase the prices of Switch 2 consoles across all markets, although some countries will be hit harder than others. For those living in the United States, Switch 2 prices will increase from $449.99 to $499.99 — the same price Nintendo previously sold bundles that included games such as “Mario Kart World” and “Pokémon Legends: Z-A.” Likewise, Switch 2 consoles in Canada will jump from C$629 (approx. $459.82) to C$679.99 ($496.31), while Europe will see a similar increase from €469.99 ($553.38) to €499.99. ($588.71).

Unfortunately, Japanese gamers have drawn the short straw. Not only will the Switch 2’s price increase in Nintendo’s home country, but so will all Switch models, including the Switch Lite and OLED. To add insult to injury, even though Nintendo Switch Online is a global service required to play online games (and an evolving library of retro titles), Japanese subscribers will have to pay more money each month. If you live anywhere else, your fees will stay the same — for now.

Nintendo used Price Hike Schedule Rollout, and it’s super painful

A person holding a Nintendo Switch 2 bundle box with Mario Kart World Wongsakorn 2468/Shutterstock

Different markets will be hit at vastly different times, versus a simultaneous worldwide rollout of price increases. If you live in the U.S., Canada, or Europe, you only have to worry about the Switch 2’s price increase starting September 1, which should provide a reasonable safety net to help you save up money. However, Nintendo is giving Japanese customers less time to prepare. The new Switch and Switch 2 console prices will go into effect as early as May 25, with Nintendo Switch Online fee increases following shortly after on July 1.

Previously, outlets such as Bloomberg reported that, while Nintendo held off increasing the prices of consoles, the company was internally being pressured to mark up its products due to the ongoing RAM shortage, among other issues. Now, Nintendo has finally relented, and while only the Switch 2 is affected in most countries, don’t be surprised if Switch OLEDs and Switch Online prices increase for these markets later down the line. On the bright side, at least Nintendo isn’t rolling back its decision to price digital games cheaper than physical copies, so your wallet won’t be too upset if you buy games through the eShop. Until you need to purchase a memory card to store them, that is.

Source

Posted on

Apple’s Rumored AI AirPods Upgrade Is Already Raising Major Privacy

Close-up shot of AirPods Pro 3 outside of the charging case Christian de Looper/BGR

Apple has long been rumored to be introducing cameras onto its AirPods, and now Bloomberg suggests that the device has entered an “advanced testing stage,” meaning the final design and upcoming features have been decided, and it’s almost ready for production. With higher expectations regarding Apple’s first AI wearable, people are already taking to social media to discuss the possible privacy concerns.

One user on X wrote, “So we’re not going to have privacy anymore. You can be extra careful not to allow tracking or surveillance on your device. Meanwhile, someone at grocery store, bus, restaurant, etc. could be feeding info about you to Apple.” Another on X said, “What’s the purpose of putting a camera in your ear?” Over on Reddit, users say they don’t see a point in having AirPods with a camera, especially when people have mid to long hair, and the cameras will face sideways.

This device is expected to be introduced later this year, depending on the success of the new Siri, as the cameras are intended to work with the digital assistant. That said, privacy questions will be something Apple will have to address, but the people might just have to get used to cameras in Airpods. While the general public is used to people just raising their hands with their iPhone camera in public spaces, there’s still a discomfort whenever they see smart glasses with recording capabilities. AirPods with cameras might be the next frontier.

What’s AirPods with camera all about?

A hand holding AirPods Pro 3 inside the charging case José Adorno/BGR

According to Bloomberg, these AirPods will use the cameras to “see the space surrounding a user and provide information.” They’ll function like Siri’s eyes and aren’t designed to take photos or videos. Instead, they will capture data in low resolution and will always have a green light on whenever they’re capturing information.

Bloomberg suggests that this wearable could complement the iPhone’s Visual Intelligence, offering a hands-free experience with Siri. For example, users could ask Siri to add information from a flyer to their iPhone’s calendar, suggest a meal to cook based on their groceries, or even translate something in a different language. It could even “provide more advanced turn-by-turn directions,” which is something Google recently did with its new Maps app update.

With a similar design to the AirPods Pro 3, it’s unclear if Apple could upgrade this wearable with a new, more powerful H3 audio chip, or if the company will rely on the iPhone to process the data, or send the data to a cloud, using Apple’s Privacy Cloud Compute system. Still, there isn’t a lot of information about these new AirPods, but this isn’t the only AI wearable Apple has in the works, as it is also planning an AI pendant and smart glasses as well.

Source

Posted on

Can You Control Smart Plugs Away From Home?

Person holding a white smart plug in one hand and a smartphone in another Dikushin Dmitry/Shutterstock

Smart plugs are a convenient and cost-effective way to turn any home into a smart home, offering a wide array of clever uses around the house. These devices allow you to remotely control any device they are connected to, but the best part is that since smart plugs rely on the internet, you can remotely control them from across the house or around the world. While these are super helpful to have throughout your home, keep in mind that smart plugs can also save you money in the long run.

While the operation may be limited to simply turning the device on or off, it’s the remote-control functionality that makes smart plugs a valuable upgrade. Even if you don’t opt for one of the best smart plugs on the market, you can still use them to power devices on or off from just about anywhere, as long as both the smart plug and the device you are using have internet access. So, if you’re in bed, on the couch, or out of town, smart plugs are a smart buy.

Use the companion app for remote control

Installing the TP-Link Tapo app to remotely control a smart plug

To remotely control a smart plug when you are away, you will need the plug’s companion app. Almost every manufacturer has one, and it is usually available on both the Apple App Store and the Google Play Store. It’s the same app that you use to monitor energy consumption or set up schedules for connected devices. For instance, it’s the “Kasa Smart app” for the Kasa Smart Plug and the “TP-Link Tapo” app for the Tapo Smart Plug. Many smart plugs also work with the smart home apps natively available on Android and iOS. If you are using the TP-Link Tapo smart plug, simply launch the app, select the smart plug from the list, and tap the power button to turn it on or off, the same way you would at home. If the smart plug supports voice control, you can use that as well. 

As for connecting the smart plug to a Wi-Fi network, you should ideally have done this while setting up the smart plug for the first time. If the smart plug doesn’t work very well when controlled remotely, it could be a poor network connection to blame. To address that, you may need to set up a Wi-Fi extender or a mesh network to boost signal strength. This will improve Wi-Fi signals to the smart plug, ensuring smooth remote operations.

Source

Posted on

5 Things Your MacBook’s Touch ID Button Can Do (Besides

Apple introduced Touch ID in 2013 with the release of the iPhone 5S, a fingerprint recognition sensor that provides users with an easy way to secure their devices. The feature came to Apple’s laptops starting with the 2016 MacBook Pro and has been included in the majority of MacBook models at every price point that Apple has released since then. One notable exception is the base-model MacBook Neo, but the fingerprint scanner is even part of the Magic Keyboard that comes with most iMacs. While the iPhone X ditched the physical home button and swapped fingerprints for facial recognition, Face ID hasn’t replaced Touch ID on MacBooks yet.

Of course, your MacBook’s Touch ID button — located in the upper right-hand corner of the keyboard — does more than just let you lock and unlock your laptop without having to type in your password every time. You’ve probably run across a few of its other functions, but there are more you may not know about. That includes some that don’t involve Touch ID at all, such as rebooting your device or opening up one of your Mac’s best accessibility features.

Enter passwords

You’ve probably already used this one, but you can use the Touch ID button to AutoFill usernames and passwords in Safari. You’ll need to have the information saved in iCloud Keychain, but you can choose to remember passwords for future Touch ID use. If this isn’t working for you, go to System Settings, then Touch ID & Password, and make sure Use Touch ID for autofilling passwords is turned on. You’ll also need to set up a password for your MacBook itself before you can use iCloud Keychain features.

Additionally, you can use Touch ID to access password-protected content on your laptop, like notes, documents, and the “Recently Deleted” and “Hidden” albums in the Photos app. This is helpful if you have things on your laptop you’d prefer to keep private, especially if you’re using a shared device. Be aware that there are some notes you can’t lock, including ones you’ve already shared and those containing videos, audio files, PDFs, or documents.

Make purchases

This is another feature you’ve most likely used already, but you can use Touch ID to make payments with Apple Pay or make purchases within iTunes, the App Store, and Apple Books. That, of course, requires you to have a card on file for Apple’s digital storefronts or Apple Pay. If you have an iPhone, you’ve likely already done this, but you can set up Apple Pay by going to System Settings, then Wallet & Apple Pay. From there, you can choose to use a card on file (if you already have one) or add a new card either manually or with your computer’s camera.

Touch ID isn’t the only way to use Apple Pay on a MacBook, as you can also confirm purchases with your iPhone or Apple Watch, but it’s the most convenient. Just make sure you have Touch ID enabled for Apple Pay and other purchases in System Preferences.

Switch profiles

When you set up Touch ID on your MacBook, you have the option to enable or disable certain features. A lesser-known one is fast user switching, which allows you to swap between different profiles on your device with just your fingerprint when multiple users are signed in. It’s a feature you’re more likely to need on desktops, but it’s nice that it’s an option for those who share a laptop.

To turn on fast user switching, go to the Touch ID & Password menu in System Preferences and enable Use Touch ID sensor for fast user switching. Note that you’ll need to have device administrator privileges to set this up. To use it, press the Touch ID button until it clicks; that will open up your account, allowing you to quickly go about your business. Keep in mind that the user needs to have already used their password to sign in at some point recently, otherwise they’ll be prompted to enter it.

Reboot or lock your device

This feature doesn’t have to do with Touch ID, but rather the button itself. The Touch ID button replaces the old power button on newer models, something that some Reddit users have admitted they didn’t notice even after using their MacBooks for quite some time. This is what you’ll use to put your laptop to sleep and, when necessary, force it to shut down. To access the shutdown functionality, just press down on the button harder than you would to use the fingerprint reader. If your computer is unresponsive, keep holding the button down until it shuts down. You’ll lose any unsaved changes, but a restart will hopefully resolve your problem.

You can also use the Touch ID button to lock your MacBook’s screen by quickly pressing it, giving you a way to instantaneously secure your device. There are other ways to do this, like setting up hot corners and making one a lock screen shortcut, but the Touch ID button is just as simple in a pinch.

Turn VoiceOver on and off

Finally, the Touch ID button is a convenient way to turn on one of the MacBook’s best accessibility features: VoiceOver. This is a built-in screen reader for those with blindness or low vision that’s been designed to read text, navigate the screen, and set up braille devices. There are several ways to turn VoiceOver on, but one of the easiest is holding down the Command key and quickly pressing the Touch ID button three times.

With VoiceOver enabled, you can navigate your MacBook using various methods like keyboard commands, trackpad gestures, or an external braille display. You can also use Keyboard Help to read out which keys you’ve pressed and any commands you’ve entered. There are some standard commands and trackpad gestures, such as muting and unmuting VoiceOver with a three-finger double tap. You can also set up custom gestures and key commands, with the option to swap between Built-in and User commands.

Source

Posted on

Here’s When You Should Be Replacing Your Phone’s Screen Protector

Someone holding a cracked standalone screen protector above a smartphone Lazy_Bear/Shutterstock

Whether you plan ahead or not, realistically, the screen protector on your smartphone will need to be replaced at some point. They’re not designed to last forever. As one of the last lines of defense between the outside world and your phone or tablet’s display, they need to be at the top of their game to repel just about anything from scratches and scuffs to potential liquids and particles — like sand. Over time, regular wear and tear and exposure to various elements, including even sunlight, can wear down their protective properties. In which case, it’s time to replace the protector with a fresh one.

When you notice a screen protector is cracking, beat up, or coming loose, those are the obvious signs that it’s time to swap it out for a new one. But some other, lesser-known signs include visible scratches, reduced sensitivity of the touchscreen when using the device, and lower visual clarity. In the latter case, you might see stains, a non-removable haze, or even yellowing. Peeling edges and the influx of air bubbles are further signs that it might be time to swap out the protector or film.

Choosing the proper replacement is also important. Comparing options, you might wonder if expensive screen protectors actually save your phone from damage more effectively. The better way to look at it, however, is whether the protector you choose fits your lifestyle. Plastic, tempered glass, and hybrid options are available, and all are suited to different purposes.

Which screen protector should I choose?

Someone getting ready to apply a screen protector to the front of their smartphone. Stefan Tomic/Getty Images

There are several types of screen protectors available, including thermoplastic polyurethane (TPU), polyethylene terephthalate (PET), tempered glass, etc. Tempered glass tends to be more expensive but offers superior durability for the most part, along with impact- and scratch-resistant properties. TPU protectors are relatively cheap, with decent durability — though not on the same level as tempered glass. They may also have self-healing properties to fend off minor scratches and scuffs. Finally, PET screen protectors have the least protection overall, but they’re also the most cost-effective option. They’re extremely thin compared to the other two options, making them virtually invisible to you when applied.

All three types can come with unique properties like extra privacy protection, anti-microbial treatments, and oleophobic coatings. The best way to choose is, honestly, to consider how much protection you want and how much you want the protector to “feel” like your original phone. Go with tempered glass for shatter and scratch protection, especially if you’re accident-prone. Tempered glass also feels the closest to the real glass panel of your phone’s screen. For extra impact protection, add a rugged case, as well.

Screen protectors offer more benefits than just damage prevention

Close up of a person installing a tempered glass screen protector on their phone. jittawit21/Shutterstock

There’s another reason to replace your screen protector regularly, and it has to do with germs. It’s difficult to give a specific timeline because screen protectors break down differently, but annually is a good frequency.

Many screen protectors come with an anti-microbial layer that helps prevent germs and nasty buildup. After all, you’re touching your device with unwashed hands after interacting with the world around you, so it’s bound to pick up some gross stuff. But that coating can wear down like anything else. That’s when germs really start to gather. Replacing the protector can help refresh that anti-microbial layer, as long as you choose one with it, thereby offering additional germ and grossness protection. Although the experts recommend avoiding buying antimicrobial phone cases for that benefit alone, and instead suggest regularly cleaning your phone with alcohol wipes. They might stave off germs, but are ineffective against pathogens.

Beyond the anti-microbial properties, they can also offer blue-light filtering, an anti-glare coating, and even privacy protection to shield onscreen content from would-be snoopers. In fact, one of the best tech gadgets to actually protect your privacy if you don’t have the Samsung Galaxy S26 with the technology built in, is a privacy-forward screen protector. However, depending on how these coatings or traits are incorporated, such as a thin layer over the top of the material, they can wear down over time and lose effectiveness. When that happens, a replacement is a good idea, especially since they’re relatively inexpensive and it only takes a few minutes to swap out the protector.

Source

Posted on

The Fast & Furious Outer Space Sequence Gets One Thing

Roman and Tej's car in space in F9 Universal

The “Fast and Furious” franchise, aside from veering away from its original premise of high-speed street racing, has defied the laws of science with each film that hits the garage. Audiences have seen Dwayne “The Rock” Johnson pull down a helicopter like he’s Captain America in “Hobbs and Shaw,” an army of zombie cars flood the streets of New York, and Dominic Toretto (Vin Diesel) lift a car to use as a shield during a gunfight, as if he were flipping IKEA furniture. Perhaps the most absurd moment in the entire series, though, is something fans practically brought into existence when Tej (Ludacris) and Roman Pierce (Tyrese Gibson) drove a Pontiac Fiero into space.

It’s quite a jump from the first film, which featured our heroes hijacking trucks carrying TVs and DVD players. Regardless of how ludicrous it was (which coincidentally involved Ludacris himself), Roman and Tej’s lap through the stars actually earned some respect from a real-life astronaut. In an interview with Vanity Fair (via YouTube), former astronaut Chris Hadfield was asked to share his thoughts on various movies and shows about spaceflight, pointing out what they got right and what they got wrong. Sandwiched between the likes of Apple TV+’s “For All Mankind” and “Top Gun: Maverick” was “F9: The Fast Saga,” which, as crazy as driving a car into space might be, certainly captured the awe of looking down at our beautiful blue planet spinning in the vastness of space.

Fast 9 got the sight of Earth just right, according to Chris Hadfield

Roman and Tej in their space suits in F9 Universal

Hadfield didn’t mince his words when it came to the movie’s daring and downright silly voyage into space. “Their engines fire, and like 30 seconds later, they’re in orbit. It took me eight and a half minutes, so they really went fast. They were getting crushed.” Nevertheless, Hadfield was forgiving of the franchise’s ninth movie, going where no street racer had gone before, specifically when “Fast 9” pumps the brakes and lets the heroes just look where they are.

It’s in Tej and Roman’s brief beat floating through space that Hadfield was happy to praise, capturing the rare experience of seeing Earth in its entirety. “I love the scene when those two guys — and you see it reflected in their visors — are suddenly actually seeing Earth from space. The beauty of that and the wonder of it that they’re emoting there, it feels just like that,” Hadfield explained. “Suddenly, all of the blue is below you. You’re out in the eternal blackness, and all of life is laid out there on this beautiful curving arc under them.”

Incredibly, then, it’s in one of the most far-fetched moments in the entire tire-screeching saga that they actually had a bit of reality to it. Well done, Toretto family. While you might have tested your audience’s acceptance of Vin Diesel having an estranged brother that looked like John Cena, sending a mechanic and a street racer on a space mission got the thumbs up from someone who has actually been on one for real.

Source

Posted on

The Frustrating Bluetooth Connection Problem You Can Fix With One

Finger about to tap the Bluetooth icon in the control panel of an Android smartphone eRHa Lens/Shutterstock

When Bluetooth devices became mainstream and really affordable, it made things so much easier. You didn’t have to rely on wired connections anymore. Additionally, with recent developments in Bluetooth technology, connection strength, stability, and audio quality have improved, even during video calls, which involve bi-directional transfer of data. But there’s one thing still troubling users: frequent disconnections.

Many of us still experience Bluetooth devices disconnecting from a PC or smartphone as soon as the display turns off or the system goes to sleep. Sometimes, simply re-enabling Bluetooth or reconnecting the device works, but there’s a hidden Android setting to extend battery life that can fix this problem in one go. What happens is that the operating system, in a bid to save battery, disables the Bluetooth functionality as soon as it detects inactivity, resulting in frequent disconnections. This behavior is not exclusive to any device, but can be seen across operating systems like Windows and Android. The good news is that fixing this doesn’t take more than a minute.

Fixing Bluetooth disconnections on Windows

Disabling auto-device turn off under power management for Bluetooth adapter in Device Manager on Windows 11 Kazim Alvi/BGR

On Windows, there’s a hidden setting within the Device Manager that automatically turns off the Bluetooth adapter. Remember, this is the adapter responsible for all Bluetooth connections on your system. So, if you ever find your devices frequently disconnecting after moments of inactivity, this is the first thing you should check.

To do that, open Device Manager on your PC, expand the Bluetooth entry, right-click on the Bluetooth adapter (not the devices), and select Properties. Now go to the Power Management tab, uncheck the Allow the computer to turn off this device to save power option, and save the changes.

Whether your Bluetooth headphones are disconnecting, or the mouse, keyboard, or any other peripheral stops working all of a sudden, disabling this power-optimization setting should do the trick. As for identifying the Bluetooth adapter from the list, it’s likely to be the only one with the Power Management tab. The rest are simply the devices that you have previously connected to the system.

Changing Android settings to fix Bluetooth connection problems

Disabling Bluetooth under Optimize battery usage on Android to fix frequent disconnects Kazim Alvi/BGR

Android devices are just as likely to be affected by this Bluetooth problem, and it again comes down to a built-in battery-saving feature, not the devices themselves. On an Android smartphone or tablet, you usually connect fewer Bluetooth devices than a computer, but a quick change goes a long way in streamlining your experience.

To prevent Bluetooth from disconnecting on your Android device, open Settings, go to Apps, tap on the ellipsis near the top right, and select Special access. Now, choose Optimize battery usage, then pick All from the top menu, and disable the toggle next to Bluetooth. That’s it, no tricky or advanced changes are required. 

There are several other common Bluetooth problems that this change might fix, but more importantly, it will ensure seamless Bluetooth connectivity even when you are not actively using the system, whether it’s your smartphone or a Windows computer. Keep in mind that this may slightly affect the battery life, but for those who prioritize connectivity, it won’t be a bad trade-off.

Source

Posted on

Fire TV Is Dead – Here’s What Amazon Is Calling

Close up of the Amazon Fire TV logo on a store display. PJ McDonnell/Shutterstock

Amazon Fire TV is dead. Long live Amazon Ember. Well, technically. Amazon unveiled the new branding in a blog post while announcing the Ember Artline lifestyle TV series. Artline is meant to be a competitor to Samsung’s The Frame series, and other artistic displays that show off realistic artwork. First mentioned during CES 2026, Ember will effectively now include all Amazon smart TVs under the same umbrella, which you should soon see at retailers with the new name. But Fire TV isn’t actually going away completely as this name will continue to be used for the operating system on Amazon’s smart devices.

If that’s confusing, the best way to explain it is that Ember will now be the name for all physical televisions from Amazon. Instead of Fire TVs they will now be Ember TVs. However, they will be running the Fire TV OS, Amazon’s smart ecosystem. What this is primarily intended for is to help differentiate Amazon-specific TVs from other brands and unify the technology. For example, TCL, Toshiba, Insignia, and Hisense all sell third-party Fire TVs, and that will still be the case. Now it will be easier to tell when you’re getting an Amazon-made TV versus one of the other brands.

Adding to this confusion, Fire Sticks and Fire streaming devices aren’t getting a name change. Those will still be called the Fire TV Stick or the Fire TV Cube. The new Fire TV Stick may look like a major upgrade to the previous models, but it still carries the same “Fire TV” branding you’re used to.

What Amazon TVs now carry the Ember brand name?

In the rebranding announcement post, Amazon explained it would start with the new “first-ever lifestyle TV” from the company, the Amazon Ember Artline. But that’s not the only TV that carries the new name. Many of the pre-existing “Fire TV” televisions are the same, and have the same review details in product listings, albeit with the new branding. For example, the Amazon Ember 32-inch 2-Series used to be called the Amazon Fire TV 32-inch, but now the product description explicitly says “with Fire TV.”

Other TVs in the Ember line including the Amazon Ember 4-Series 4K, Ember QLED Series, and the Ember Mini-LED Series. This also doesn’t change anything about the TVs themselves as far as we’re aware. In other words, Amazon’s self-named Fire TVs will still be manufactured by the same parties, presumably, with the new Ember series branding.

That being said, Amazon Fire TV did change its look to an entirely updated and revised interface. Although it has the same name, it’s a new and improved experience across the board with better layouts, rounded panel corners, new color gradients, updated typography, and optimized spacing, among other adjustments. It also has better performance and is more responsive — Amazon says the update introduced 20% to 30% speed gains.

Source

Posted on

Why The Remarkable 2 Tablet Was Discontinued

The reMarkable 2 tablet was discontinued on May 6, 2026. The reMarkable 2 is a “paper tablet” designed for reading or taking handwritten notes, with a thin form factor and surface texture that replicates the feel of paper. It was released in June of 2020 and helped the company triple its operating profits in the following year. But after six years, the reMarkable 2 tablet is no longer being manufactured or sold.

In an article published by reMarkable, the company revealed its reMarkable 2 tablet was discontinued to make room for the reMarkable Paper Pure, the new flagship model. However, the Remarkable 2 device will still receive software updates, and ReMarkable will continue to sell dedicated accessories, including markers and attachable keyboards. The ongoing support is sure to be a relief for reMarkable owners, especially after recent news of Amazon discontinuing support for older Kindle models. Not every e-reader manufacturer is ready to leave their existing customers in the cold.

Should you upgrade to the Remarkable Paper Pure?

You can still use your reMarkable 2 tablet for all of your everyday use cases, even now that the company has discontinued it. But is reMarkable marketing the Paper Pure as a replacement your sign that it’s time to upgrade?

The Paper Pure has a 10.3-inch black-and-white screen that boasts 20% higher contrast compared to the reMarkable 2. Kindles and other e-readers are better for your eyes than tablets, and the Paper Pure’s enhanced screen attempts to bring that to another level. It also has 30% longer battery life, 4x more internal storage at 32 GB, and 50% faster scrolling and navigation.

If you are ready to upgrade, the Paper Pure isn’t your only option. We reviewed the reMarkable Paper Pro Move and found it to be a worthwhile buy with a portable form factor that will feel like a convenient improvement if you’re frequently on the go. It starts at $449, which is actually $50 more than the newer Paper Pure, but its versatility might make it a more meaningful upgrade depending on your lifestyle. On the other hand, if these reMarkable tablets aren’t quite remarkable enough for you, there are plenty of other e-ink gadgets that aren’t an Amazon Kindle.

Source

Posted on

Amazon Users Call This $22 Keychain Gadget ‘Reliable’ In Emergencies

We may receive a commission on purchases made from links.

For those who have ever been in public with a dead smartphone, you likely know the importance of having access to power. Whether you just want to play a mobile game to pass the time or you plan to use your device to call for a ride, having dead batteries can lead to precarious situations. While we can recommend plenty of cheap power banks users swear by, Amazon currently has one on sale that’s small but mighty.

Available on Amazon with a sizable discount, the Rorry 5000mAh Portable Charger Power Bank is small enough for your keychain or an everyday carry bag. With a slim, portable design and a max output of 5V, it’s got some surprising features, including the ability to share it with someone else while you’re charging your own device. It also includes different cables built directly into the device for wide compatibility. 

Though many smartphones and devices promise all-day battery life, it’s never fun to be in a public space and have a low-battery warning appear on your screen. Like keeping some emergency gadgets in your vehicle, it’s never a bad idea to have a portable charger on your person.

Amazon customers save 28% on this 5000mAh portable power bank

With a 4.5-star rating and over 380 reviews, the Rorry 5000mAh Portable Charger Power Bank is available for $21.59, shaving a good amount off its usual listing price. Though we’re looking at the black model, an assortment of soft pastel colors is available at the same price, including blue, purple, pink, and more. With a built-in USB-C cable and port, Lightning cable, and an included keyring, the device offers a nice balance between portability and functionality while still retaining a portable size.

Specifically designed for devices in Apple’s iPhone and AirPods lineups (though it is USB-C-compatible), the company claims the 5000mAh battery can fully charge an iPhone 15 in about 2 hours or charge AirPods in just 1.2 hours, up to 8 times per cycle. The battery itself can be fully charged in just 2.5 hours, and as long as one device has a Lightning port, you can charge three devices at once. There are also safety measures built into the power bank, including over-heating, over-current, over-voltage, and short-circuit protections.

Along with customers finding it to be a reliable accessory, they also praise its compact design, charging speeds, and overall convenience. However, some users report issues with charging the bank itself. Nonetheless, 86% of users rated it 4 stars or higher, with 81% of all users giving it 5 stars. 

Source