Posted on

Using Your Laptop On A Soft Surface Can Slowly Kill

a woman using a laptop on her lap Stock_lab/Shutterstock

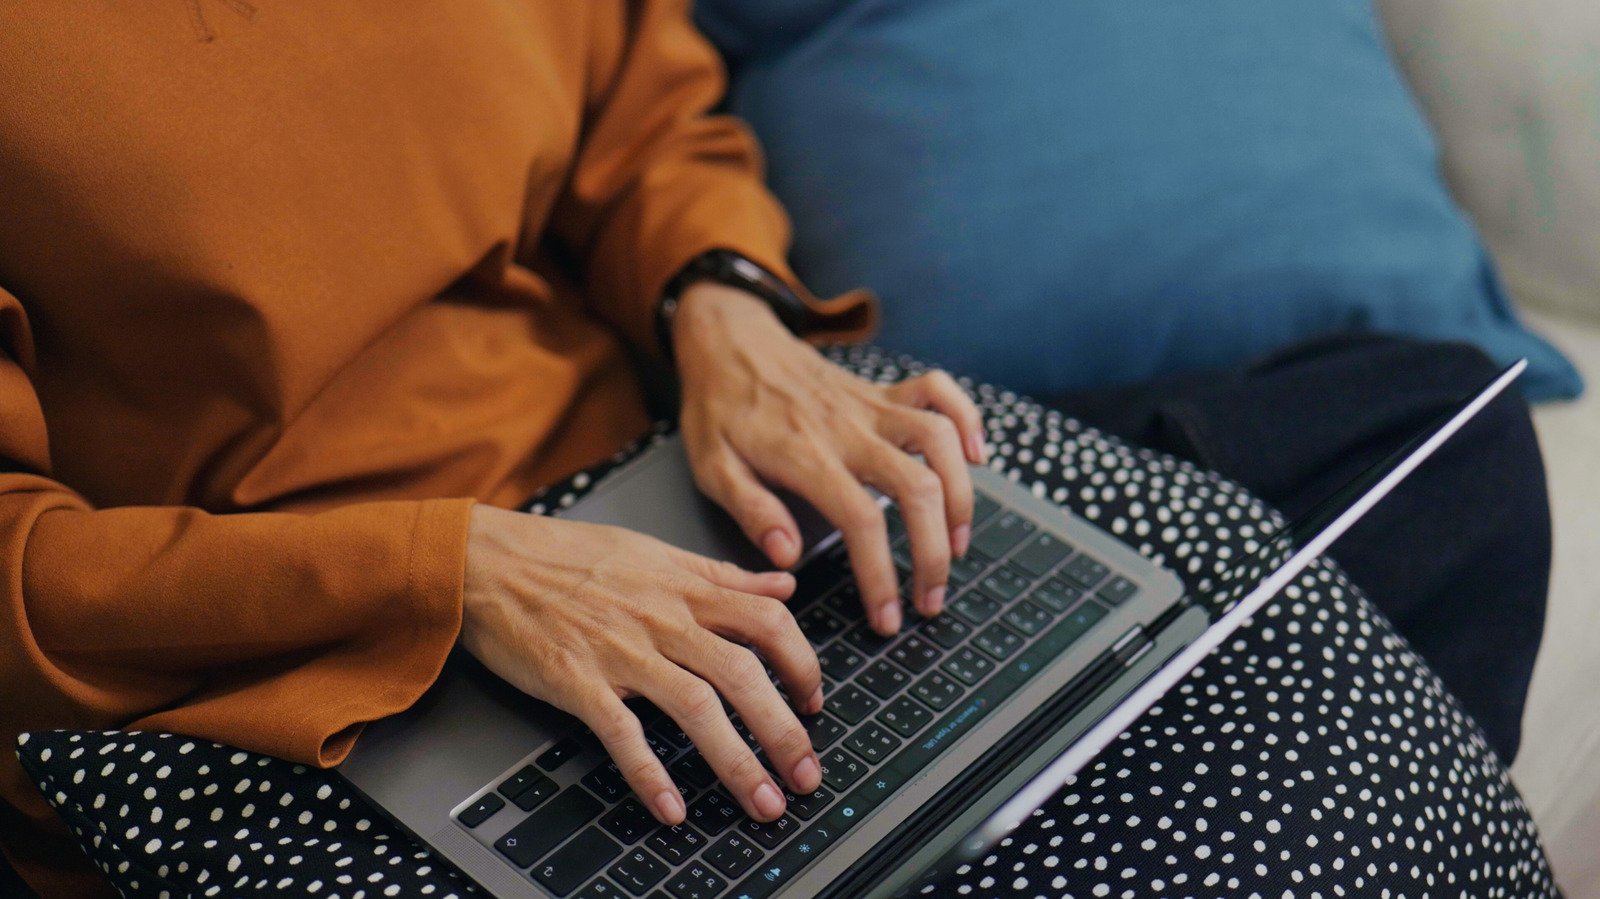
As the name seems to suggest, a laptop is designed for your lap. That’s even how it’s described in the dictionary. It’s a more convenient and portable computer you can take with you for work, school, or play. All that portability means you may use it in some more comfortable locations such as your bed or the couch. While it’s easy to move from room to room or to a coffee shop where you may put it in your lap, working on a laptop on a soft surface may harm it more than you’d expect.

Placing a laptop on a couch cushion or on the bed can obscure its fan and block airflow. Doing so may cause the laptop to overheat as the fans are forced into overdrive in an attempt to cool it down. That strain can, over time, damage parts such as the battery, leading the laptop to run less efficiently. A big tell that a laptop could be too hot is if the fan sounds much louder.

There are ways to make sure the laptop is properly vented and cooled even if you use it on a soft surface. There are a few things around the house you can use to help, but one of the most effective ways is to get a cooling device. You can also prevent overheating laptops with this cooling pad.

How to use your laptop on a soft surface without damaging it

a laptop with a cooling pad underneath it Stefan.Simonovski/Shutterstock

Using a laptop on the bed, couch, floor, or your lap can be done without it overheating if you plan ahead. If you prefer browsing the net or working that way, a cooling pad provides cool air for your laptop. They come in many shapes and forms, but work by blowing cool air into the underside of the laptop so it does not overheat.

Cooling pads, sometimes called mats or fans, are flat mats that are placed between your laptop and the surface it’s resting on. They can be used just about anywhere you please from a bed, a carpeted floor, your lap, a comfy recliner, or a table. Many work through batteries or come with a USB cable to connect directly to the laptop. Though if it’s your first time using a cooling pad, make sure you aren’t accidentally using it wrong.

Cooling pads are a great way to cool down a laptop or to make sure it doesn’t reach hot temperatures. If you are in a pinch and are waiting for your cooling pad to arrive, you could always elevate your laptop on the soft surface. Another suggestion is to use a hardbound book to prop up the laptop, just make sure it’s not blocking any vents or fans. You could also invest in a stand you can place on the surface as well.

Ways you can cool down your laptop

a smoking laptop from overheating Simonkr/Getty Images

Keeping a laptop from overheating comes down to making sure it’s elevated, cooled, and can vent properly. However, using a laptop on a soft surface isn’t the only reason it could get overheated. There are several other ways your laptop could heat up even if you use a cooling pad or elevate it properly.

As you use your laptop, it will collect dust and dirt that can clog the interior components. You could open up the laptop and clean it yourself, but using a can of compressed air on the vents may do the trick best. Another cause of overheating is running too many applications at once. If you’re playing a graphically heavy game, chatting on Discord, and streaming, your laptop’s CPU and GPU may struggle, causing the fan to work harder. Though you may not need a new laptop as there are laptop upgrades cheaper than buying a new computer.

If you want to use your laptop on a soft surface, using a cooling pad or stand is a good idea to prevent it from potentially overheating. Taking care of your laptop by blowing out dirt, using less applications, and tools that manually control the speed of the fan can help. Though, when in doubt, shutting it down if it gets too hot, waiting until it cools, and turning it back on can help.

Source

Posted on

Can Your Phone’s Hotspot Replace Your Home Internet?

Person using computer while on phone South_agency/Getty Images

Connecting to a mobile hotspot can be great in a pinch, but can you use your smartphone to replace your whole home’s internet? While the short answer is yes, your connection’s effectiveness will vary based on your carrier and where you live. As with basic call reception, the strength of a mobile hotspot depends on your location, but your network provider also plays a role in whether or not it makes sense to use your phone’s mobile hotspot for home internet.

With the advances of 5G now taking hold across most major U.S. cities, those who live within the urban sprawl might find that it’s faster than their home connection. Those in rural areas, however, will likely find that the cellular connection just isn’t good enough to use their phone properly let alone as a mobile hotspot. Hotspots rely on a steady signal, and the lower it goes, the worse it’ll be. 

You will also need to double-check your carrier’s permissions for hosting a hotspot as some networks will limit the number of devices and the amount of data. For example, Verizon’s device limit is five, while most carriers have tiered data caps starting at 5GB per month. Your particular device could also play into your decision, but generally speaking, it’s pretty easy to turn on your phone’s mobile hotspot, especially if you’re an Android user. 

There’s more than just 5G connections to think about

Person using computer at home Prostock-studio/Shutterstock

Of course, there are other limitations to using a phone’s mobile hotspot to replace your home internet, and your home itself could be a key factor. The size of the house can also play into how effective your phone’s hotspot is for other devices. While newer phones’ hotspots meet a larger range, the connection can be weakened if there’s too much in the way, such as walls and furniture. 

Another hurdle with relying on your phone to provide internet service for your entire home is the battery. Turning your phone into a bite-sized router could be added to the list of habits that are draining your phone battery, especially older models with weaker batteries. Even if it’s plugged in and charging during use, this can potentially lead to overheating situations, as the phone isn’t sitting idle with the hotspot on. 

Rather than using your phone’s hotspot, it’s probably better to use USB tethering or investigate 5G or 4G routers. These take a SIM card subscribed to a network and essentially acts as a hotspot without requiring a phone. If you already have an active SIM card, it can be used as well. Looking at networks that are already providing this, Verizon, for example, now has a 5G Home Internet package that you can take advantage of.

Source

Posted on

These 5 Common Objects Are Radioactive According To The US

A person holding a radiation detector. Helios8/Getty Images

When you’re talking about radiation, it’s not unreasonable to immediately jump to man-made, weaponized radiation and the horrible effects it can have on human life. However, radiation itself is a completely natural phenomenon brought about by radioactive isotopes, unstable atoms that give off energy as they decay. These radioisotopes can be found in harmless quantities just about everywhere, from gadgets like smoke detectors and exit signs to natural things like gemstones or fruit.

What makes weaponized radiation so dangerous is that it bombards the ground with massive quantities of radioisotopes in a rapid fashion, well past the point that it would induce radiation sickness and damage your body. In the tiny quantities that radioisotopes occur in everyday objects, though, they can’t hurt you, and in the case of man-made objects, they wouldn’t be able to serve their purposes properly without that teensy bit of radiation. To help assuage concerns, the United States Department of Nuclear Energy maintains a small list of odds and ends where radioisotopes can be found, at least one of which may be right next to you.

Clocks and watches

A wrist watch on top of a wallet. Artfully79/Getty Images

When you think of radiation and clocks, the first thing that springs to mind is probably the famous atomic clocks used by organizations like the National Institute of Standards and Technology, the gold standard in the complicated pursuit of perfect timekeeping. These clocks measure the passage of time through the resonant frequencies of atoms, which naturally involves some radioactive materials. Any consumer-grade clock that purports to be “atomic” doesn’t actually contain radioactive materials; however, it’s just synced to the clock used by the NIST.

While a full clock in your home isn’t radioactive, there are some timepieces that may contain radioactive elements, specifically watches. If you’ve ever had a wristwatch with the ability to glow in the dark, you’ve got a little bit of radiation on your wrist. That glowing phenomenon is caused by a little glass container, within which is housed a little bit of radioactive tritium gas. Because the glass is completely sealed, you don’t need to worry about being exposed to its radiation, and even if you were, because a watch is so small and the container even smaller, the actual level of radiation you would be exposed to if it broke would be minuscule. The radioactive particles in tritium gas can only travel a couple of millimeters before dissipating, anyway, and it can’t penetrate human skin.

Exit signs

An illuminated exit sign in a hallway. Caroline Munsterman/Getty Images

Speaking of glowing things, anyone who’s ever worked in an office building or lived in an apartment building is likely familiar with the distinctive glow of an exit sign. Even in the event of a power outage, those signs keep on glowing, clearly marking the path to the nearest safe exit in an emergency. You might expect these signs to be powered by batteries, but in fact, that glow comes from the same place as those glowing watches.

A typical exit sign contains a handful of sealed glass tubes containing tritium gas, the sides of which are lined with luminescent phosphor. That tritium gas emits radioactive particles, which cause a mild chemical reaction with the phosphor and make it glow. This is how an exit sign stays lit up even if there’s no external power, and that’s why every commercial building in the United States needs to have them installed for safety purposes. Again, tritium gas barely moves through the air, can’t penetrate human skin, and its actual radiation dosage is minuscule. Even if an exit sign fell right on top of your face, rather than radiation poisoning, the only pressing concern would be your injured nose.

Smoke detectors

A person installing a home smoke detector. Brianajackson/Getty Images

Radioisotopes aren’t only used to make things glow. Despite the dangers associated with radiation, it’s actually thanks to radioactive elements that society has some of the most vital safety equipment in human history. Case in point: the smoke detector, the vital fire and smoke warning system that’s been saving lives since the 1960s. Obviously, a smoke detector’s job is to detect smoke, but how can a machine do that when it can’t smell? Rather than odors, the answer lies in the flow of ions in and around the detector, the disruptive elements of smoke, and the radioactive isotope at the center of it all.

Many consumer-grade smoke detectors contain a small amount of Americium-241, a radioisotope, which is encased in a shielding layer of foil and ceramic. The presence of this radioisotope ionizes ambient air molecules, creating both positively and negatively charged ions that flow between two charged plates in the detector. When smoke passes nearby, the flow of ions within the detector is interrupted, and the alarm is triggered. Thanks to that foil and ceramic shielding, the Americium in the detector poses no radiation threat to you.

Even if it were damaged, the radiation dose is very small and can be stopped by something as thin as a piece of paper. You may be exposed to trace amounts of radiation if you stood right next to a damaged smoke detector every day for years on end, but no more than you would from sitting in front of an old CRT TV.

Gemstones

An uncut amethyst gemstone. Elis Cora/Getty Images

As previously mentioned, radiation is a completely natural phenomenon, brought about merely by the decay of atoms. Because it’s naturally occurring, there are also many natural objects in the world that may contain various amounts of radiation. One good example of this is minerals; uranium, for example, is a naturally occurring mineral that is very rich in radioisotopes. While that’s an extreme example, even something as simple as the gems in jewelry can also contain natural radiation, albeit in a much, much smaller dose. Certain kinds of gemstones, particularly very vibrant and colorful ones, are actually the product of radiation exposure.

Gemstones like amethyst, green diamond, and yellow sapphire are produced when minerals are bombarded with radioactive energies, including gamma, neutron, or electron beams. Gem manufacturers will perform this process deliberately to make their gems look more appealing. These manufacturers can just blast a regular, dull gem with a radioactive laser for a while, and it’ll turn vibrant and shiny. Don’t worry about wearing radioactive stones, though; as required by the United States Nuclear Regulatory Commission, any gems produced in this manner must be set aside for several months to allow the radiation to dissipate, then be submitted to a radiological survey to verify their safety before they can go on sale.

Bananas

A pile of ripe bananas. Klymenko Mariia/Shutterstock

It may seem like the best way to keep radiation away from you is to ensure none of it enters your body. However, even some of the foods you eat on a regular basis may contain trace amounts of naturally occurring radioisotopes. For instance, one of the human body’s most important minerals, potassium, can contain a particular radioactive offshoot called potassium-40. You know what has a lot of potassium in it? Bananas.

A single banana can contain a very small dose of radiation via its potassium content. Technically, your body would actually absorb more radiation from eating a single banana than it would standing next to a nuclear power plant. However, the actual amount of radiation present in a single banana is positively paltry. A single banana may emit about 0.01 millirems of natural radiation. For reference, it takes 1,000 millirems to make one rem of radiation, and radiation sickness usually starts to manifest around 50 rems. By that math, you would need to consume about 5,000,000 bananas in a single sitting before you even start to develop radiation sickness, and at that point, you’d probably have more important things to worry about.

Source

Posted on

This Common USB Stick Fear Has Been A Myth For

A flash drive being inserted into a laptop 
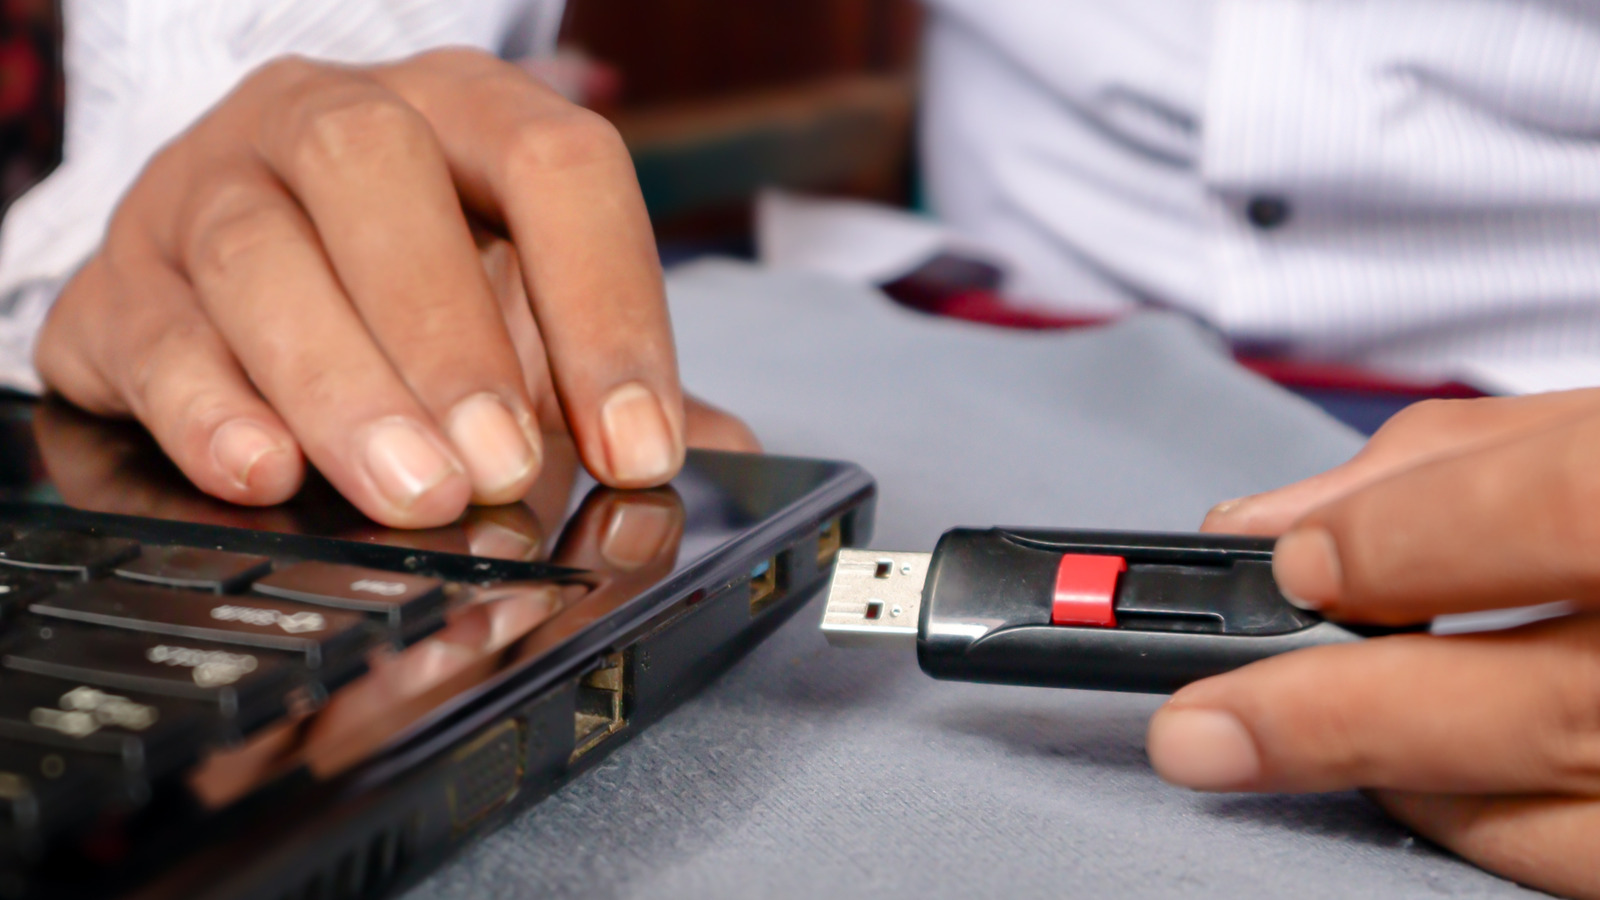
Eza_Nanda/Shutterstock

Back in the day, yanking out a flash drive or external hard drive from a Windows computer was seen as careless. That’s because operating systems cached the data they were transferring in RAM before writing it to an external drive for improved system performance. If you removed the USB stick without ejecting it, data could end up corrupted or even permanently lost because it was still cached in memory. By safely removing it, the OS did some housekeeping, such as emptying the cache to clear any pending write operations before detaching the drive. 

But this has since become a myth as Windows users don’t need to do so anymore. Since Windows 10 version 1809, which was released in November 2018, Microsoft has included a feature called “Quick removal” and made it the default external storage removal policy. Windows no longer caches disk write operations in memory, generally making the external drives ready to be removed at any time without needing to follow the safe ejection process. However, “Quick removal” didn’t completely eliminate the need for safe removal. There are some instances where you still need to use it.

When you need to safely remove external drives

A flash drive being inserted into a laptop Dmytro Duda/Getty Images

While write caching is disabled on Windows by default, macOS and Linux still have it enabled. On these operating systems, you should always safely remove external drives. There’s no official documentation on disabling it on the support pages of Apple or Linux, so it’s it’s the expected workflow. Even with “Quick removal” on Windows, there’s still a small chance of data corruption or loss if you don’t check that all files have finished transferring to the drive. If unsure, follow the safe ejection protocol instead.

Sometimes, you might need to enable write caching on Windows, forcing you to always safely remove USB sticks. This can happen if you notice that file transfers are slowing down your computer. Although having to manually eject drives is annoying, cache writing ensures that the disk writing process doesn’t have a negative impact on system performance by offloading it to RAM. Without it, the operating system will need to finish the data transfer in one go, which can lead to sluggish performance. This is not much of a problem with faster, more reliable storage options like SSDs.

To re-enable cache writing, follow the steps below:

  1. Right-click Start and select “Disk Management.”

  2. In the lower section of the window, you’ll see drive labels. Right-click the external drive you want and select “Properties.”

  3. In the “Removal Policy” section, select “Better Performance.”

  4. Click “OK.”

Source

Posted on

3 Reasons Why Your VR Headset Is Collecting Dust

A VR headset siting on white desk Pressmaster/Getty Images

Not too long ago, it may have been possible to reasonably argue that virtual reality (VR) headsets were poised for a breakthrough in popularity. However, it now seems any initial enthusiasm about these devices has worn off. As Business Insider reports, while sales of lighter tech-enabled smart glasses may be increasing, in 2025, shipments of heavier VR headsets appear to have dropped by about 43%. As a VR headset owner, I can personally speak to factors that may be driving this trend.

In early 2020, looking for a device that would let me escape the confines of my apartment with a pandemic quickly approaching, I purchased an Oculus Go. I was impressed enough at the time to purchase an Oculus Quest (now called Meta Quest) shortly after. For a few months, I used the Quest almost daily. Games like “The Climb” allowed me to simulate an extreme sports experience, “Superhot VR” almost convinced me I was in “The Matrix,” and VR apps like “Mission: ISS” leveraged the technology to offer a small glimpse of what space travel might actually look like from an astronaut’s perspective.

From where I’m typing this, I can look directly at the closet where I keep my Meta Quest. It’s been there for four years. While the novelty of VR kept me engaged at first, it’s been a while since I’ve felt the need to strap on the headset. The reasons why might shed some light on the waning popularity of these devices.

Wearing a VR headset isn’t actually convenient

A person using laptop with a VR headset next to them on a white desk Seacalm/Shutterstock

As immersive as VR worlds can be, it’s worth addressing a basic point right off the bat: Actually accessing those worlds isn’t exactly comfortable or convenient. Research indicates that, while it’s not necessarily a major problem, discomfort isn’t particularly uncommon among users of VR headsets. I can attest to the fact that these devices certainly never felt like they were designed with ergonomics in mind. The headset is noticeably heavy, and to ensure a seamless VR experience, you have to wear it fairly tightly. This caused me headaches on more than one occasion.

Now, I remember my Quest allowed me to “draw” an invisible perimeter around my body before I started playing any games or opening up any experiences. The perimeter was meant to ensure I didn’t bump into anything or trip over anything in the real world while the VR headset’s screen dominated my visual field. If I stepped outside of the perimeter, the device would alert me.

On the one hand, this basic safety feature allowed me to indulge in VR experiences ranging from simulated fitness classes (“Supernatural”) to boxing (“Creed: Rise to Glory”) without worrying about accidentally punching a hole in the wall. On the other hand, it’s still difficult to fully relax into that kind of experience when you can’t see (and to some extent, can’t hear) what’s actually going on around you. No doubt, spending more than half an hour or so isolating your senses from the real world with an uncomfortable device strapped to your head can start to feel disorienting and unnatural.

VR isn’t ideal for extended usage

A person wearing a VR headset and expressing surprise Hiroba Studio/Shutterstock

My personal experience isn’t the only evidence to suggest that VR headsets suffer from a “This is fun, but in limited doses” effect. According to a report from AR Insider, the vast majority of VR headset users spend a maximum of six hours a week in VR. About 30% of users spend less than an hour a week using their devices.

In a World Economic Forum editorial, Jeremy Bailenson, the founding director of Stanford University’s Virtual Human Interaction Lab, speaks to the strengths of this technology while admitting that spending more than half an hour in a virtual world probably isn’t advisable. Bailenson explains that VR can have productive uses that include training firefighters, offering “field trips” to help users learn about climate change, and even promoting empathy by letting users inhabit other bodies. I can personally state that the “Anne Frank House VR” experience brought me to tears by giving me a peek into the experience of hiding from oppression in a small attic.

That said, as Bailenson points out, VR environments don’t perfectly resemble ours. This alone can fatigue the senses. In addition, there’s something that feels inherently “bad for you” about spending hours cut off from what’s actually happening around you. These are certainly reasons my VR sessions were never that long. The problem is, starting up the device and navigating to an app takes a few minutes on its own. After a while, without making a conscious decision, I started to silently decide that using VR for half an hour wasn’t worth the hassle of starting a session.

In my experience, VR games offer quick hits of novelty

A person wearing a VR headset against a background with an abstract light graphic Choreograph (konstantin Yuganov)/Getty Images

Thinking back on how much fun VR was when I first bought my devices, only to realize that writing this article has done nothing to make me want to take the Quest down from the closet shelf to jump back in, VR starts to feel like, well, a gimmick. At least, that’s my impression from an average consumer’s perspective. Here’s the main problem I’m remembering: While the coolest VR games and experiences felt new and exciting, they didn’t offer much beyond that.

For example, one of the most popular VR experiences from my time using the Quest was “Richie’s Plank Experience.” I’ll admit, this was fun to play and even more fun to use as a way of introducing others to VR. The game/app simulates walking a plank off a skyscraper. Even though you know it’s VR, it’s hard to convince yourself to take the plunge.

But once you do, the experience is over in five seconds. On the other hand, while “Supernatural VR” may be the gold standard for showcasing the unique features a VR game can offer, as someone who always struggled to complete video games, I finished that one up in a weekend consisting of multiple short gaming sessions. Once I got used to the gimmick, the replay value dropped off a cliff. After a while, it didn’t seem worth it to spend money on games and apps that offered nothing more than a few moments of “Wow, this is cool!” excitement.

VR does have its benefits

An elderly man looking excited while wearing a VR headset Antonio_diaz/Getty Images

None of this is meant to suggest that VR is a useless technology. While I might not have donned my headset in almost half a decade, I can’t say I’m unhappy I ever bought one. For close to a year, the Go and Quest delivered enough entertainment to justify their costs.

That said, some of their most rewarding experiences ended up being lesser versions of experiences I could have had in the real world. Sure, I could burn some calories while pseudo-dancing to classic tunes with “Supernatural,” but working out in the real world is more convenient. I enjoyed using VR to simulate hikes, but doing so often reminded me that, hey, I might be better off just going on an actual hike.

What’s worth noting is that VR’s real value may be found outside of the consumer gaming and recreational spaces. For instance, VR can be a resource-friendly tool for training surgeons, truck drivers, and others. VR can also enhance the effectiveness of exposure therapy programs for people with PTSD. After all, when we take a step back, we should remember that VR is a relatively new technology. It makes perfect sense that it hasn’t come close to realizing its true potential yet. In the meantime, if, like me, you own one of these devices, it’s worth exploring some productive and fun uses for an old VR headset. If you’re just getting started with the Quest, you should also learn more about the essential Quest VR apps you may want to download first.

Source

Posted on

What Does The Red Light Mean On Your Oura Ring?

Health and fitness wearables are experiencing something of a renaissance at the moment, like the Oura Ring and smart watches. In the case of Oura, it’s a sleek, lightweight smart ring capable of tracking all kinds of health metrics, from sleep to heart rate to temperature. In fact, it includes so many advanced features, sometimes it can be a challenge to keep track of what the various indicators actually mean — including a red light. 

A red light on a health tracking device may seem alarming, but don’t worry: If you grabbed an Oura Ring 4, one of our favorite smart rings, and it’s displaying a red light, that just means it’s actively measuring your blood oxygen levels (SpO2) while you’re asleep. The sensor keeps an eye on variations in those levels, which can be important indicators for your overall health. Most people’s blood oxygen saturation level should measure between 95% and 100%; a reading too far below that may indicate a potential issue. Be aware that this feature isn’t available on Gen2 or older Oura Rings.

How the Oura Ring detects blood oxygen levels

An image of the Oura app on a smart phone in front of a screen displaying some of the smart rings bella1105/Shutterstock

While you’re asleep, the Oura Ring sends pulses of red and infrared light into your finger by way of it’s LEDs. Highly oxygenated blood reflects more red light than infrared light; inversely, low blood oxygenation levels mean more infrared light is reflected. The ring measures this and reports the data in the Oura app. You can find it on the Sleep screen, though you’ll want to ensure that your Oura Ring’s sleep tracking is working correctly first.

You can see your Average Blood Oxygen score, which is the percentage of oxygen in your blood over three hours of sleeping, as well as a graph of your Breathing Regularity. This will give you a sense of any irregularities in blood oxygen levels over time, and is not the same as respiratory rate, which is based on breaths per minute.

Normally, you won’t see those red LEDs light up during the day, but you may catch a glimpse of them anytime the ring detects sleeping. If you’re relaxing and your heart rate, BPM, and movement hit low levels, the Oura ring may think you’ve fallen asleep and begin reading your SpO2.

How to use Oura’s blood oxygen sensing features

Tracking of Breathing Regularity and Average Blood Oxygen needs to be manually enabled before the Oura ring will start measuring while you sleep. To do so, find the hamburger menu in the Oura App and select Blood Oxygen Sensing, then tap the button and toggle it on. To activate it, your ring will need to be connected to the app via Bluetooth. Next time you’re asleep for more than three hours, your scores should pop up on the app’s Sleep screen.

Breathing Regularity shows up in the app as a color-coded timeline with an optimal rating displaying no major variations. A good rating will display as dark blue vertical lines, while fair is rendered in light blue. Frequent variations in your blood oxygen levels, which show up as white lines, may indicate an issue with your breathing or oxygenation, so you’ll want to pay special attention in this case. There are also suggestions on how to improve your breathing regularity that can be accessed by tapping the information icon. 

Source

Posted on

5 Of The Worst Places To Set Up A 3D

Person working with a 3D printer inside a lab Cyano66/Getty Images

Buying a 3D printer is just the first step. You need to correctly set it up too. When it comes to placing a 3D printer, there are lots of factors at play, especially relating to aspects like health, safety, and convenience. That makes some areas of the house or workspace perfect for a 3D printer, while rendering others a major risk.

For instance, experts have long warned about setting up 3D printers in bedrooms, as prolonged exposure to harmful emissions from the printer puts your health at risk. Similarly, putting 3D printers in areas that see frequent changes in temperature, say near a window or air vent, impacts the print quality, as 3D printers operate best in spaces with stable temperatures.

Whether you’re working with quick prints or want to operate the 3D printer overnight, a proper setup is critical to ensuring high-quality prints, minimizing health and safety risks, and offering peace of mind. The placement is just as important as picking the best 3D printer or the right filament.

Your bedroom

3D printer and filament kept on a table inside a room with cabinets and a TV in the background SofikoS/Shutterstock

Your bedroom may seem like the perfect place to set up a 3D printer. It’ll always be right there, allowing easy access throughout the day. Whether you want to monitor an ongoing print or start a new one in the middle of the night, the 3D printer will be within arm’s reach. But your bedroom is the worst place to set up a 3D printer.

One of the things you must know about 3D printers is that they emit harmful fumes. And if you’re in close proximity to it for extended periods, it’s a major health risk. These emissions, to a certain degree, depend on the filament used. Studies suggest that the higher the temperature required to melt the filament, the more the emissions. This means that filaments like ABS will produce more emissions compared to PLA. Remember, they’re both toxic, though PLA is considered somewhat safer than ABS. So, whether you’re using ABS or PLA, it’s best to always place the 3D printer in a well-ventilated area. As for avoiding exposure to particles generated during the printing process, you can opt for 3D printers that feature enclosures.

Even if we were to ignore the health risks, setting up a 3D printer inside your bedroom impacts your sleep. That’s because 3D printers make noise and generate heat. When operated for extended hours at night, it becomes more than an inconvenience, affecting your comfort level. Of all the places inside your home, the bedroom should be the last to set up a 3D printer.

Kitchen

Wooden table top in a kitchen with cabinets, plants, and a window ArtPhoto21/Shutterstock

Your kitchen too might seem like a convenient area to place a 3D printer. It’s well-lit, has proper ventilation, and plenty of stable surfaces. But it’s another place you should never set up a 3D printer, and there are several reasons why.

First, harmful fumes and emissions from the printer can contaminate items around it. Similarly, the kitchen itself has airborne impurities like grease, food particles, and more, which can stick to components, affecting the normal functioning of your printer. You’ll also be forced to clean the 3D printer more frequently, a task that can simply be avoided by placing it in a relatively cleaner space.

Additionally, the kitchen has high moisture levels, and humidity affects the filaments. Even under normal conditions, it’s advised to store filaments in airtight containers with a few packets of silica gel to avoid moisture buildup. Then comes temperature fluctuation. While you’re cooking, the temperature rises quickly, and when you’re done, it falls back down just as fast. Your 3D printer can’t handle this well, and it shows up in the quality of prints.

Common areas with frequent movement

Working 3D printer with filament placed on a white table Sergiophoto84/Getty Images

When it comes to common areas, say, the living room or a hallway, these are again bad choices to place a 3D printer. That’s because these areas see a lot of movement throughout the day, which exposes your printer to continuous vibrations. When that happens, the prints may show signs of misalignment between layers. Keep in mind that 3D printing is supposed to be a precise operation, and ideally shouldn’t be exposed to external vibrations of any kind.

Other than that, if you have kids or pets in the house, placing it in common areas increases the risk of someone accidentally running into the 3D printer. While that will most certainly affect the ongoing job, there’s also the risk of damage to the printer itself in case of a major collision or if it topples.

You should ideally place the 3D printer in a garage, laundry room, or other place that doesn’t see a lot of movement. And make sure to install exhaust fans to remove ultrafine plastic particles and other harmful emissions. If you want to monitor the ongoing job, install a top-rated security camera. Or to save money, you can repurpose an old webcam into a security camera.

Near windows and vents

3D printer placed alongside a laptop on a wooden table next to a glass door SofikoS/Shutterstock

Placing your 3D printer near a window may seem like a smart move, given all the talk around ensuring proper ventilation. But it’s also not the right choice for three reasons. First, areas near windows are more susceptible to temperature changes. They will be warmer during the day and cooler at night, compared to the rest of the house, which makes it a bad place for 3D printers. It’s best to go with places where temperatures remain largely stable. Also, make sure that the printer is not sitting under sunlight.

Second, if the 3D printer is placed near an open window or an operational vent, the sudden gush of air may cause warping. That’s obviously something you don’t want. Lastly, the 3D printer must be kept away from dust, and that’s why it shouldn’t be placed near a window. Like any other device, dust accumulation will reduce the lifespan of your 3D printer, as well as lower the quality of prints.

While ventilation is important, uncontrolled airflow is not the solution to it. On the contrary, it creates more problems. That said, you don’t necessarily have to move the printer to another room, but just away from the window or vent.

Uneven, unstable, or small surfaces

3D printer placed on a large wooden table alongside a laptop and spools of filament SofikoS/Shutterstock

While this may feel obvious, it’s still one of the most common 3D printer mistakes. It’s vital to place the printer on a flat, even surface. Even a slight tilt can cause parts to shift during printing. The surface needs to be stable too. You should ideally go with heavy tables or desks that remain steady and don’t wobble. If there’s a lot of vibration or foot traffic, you can use dampening pads to minimize the effects. An uneven or unstable surface is also a safety risk, as the printer may fall due to sudden movements.

Additionally, the space needs to be sufficiently big. While most people aim for a surface big enough to house the printer, you also need space around it. This ensures easy cleaning, and prevents accidents. Besides, 3D printers often create lots of mess, and constrained spaces make cleaning all the more difficult.

If you’re actively using the printer, you’ll also need storage space for filaments or resins, along with other 3D printer essentials. It’s vital to plan all this in advance, or you run the risk of poor print quality, lots of frustration, and even accidentally damaging the 3D printer.

Source

Posted on

Do You Need To Take Off Your Headphones At A

A person placing headphones and other belongings into a bin at a TSA checkpoint. Frame Stock Footage/Shutterstock

Wireless headphones, including over-the-ear models and earbuds like Apple’s AirPods, are commonly seen in public, as many smartphone users rely on these accessories to listen to their favorite content and talk on the phone while they’re on the go. Some people may wear their headphones throughout the day, even when they’re not listening to music, to the point where they might forget to take them off when the situation calls for it.

TSA checkpoints are one scenario where some headphone users might not take off their devices while preparing for the security check and moving through the checkpoint, but that’s not the proper procedure. Instead of wearing the headphones while going through the TSA checkpoint, users should place them inside the bin with all their belongings for screening. The only exception concerns people who are deaf or hard of hearing, who may keep using their hearing devices while passing through the checkpoint. But even then, additional screening may be applied.

The TSA allows users to bring headphones on planes, including carry-on bags and checked bags. Most people will probably want to use the headphones during the flight, so they’ll have them with them, or in their carry-on. While TSA documentation notes the traveler’s right to carry these devices, it also says that it’s up to the TSA officer to decide whether the device is allowed through the checkpoint. The documentation does not say whether the user should place the headphones in the bin when passing through the checkpoint, but TSA agents may instruct users to do so. If they allow a user to pass through the checkpoint with headphones on, the metal components inside the device may sound an alarm, which can lead to additional screening.

It’s not just about the alarm going off

A person wearing headphones around the neck at an airport. DG FotoStock/Shutterstock

If the metal-detecting alarm sounds, a TSA officer can conduct an additional screening, which may include a pat-down and inspection of the headphones that may have triggered the alarm. Users may be required to pass through the checkpoint again, without wearing the headphones, which may be placed in a separate bin. The X-ray machine will not harm your headphones or other electronic devices, if you’re concerned about damage. But there’s another reason why travelers should avoid wearing headphones while passing through TSA checkpoints that has nothing to do with triggering an alarm and slowing down the queue. Former TSA agent Caleb Harmon-Marshall told Business Insider that he would never wear headphones while going through security checks because he wants to be “very mindful” of his surroundings.

TSA checks can be very stressful for both the traveler and the officer, especially in crowded airports. Wearing headphones can make it difficult to hear instructions from TSA agents, even if you stop playing music or podcasts while you approach your turn to go through the security check. You may be an experienced traveler who is very familiar with TSA screening, but if you can’t hear a particular instruction, you’ll slow the security check for yourself and others behind you. That’s why it’s a good idea to take off your headphones and place them in the bin or your bag while you pass through the checkpoint.

Removing the headphones at TSA checkpoints will give you another benefit if you wear AirPods or other headphones all day. You’ll give your ear a break from the headphones, allowing ventilation to the ear canal and helping to improve ear health.

The only exception

A person wearing AirPods Pro. TatianaKim/Shutterstock

The TSA online documentation has a section for deaf or hard-of-hearing users where it explains that people with hearing disabilities should inform the TSA officer that they’re “deaf or hard of hearing and require assistance with the screening process.” The same page says that hearing aids or cochlear implants should not be removed during the security check, warning that additional screening and inspection may follow.

Since Apple’s AirPods Pro also offer hearing aid functionality, the devices may qualify as hearing aids. However, unlike hearing aids and cochlear implants, which indicate a hearing problem, the AirPods Pro don’t signal that the wearer may have hearing difficulties. In this case, the user should inform the TSA agent that they’re using the AirPods Pro as a hearing aid. Even then, it’ll be up to the agent to allow the use of the wireless headphones during the security check. The same goes for other headphones that can offer hearing aid functionality.

The Canadian TSA (CATSA) says that people with hearing disabilities can be screened without removing hearing aids or devices, but these will be inspected visually. The agency notes that some hearing aids may be affected by X-ray and metal detectors, advising users to ask for full body scans or physical searches. The Australian Home Affairs office notes that travelers do not need to remove hearing aids (cochlear implants, external components for cochlear implants, and middle ear implants), and that the devices will not be affected by metal detectors and body scanners.

Source

Posted on

4 Places You Should Never Store Your Phone

Smartphone in car glove compartment vin.rusanov/Shutterstock

A smartphone is a significant investment and protecting that investment takes a variety of forms. For example, a durable phone case and phone insurance, such as AppleCare+, are obvious ways to protect your phone, but it’s important to account for solutions that might be a little easier to overlook when seeking to minimize phone damage. Specifically, it’s vital to be aware of the types of spaces and locations where you should never store your phone.

How and where you store your phone can not only have a major impact on the functionality and lifespan of your device, but it can affect your own health, too. Other than guarding against physical damage from water and impacts, you should also store and charge your phone in a manner that protects it against environmental damage, and make sure you’re not keeping the phone too close to your own body for a long time. While learning about where not to store your phone, you may also want to research other habits and behaviors you should avoid that will help maximize your phone’s performance and safety.

Never store (or charge) your phone near heat sources

Phone and tablet charging on bed near pillows and blanket FotoHelin/Shutterstock

One of the most important considerations to account for when deciding where to safely store your phone is the way heat can damage it. However, it’s easy to forget that various appliances, devices, and surfaces can also give off the type of heat that may damage a phone. You should also make a point of not storing or charging your phone near these potential heat sources.

Naturally, this means not storing or charging the phone near appliances that obviously emit heat, such as ovens, microwaves, and even televisions. In addition to these areas, also consider how seemingly benign surfaces can become sources of heat in various situations or circumstances. For example, if you’re charging your phone overnight, you shouldn’t do so in a way that leaves it covered by blankets or a pillow. Along with potentially leading to phone damage, there’s evidence to suggest this could even be a fire hazard. Instead, it’s best to charge a phone uncovered on a hard surface with good airflow.

Don’t store your phone in your car

Phone sitting on dashboard of car Bitsandsplits/Getty Images

It may be common sense to keep your phone away from heat sources around the house, but don’t forget that your car’s interior can get surprisingly hot, especially on a sunny, summer day. This is one reason why you should never store your phone (or any device) inside your car.  Even if a car is parked in the shade, while it might not get as hot as a vehicle parked in the sun, it can still get hot enough to pose a risk to a phone stored inside of it. Exposing a phone to excessive heat can damage its internal parts, potentially leading to a range of issues.

Research shows that cars often function like greenhouses in warm weather. They can trap heat easily, leading to rising temperatures in short periods of time. Keep in mind that the temperature may fluctuate throughout the day, so even if the car doesn’t seem like it will get too warm when you park it, that could change over the course of a few hours. In addition to the heat your phone will be exposed to when stored in a vehicle, leaving any valuables unattended in a car also opens the possibility of theft.

Don’t put your phone in a security bin at the airport

Phone with other valuable items in airport security bin Chalabala/Getty Images

Knowing where not to store your phone also requires knowing where you should try to avoid keeping it even for short periods. For instance, travel experts discourage storing a phone in a TSA bin when proceeding through security at an airport. They point out that leaving your phone out of sight in a TSA bin puts it at risk of theft. In addition, when you’re in a hurry, it’s easy to forget to grab your phone from out of the bin as you gather your belongings.

Instead, experts suggest keeping a phone (as well as other valuable items, like wallets) inside a zippered section of a bag or item of clothing when going through security. They also recommend checking to confirm your valuables are still in those zippered sections right away when gathering your belongings, just to ensure you don’t accidentally walk off without your phone. That’s a mistake you might not realize you’ve made until it’s too late to correct it. Points like these serve as a reminder that potential damage isn’t the only factor to keep in mind when choosing where (and where not) to keep a phone. 

Limit how often you store your phone in your pocket

Close-up of person putting phone in pocket Alfonso Soler/Shutterstock

Keeping your phone in your pocket for extended periods could involve exposing it to the type of heat that leads to damage. Perhaps more importantly, you’re also exposing your body to radiofrequency waves, which technically represent a form of electromagnetic radiation. It may be tricky to keep your phone easily accessible without storing it in your pocket, but it’s worth exploring other options — not only for your device’s safety but your safety, too.

Although health experts admit there’s still limited research and evidence to indicate precisely how dangerous this type of radiation can be, there may be some reason to believe it could contribute to health issues ranging from infertility to cancer. The aim is to minimize direct exposure to the device. On a side note, using your phone too often in general can be bad for your mental and emotional health. Taking these steps can reduce your exposure to radiation and your phone’s exposure to excessive heat.

You may have to adjust some of your phone usage habits if you’ve been storing it improperly. Making these changes is worthwhile, though. By heeding the advice here, you’ll keep both you and your phone safe.

Source

Posted on

Is It Safe To Use Your PC Without A UPS?

A man plugging his PC cables into a UPS AYO Production/Shutterstock

An Uninterruptible Power Supply (UPS) is exactly what it sounds like: When your home’s electricity service gets interrupted — either due to a blackout or a tripped breaker – the device continues supplying power to your PC, monitor, or even that laptop you’re using without a battery. Since abrupt computer shutdowns can cause damage to both your hardware and software, a UPS has a battery that isn’t immediately cut when the power goes out. Your computer switches to this battery in the event of a power outage without turning off, and it continues functioning for a short period of time.

A UPS can certainly be helpful, but do you actually need one to keep your PC safe? For most people, it’s a great way to protect against several risks, but it isn’t a necessary purchase. If you live in a place that rarely suffers from power outages and generally doesn’t deal with things like brownouts or electricity surges, you can get by just fine without a UPS, unless you get extremely unlucky with a big power surge. We still recommend using a UPS, though, as the up-front cost is much cheaper than getting your pricey GPU replaced on the off chance that power issues do indeed damage it.

Apart from giving you backup electricity for a few minutes, certain kinds of UPS units have additional benefits as well. A line-interactive UPS, for example, can monitor and control the incoming electrical current being supplied to your PC. This can save your hardware from being damaged by “dirty power” conditions like undervoltage or power surges, even if there’s no blackout.

How blackouts and power surges damage your PC

A person holding a candle and pressing a button in the case of a blackout

As with any other electrical appliance, each computer component that consumes power is susceptible to harm if power suddenly goes out, flickers, or surges. In the case of a blackout, an old HDD’s mechanical read and write heads suddenly stop. This can result in them physically crashing into the platter, resulting in bad sectors and permanent damage to the drive. There’s no risk of this with modern SSDs that have PLP, but older models can still be susceptible to data loss in other ways.

Hardware aside, the files inside your computer are also incredibly prone to data loss or corruption if your PC abruptly turns off. This is true if you lose power without saving an important file, but it goes beyond that as well. If your PC is updating or installing files, a sudden power outage can corrupt your data. The harm this does is much more severe if this happens when you’re performing a system update, in which case the sudden power cut can corrupt your entire OS.

With all this in mind, it’s also important to note that a power outage by itself usually doesn’t harm any of your more important PC components — your GPU, power supply, and motherboard — but electrical power surges do. It’s not uncommon for a power surge or flickering electricity to follow after a sudden blackout, and if this happens often, it can fry pretty much anything inside your computer. It might not be as flashy as many other cheap ways to upgrade your gaming setup, but a UPS (or even a simple surge protector) is a wise purchase for pretty much anyone, especially now that AI data centers might be triggering more electrical surges and outages.

When does a UPS become necessary?

A person working at a PC in the dark Tempura/Getty Images

A UPS might be necessary for your PC’s safety if you live in an area that experiences constant power outages or brownouts. This could be regions prone to extreme weather conditions or areas with overhead power lines. While a sudden grid failure or power cut every few months might only have a low chance of doing any significant damage, frequent blackouts can severely shorten your rig’s lifespan. The same is true for electrical brownouts or when dealing with dirty power — your PC might survive a short period of being connected to uneven voltage, but if you’re constantly running it on dirty power, the prolonged exposure can speed up its decay.

Furthermore, when you’re asking if it’s safe to use a PC without a UPS, it isn’t just about the potential risk to your hardware components. If you’re a freelancer who has spent hours on a project, a college student cramming right before a deadline, or even a casual gamer playing a title where you don’t get an opportunity to save often, the risk of data loss is severe. For work or documents, a cheap UPS that doesn’t have a huge battery can give you the two or three minutes you need to save your work. For gamers who might need more time to reach the next save point, a more expensive UPS with a bigger battery might be needed. Either way, it’s better to have a backup and not need it than to need one and not have it.

Source