Posted on

Aircraft Carrier Power Explained: Why New Ships Need Giant Generators

A US aircraft carrier mid-ocean with three smaller vessels off its starboard side wz94/Shutterstock

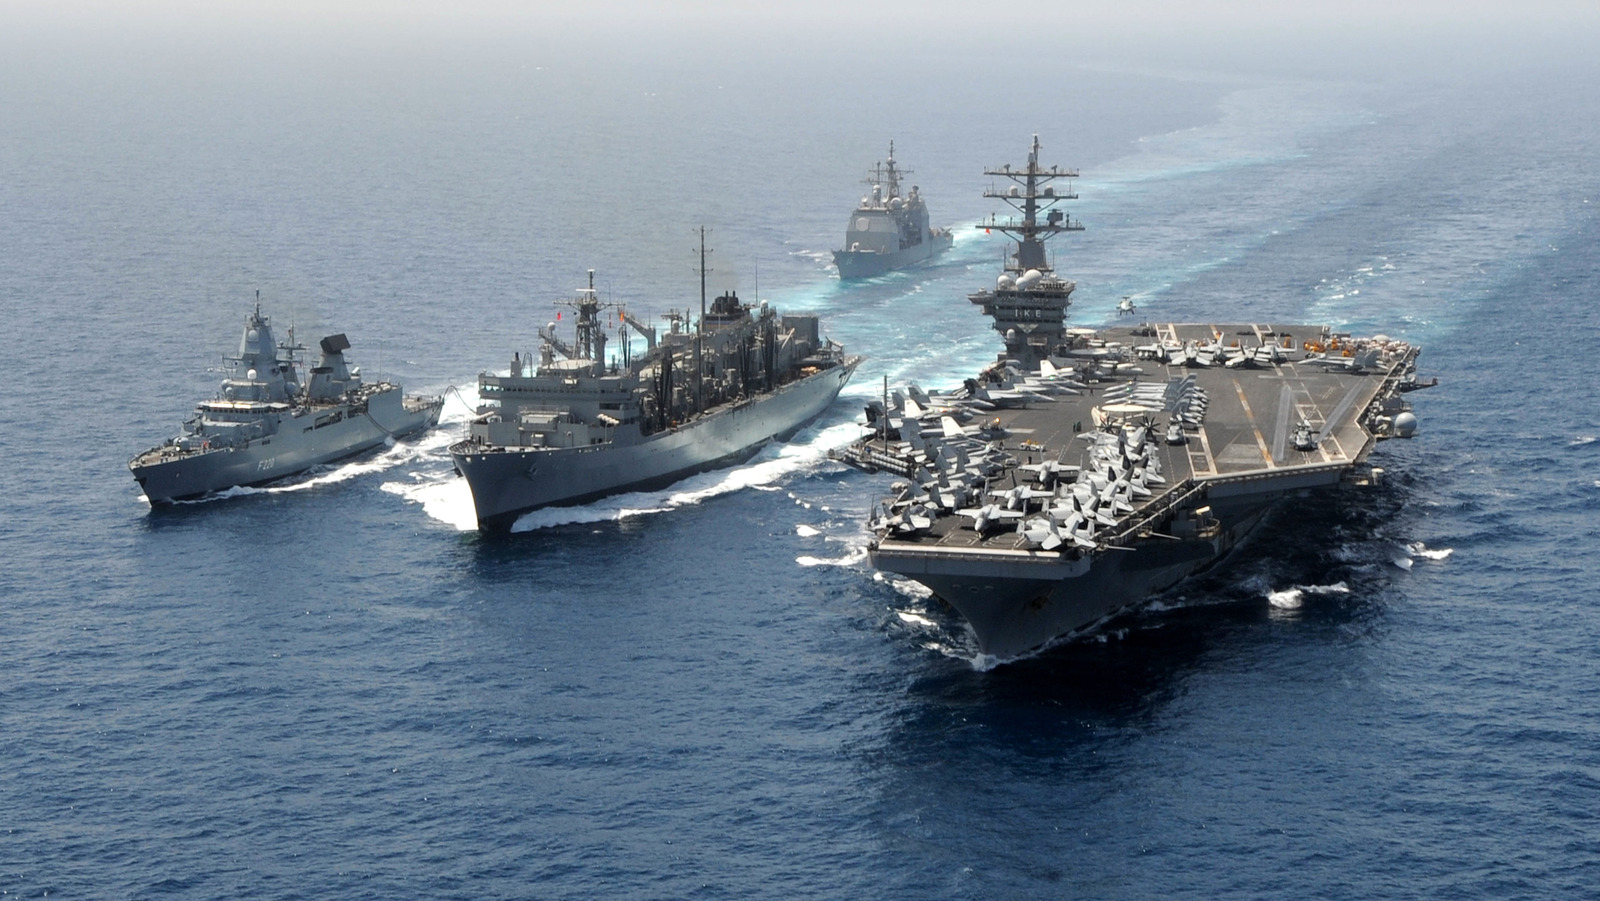
When you’re onboard what is essentially a massive floating city, isolated in the middle of the ocean, logistics like resupply can be a massive nightmare. Refueling is also staggeringly expensive. A conventionally powered aircraft carrier like the (now retired) USS Kitty Hawk requires up to 700,000 barrels of oil a year. At the current price of oil, $83.46 per barrel, that’s more than $58 million per year, or slightly over $160,000 every day. Conventional fuel also takes up a massive amount of space, and coordinating delivery and refueling with supporting vessels adds further logistical challenges and expense. With all those factors in mind, the appeal of nuclear power becomes pretty obvious. 

Nuclear reactors can operate for 20 years or more without ever needing to be refueled (though when necessary, that refueling process is a huge undertaking), and they’re also smaller than traditional generators and their required fuel stores. However, new power requirements for increasingly sophisticated systems are demanding more and more power, which means larger reactors. So how do they work, and what’s drawing all that power? Let’s dive in.

The basics of nuclear power

An image of nuclear reactor cooling rods Ultraskrip/Shutterstock

In a sense, nuclear power is actually delightfully steampunk. A nuclear pressurized water reactor (PWR) works by splitting enriched uranium atoms through nuclear fission. Water is kept at high pressure so that it won’t boil, even at extreme temperatures. That pressurized water is then fed into the core of the reactor, which superheats it before passing it on to a heat exchanger.

The exchanger allows the water to pass its heat to a secondary loop of non-pressurized water which does boil, generating blasts of steam that drive turbines. Those turbines are attached to systems like the propellers that move the vessel through the water, or to electric generators that transform the kinetic energy into electrical energy to power various systems.

Meanwhile, in the reactor, control rods absorb excess neutrons produced during nuclear fission to regulate output. After the steam has done its job, it’s recaptured by condensation and recycled back into the system so it can be reused, creating a continuous cycle. PWRs are popular because they avoid boiling water inside the reactor itself, which can cause instability, and they concentrate all radioactive material safely inside the primary loop, reducing the possibility of leaks or contamination.

Why reactors are so large

A close up view of the fore of the flight deck of an aircraft carrier Arolss/Shutterstock

The main reason that modern reactors/generators have to be so huge, and pump out so much energy, is that the demands of a modern carrier are so much steeper than older ships. As you can imagine from a vessel housing between 60 and 90 aircraft and carrying more than 4,000 people, even older carriers required absolutely massive amounts of power. That demand for energy has continued to increase with the incorporation of modern technology and weaponry.

Take the electromagnetic aircraft launch systems (EMALS), for instance. It’s the catapult system that allows aircraft like fighter jets to launch from the deck of a carrier despite the short runway. Where old versions used high-pressure steam, EMALS use electromagnetic force generated by a linear electric motor stretched out along the flight deck. EMALS allow for much finer control over aircraft speed and acceleration than their predecessors (meaning less structural stress on aircraft), and eliminate the need for the large mechanical braking systems used in steam systems. However, as you’ve probably gathered, they also use significantly more power than steam alternatives, up to triple the voltage.

EMALS are just the tip of the iceberg. Modern carriers also need to provide power to highly advanced sensor and radar arrays, weapons elevators, and an advanced arresting system to help “catch” returning aircraft without damaging them. There are also more mundane concerns, like lighting, HVAC, and desalination. In the latest generation Ford-class carriers, energy is also required to power futuristic directed-energy weapons, like prototype solid-state lasers for disabling or destroying hostile drones. It’s easy to see why these cutting edge carriers require massive reactors with compartments on the scale of small buildings.

Source

Posted on

4 Clever Uses For Your PC’s Microphone (Outside Of Zoom

A man in front of a PC using a headset microphone. PeopleImages/Shutterstock

Not too many years ago, having a microphone plugged into your computer was either a simple novelty or a professional-only tool for making music or sound effects. These days, though, PC microphones are a dime a dozen, whether it’s a budget or expensive gaming headset or a laptop with a mic built right in. Having either a built-in or standalone mic is naturally useful in today’s interconnected world for things like Zoom calls, but that’s far from their only purpose. With a microphone, you can use all kinds of interesting features, from dictating and transcribing text to browsing the ‘net without ever touching your keyboard.

To better accommodate the modern functions and purposes of microphones, Windows 11 has numerous voice-powered features built in, which you can access with a quick setup and a bit of know-how. Not only that, but there are also third-party apps you can use with your voice, such as smart assistants for controlling gadgets around your home. If you’ve got a microphone on your PC and haven’t done anything particularly interesting on it, there are all kinds of cool tricks you can pull if you just know how.

Dictate text documents

A man in front of a laptop talking into a headset microphone. insta_photos/Shutterstock

One of the baseline features of a microphone-equipped PC is voice recognition for dictation and transcription. In fact, this feature is even older than microphones for voice or video calls, with one of the most prominent examples, Dragon NaturallySpeaking, released in 1997. Of course, we’re well past the point of needing a dedicated app for dictation and transcription; Windows can do it natively now.

Once your PC’s microphone is set up and programmed to recognize your voice, you can use the Windows dictation shortcut to begin automatic speech-to-text. Just click on any text entry field and, assuming you don’t have a dedicated microphone button on your keyboard, press the Windows key and the H key to activate dictation mode. Your PC will let you know it’s listening, and you can begin speaking into the microphone to transcribe whatever you say. It’s a convenient, hands-free way to take notes or write simple documents, especially if you’re not the best at touch-typing. The only catch is that Windows will only have native support for whatever language is set for your current region, so if you want to speak a different language, you’ll need to install it separately via the Language & region menu in your Windows settings. The good news is that there are numerous language packs you can install, including French, German, Japanese, and multiple forms of English and Chinese.

Remotely use your mouse and keyboard

Speaking of hands-free PC operation, dictation isn’t the only way your PC’s microphone can keep your hands off the keyboard. Using Windows speech recognition, you can actually interface with most aspects of your PC in the same way you would with your mouse and keyboard. Beyond being a convenient hands-free option, this feature is invaluable for those with impaired or diminished motor skills in their hands. This, for example, ensures you can still use your PC even if you’ve injured your hands somehow, all without having to touch your peripherals.

Using the Voice Access feature in Windows 11, you can dictate both individual keystrokes and mouse interactions. In the case of the former, simply activate dictation mode, and clearly speak the keys you want to speak. This can be used for entering text into entry fields on a web browser, for example, but you can also use commands like “select that” to select entered text, then dictate keyboard shortcuts like “control, C, control, V” to use copy-and-paste, though you could also just say “copy that” and “paste that.”

As for using the mouse, you can use voice commands to manually move the mouse pointer around your screen, then simply command “click” or “double-click” to click on objects and links. You can even drag and drop items on your desktop the same way you normally would. If the screen is a little too large to move around in this manner, you can speed things up with the “show grid” command, which creates a numbered grid across your screen. Just say one of the grid’s numbers, and your pointer will automatically jump to that numbered segment.

Activate functions and shortcuts

Interfacing with your PC isn’t just about typing and clicking. Experienced users use a multitude of functions and shortcuts to simplify processes. In the same way, while you can manually enter text and move the mouse around using Windows Voice Access, there are many scenarios where it would probably be easier to use a shorthand command, of which there are quite a few.

For example, if you wanted to open a particular app like Firefox or Slack, all you’d have to do is say “Open Firefox” or “Open Slack.” Similarly, you can close apps by saying “close,” followed by the app’s name. Using commands, you can swap between active windows, minimize or maximize them, jump right to the desktop, and scroll up and down on larger pages. You can also interact with items on your display directly rather than commanding the mouse pointer over them. If you wanted to open the Recycle Bin on your desktop, for instance, you could just say “double-click Recycle Bin.” If an item on your screen doesn’t have a clear name to refer to it by, you can instead use the “show numbers” command to activate a numbered overlay, assigning numbers to every interactable item currently shown. When you see what you want to click on, just say “click” and the number it’s been assigned.

Use a smart assistant

If taking Zoom calls is one of the primary reasons to have a microphone on your computer, the other is using smart assistants. Smart assistants have become a staple of many people’s everyday lives, accessed via smart speakers to control various compatible devices around their homes. Microsoft used to have its own smart assistant, Cortana, though it was discontinued in 2023 and removed from all subsequent versions of Windows. While Cortana’s off the table, though, there are still other smart assistants you can use through a PC, chief among them being Alexa.

Amazon’s Alexa smart assistant can be utilized through a Windows PC via the dedicated Alexa app in the Microsoft Store. As with using Alexa on a smartphone or through a smart speaker, you can use your PC’s microphone to issue various handy commands, from checking the weather to answering innocuous questions. More than that, if you have an existing Alexa smart framework in your home that connects various smart devices, you can control all of them through the Windows Alexa app, using your voice to control lights or activate security systems, for example.

Source

Posted on

Drying Your Phone In Rice Is Actually A Myth –

Smartphone placed in dry rice as a common remedy to remove moisture. Tetiana Cherkashyna/Shutterstock

You’re standing by the water when you suddenly drop your phone. Plop. After fishing it out, you’ll rush home and dump it in a bowl of rice. You’ve always heard rice will siphon off moisture, drying out the internals and saving it from the doom of a pseudo-watery grave. 

Except that’s not going to work. Drying your phone in rice is actually a myth. In fact, if you do submerge your phone in rice, you could cause more damage. Rice dust and small particles can make their way inside and gunk up the components. You should also avoid foreign objects like cotton swabs or Q-tips, and you should not use a hair dryer or compressed air. All of these things can damage your device. Apple even went on record to explain this exact process, noting what to avoid if you get your iPhone wet or see liquid-detection alerts. 

If you have a newer phone, you might be okay. Many new phones are waterproof thanks to special coatings and designs. If your phone isn’t waterproof, the first thing you’ll want to do is power it down. Dry off the exterior as much as possible with what you have handy, like a shirt or towel. If possible, take out the SIM card, remove the back housing, and remove the battery. Hold it upright so the connector ports face down, and gently tap the sides to release any excess liquid. After that, leave the phone in a well-ventilated area.

The right way to clean a wet phone is to use alcohol

Smartphone hanging out to dry on an outdoor laundry line. Jannhuizenga/Getty Images

The best way to remove the water is to use an alcohol-based solution. This will clean the components and prevent corrosion, which is the real silent killer of moisture inside a device. It’s especially concerning when dealing with seawater or chlorinated pool water, but it can also happen with juice and sugary drinks. The liquid alone may not do much damage. It could short-circuit powered elements, but corrosion is the true concern. There are numerous instances of working iPhones being found underwater after nearly a year in a lake or other body of water. One iPhone X was submerged in the ocean for eight hours and came out unscathed.

iFixit experts recommend scrubbing gently with a 90% isopropyl alcohol solution (rubbing alcohol) and a toothbrush. Take the phone apart, remove the battery and submerge the phone’s motherboard in alcohol. Scrub for good measure. Afterward, allow it to dry and check to see if the device survived its watery encounter. 

The reason that’s not the first recommended step is that you have to disassemble your phone to access the inside, and that’s not a novice-friendly task, nor is it always possible. But it is the best solution for “displacing” moisture and cleaning potential residues left behind. Saltwater is very corrosive, especially for electronics, so if your phone falls in the ocean or a saltwater pool, you want to get it as clean as possible after, removing not only the moisture but everything else, too.

Source

Posted on

5 Essential Gadgets For Model Building

Toy model kit frames on a workbench with parts removed. Boyloso/Getty Images

We may receive a commission on purchases made from links.

Planes, trains, automobiles, mini figurines, spaceships, you can build a model of just about anything, and it’s a lot of fun, too. While some easy kits claim you don’t need tools, the more advanced ones will require you to have, at the very least, a craft knife. From there, you may need a sander, painting brushes and supplies, glue or adhesive, and a few other small gadgets. Believe it or not, if you’re 3D printing the model parts yourself, you’ll still need a lot of those tools – 3D prints don’t come out perfect. If you really want to keep the force strong with those Star Wars-inspired 3D printing projects, with clean lines and sci-fi-esque designs, pro-grade tools are a must.

The tools you need are going to depend on the task at hand, of course. If you’re painting mini-figurines that are already assembled, that’s going to be a very different process than putting together a model car. Regardless of what you’re building, there are some essential gadgets that can help. Though it may be obvious to some, you don’t necessarily need these gadgets to get the work done.

The basics, including a precision craft knife, some paint and fine brushes, sandpaper or metal files, and a solid workstation, are really the only true requirements. The following tools are essential because they will significantly speed up the experience and help eliminate a lot of minor frustrations.

Hozo NeoBlade

Hands down, the first and most important tool in any model builder’s arsenal is a precision crafting knife, which you might recognize as an X-acto knife. If you prefer simple designs, there are plenty of precision craft sets out there. But if you want ultra-precise, ultra-smooth cuts that are remarkably accessible, meaning anyone of any skill level can achieve them, Hozo’s NeoBlade is the knife to splurge on for $149. It’s a sleek, electric portable cutter that uses ultrasonic vibrations to slice through various materials like leather, resin, and carbon fiber.

You may notice some of those materials are thick and troublesome to cut through with your average craft knife, but the Hozo NeoBlade makes short work of them. The NeoBlade delivers ultrasonic vibrations at 40,000Hz, so it basically makes super-fast saw blade-style motion cuts. It also employs a unique airflow cooling system to prevent all the internals from overheating, no matter how difficult the cutting task. It’s wireless and comes with two hot-swappable batteries.

There are also six types of blades for different cutting styles and optional accessories, like storage cases, charging docks, and self-healing cutting mats for the surface of your workstation. You’ll be doing a lot of cutting, whether it’s removing individual plastic or wood model parts from their frames or trimming pieces from your 3D prints. The Hozo NeoBlade makes that fast, easy, and precise.

Hozo NeoSander

Another Hozo gadget is a unique tool called the NeoSander. It’s an electric, portable reciprocating detail sander with a huge amount of modularity. To keep it simple, it’s a precise sanding and finishing tool that uses a linear back-and-forth motion, versus rotary tools, without spinning or wobbling. That allows it to stay consistent during use, is easier to control, and results in incredibly detailed and polished pieces or surfaces. The tips of the tool can be swapped out like drill bits for a drill, and there’s even a saw-like attachment, so it could stand in as a wood, resin, or plastic cutter if you didn’t want a separate knife.

The premium combo is $169 and includes the tool, a charging dock, additional accessories, and a 64-piece multicolored sanding attachment kit. This will be especially useful for 3D prints that come out with rough edges, nubs, or bits and bobs that need to be sanded down or polished away. It can also smooth out surfaces after you do a cut with a knife. Alternatively, you could go with the basic set if you’re on a budget, which costs around $70. This wouldn’t be a bad tool to use for 3D projects that take your Raspberry Pi builds to the next level, polishing or finishing 3D printed cases and other modular shells.

Micro-Mark Brushcam

Painting requires a steady hand, a keen eye, and some solid linework, but in the case of mini figurines or small pieces, as you’d make for Warhammer or a tabletop D&D session, you need a much closer peek at where those brush strokes are going. The Micro-Mark BrushCam is ideal for that. It’s a custom-made battery-powered and USB-rechargeable brush camera that attaches to any paintbrush, thanks to a specially-designed adapter. It delivers 10x magnification and broadcasts video to your phone or tablet, via an app available for Android and iOS devices.

The camera helps magnify the tip of the paint brush so you can see where it’s going and what parts of the model it’s coloring. That makes it infinitely easier to add more details to bland models. You can do things like color faces on resin figures or add minor accoutrements to bigger models, and so on. The fact that you can supply your own brush is a huge boon; you’re not locked into a proprietary design or model. The Micro-Mark BrushCam is $90 at full price.

Revopoint Inspire 2

The Revopoint Inspire 2 is a 3D hand scanner with built-in Wi-Fi that lets you scan virtually any item of any shape and any surface to create a digital model. You can then take that model and modify it to create 3D printer blueprints or digital pieces — like prefabrications for video games or 3D modeling software. It’s primarily useful to anyone with a 3D printer, as it won’t do much for regular models or toy figures, but that doesn’t make it any less valuable for those who can leverage it. Some of the coolest 3D printing projects you should try at some point are essentially models or miniature recreations. All things you could easily scan and recreate with a gadget like the Inspire 2.

It creates highly detailed and accurate models with relatively simple scanning techniques. You don’t necessarily have to have experience working with models or 3D modeling tools, though it certainly helps. It’s battery-operated, comes with USB-charging gear, and includes a tripod for stable setups. It’s small enough to fit in a backpack, day bag, or purse, too, so you can take it with you everywhere and scan things you encounter in the world, within reason.

Some protected items or designs may not be legally scannable. That said, you can use it to scan and print architecture and fantasy-related models, arts and sculpture, and most anything you see or can imagine. The Revopoint Inspire 2 standard model is $549 at full price, while the premium package for $629 includes a mobile-mounting kit that works similarly to a selfie stick or handheld camera mount.

Neatfi XL desk lamp

Chances are, you have some kind of workspace — you always need a reliable area to build your models — but whether it’s in a dimly lit room or there’s bright overhead lighting, you’re still going to need a lighting source that’s adjustable and capable of getting in real close. Enter Neatfi’s excellent hobbyist-style desk lamps. The XL 2200 Lumens lamp, for example, comes with a built-in clamp that allows you to secure it to the surface of any tabletop, desk, or makeshift workbench, even if you have plywood resting atop some sawhorses.

That clamp, the adjustable arm, and the four levels of dimming allow you to completely fine-tune the lighting angles and brightness. That may not seem like much, but when you’re in the thick of sanding, finishing, painting, or admiring your figurines and models, it’s going to make all the difference. It’s also designed to be glare-free, won’t flicker during use, and is easier on your eyes.

It’s not “smart” as there are no app controls, there’s no built-in Wi-Fi, or anything connected. But even so, it’s an incredibly invaluable tool to have at your work desk or station that gives you a lot of light to see and focus on whatever task you’re doing. The company also offers a variety of other similar desk lamps with varying styles and brightness levels. Adding more than one could also be an option for better lighting all-around.

Source

Posted on

Before You Buy A New Soundbar, Check For This HDMI

A dark gray soundbar placed below a wall-mounted TV. Proxima Studio/Shutterstock

If you’re tired of the lackluster sound quality your TV speakers are cursed to deliver, it might be time for you to invest in a soundbar. Designed for plug-and-play connectivity, getting a soundbar up and running can often be done in just a few minutes. Many systems also come with all the accessories you’d need or want, like an HDMI cable, a digital optical cable, mounting hardware, and more. But before you sign on for a new piece of expensive audio gear, we recommend confirming the soundbar you’re interested in has an HDMI eARC port.

HDMI eARC is the upgraded version of HDMI ARC. The “ARC” part of the acronym stands for “Audio Return Channel,” an HDMI feature that allows your TV to route all audio from all connected source devices into a single soundbar or AV receiver using a single port. That tiny “e” in “eARC” stands for “enhanced” — accordingly, eARC supports more audio codecs than ARC does. For you to take full advantage of eARC features, however, both your soundbar and your TV need to have HDMI eARC ports. Additionally, you should use an HDMI cable labeled “High Speed” or “Ultra High Speed”, the latter of which accommodates data transfer speeds of up to 48Gbps. Here’s a good rule of thumb: If you know for a fact that you’re buying an HDMI 2.1-certified cable, said cable should also be ARC- and eARC-ready.

Digital optical is better than nothing, but HDMI eARC is the gold standard

An HDMI eARC port on the back of an electronic device alongside several other inputs and outputs. Achmad I Suhendar/Shutterstock

Up until the rollout of HDMI ARC, connecting a soundbar to a TV was usually handled by a digital optical cable. This wasn’t a bad way to hook device A to device B, and most soundbars and TVs do still include digital optical ports. But ARC made it possible to transmit both video and audio upstream and downstream using just one HDMI cable. With ARC, you can simply plug all your AV components into your TV, then run a single HDMI cable between your TV and your soundbar, ensuring the cable is connected to the eARC ports on both devices.

Compared to digital optical connectivity, HDMI eARC can transfer far more information between your TV and audio system, which opens the doors to more advanced codecs. Surround sound formats like Dolby Atmos and DTS:X deliver three-dimensional audio immersion, and to support this functionality, many soundbars feature up- and side-firing speakers for Atmos and DTS:X height effects. 

Unfortunately, some older TVs may not support eARC or even ARC, forcing many a home theater owner to use the next best thing: digital optical. Generally speaking, digital optical connections shouldn’t have an issue decoding basic 5.1 Dolby and DTS tracks — it’s when you start dabbling with Atmos that optical connections begin to fall short. That little red light simply doesn’t have what it takes to deliver lossless, full-quality Atmos or DTS:X audio mixes.

Get the most out of your home theater soundbar with HDMI eARC

If you’ve been waiting to pull the trigger on a brand-new smart TV that you’re looking to pair with a brand-new soundbar, then you’re in luck, as far as compatibility goes. Just about any new 4K HDR TV you’d end up taking home with you is going to have an HDMI eARC port, and the same goes for any soundbar designed for home theater use — in other words, any soundbar that supports Dolby Atmos or DTS:X codecs.

Besides being listed on the official product specs, another good tell that your prospective soundbar will have an eARC port is if it has a handful of dedicated HDMI inputs. This isn’t exactly a hard rule, but soundbars with built-in HDMI switching tend to have HDMI ARC or eARC passthrough. In such cases, instead of plugging AV components into your TV, you can plug them into the HDMI inputs on your home theater bar, then run a single HDMI cable from your bar’s eARC to your TV’s eARC. This will ensure you get both maximum-fidelity audio through your soundbar and high-speed video to your TV.

It’s also worth mentioning, however, that not all TVs and soundbars with HDMI eARC ports can support both Dolby and DTS formats. If you’re planning to use a 4K Blu-ray player as part of your home theater, we recommend ensuring the soundbar you’re buying can decode DTS tracks, a common audio codec used on 4K Blu-ray disks.

Source

Posted on

What Does The Purple Circle Mean On Snapchat?

ssorted social apps, including TikTok, Sora, YouTube, Snapchat, Instagram, and Facebook, are seen on the screen of an iPhone. Tada Images/Shutterstock

Snapchat lets you send messages, photos, and videos that disappear after a single view, 24 hours, or, occasionally, up to seven days. If you have been away from the social media app for the past few years, as you have been too busy using Instagram and its perks, you might realize a lot has changed in the meantime. One of the most important questions might be what the purple circle on the app means. The answer is that there’s a new photo or video that your friend, an influencer, or a follower posted that you haven’t seen yet.

If you’ve seen a purple circle with a lock, you’re about to see a Private Story. The person sharing that content is only doing so with a handful of people, which works similarly to Instagram’s Close Friends feature. As long as it’s a purple circle, you should know the app is telling you there’s a Snap ready to be seen. There are other colors that are important to know about when using Snapchat, as they represent different things on the app.

Understanding different colors on Snapchat

Assorted apps (TikTok, Instagram, Facebook, YouTube, Snapchat, Threads, Reddit, X, and Twitch) included in Australia's world-first teen social media ban are seen on the screen of an iPhone. Tada Images/Shutterstock

Snapchat uses three main colors you should be aware of: purple, blue, and gray. As already explained, the purple color means you have a new Snap ready to be seen, while a blue circle on your Snapchat means someone sent you something in a chat. The gray circle, on the other hand, means that a person still has content that can be seen, but you’ve already seen it. If you already checked someone’s Snaps that day and they haven’t posted anything new, but they’re still within the 24-hour window, the gray circle will indicate you can tap it to watch the content again.

It’s important to note that while these rings tell the status of some Snapchat content, the colors and icons won’t change based on privacy or friend status. As such, these three colors don’t indicate whether someone took a screenshot of something you shared or whether a person is online. 

Source

Posted on

Do You Really Own The Books On Your Kindle?

Person reading an ebook on Kindle next to stack of physical books Oleg Opryshko /Getty Images

No, you don’t truly own books that you may have purchased on your Kindle. That’s because digital files work differently from physical copies, meaning that when you purchase them from Amazon, you only get a license. You don’t receive a copy of the file that you can fully control, but this distinction isn’t only for Kindle books, and also applies across most digital media today.

When you buy a physical copy of a book, you can lend it to a friend or sell it. You can also store it on a bookshelf for decades without asking for permission. However, a Kindle purchase works differently, and your access to those copies depends on Amazon keeping your account in good standing, honoring its deals with publishers, and maintaining the infrastructure so that you can access the book from your device.

This means that if any of those conditions are removed, your library becomes harder to reach, even if you paid to have access to those books. Additionally, that gap was reinforced when Amazon removed the “Download & Transfer via USB” feature from Kindle. That tool let users back up Kindle books and have control over the files.

No, you do not fully own books on Kindle

E-Reader displaying ebook page on desk next to books and plant Simpson33/Getty Images

It should be noted that other companies employ this approach when selling their digital products, not just Amazon. For instance, PC gamers who utilize Steam are probably aware of the fact that the company employs this very system. As was highlighted by Valve in October 2024, they decided to include this information on the checkout page, which explicitly states that one doesn’t buy the product but gets a license to use it.

That kind of distinction matters because a license is conditional, which means a platform can revoke it if anything happens. So you need to follow the terms of service to avoid getting banned, but also worry about a publisher pulling a title. Kindle operates in that way, and Amazon has removed purchased books from users’ devices without consent. One example involved George Orwell titles, remotely deleted from Kindles because Amazon didn’t have the rights to sell them.

Per copyright law in the U.S., if you buy a paperback book, you have the right to resell, donate, or lend it to anyone without needing to ask permission. With Kindle books and other digital items, you don’t have the same freedom. This means that you can’t transfer them freely, resell them, or even move those copies to a different Kindle alternative without running into Amazon’s DRM.

Amazon’s DRM change makes Kindle ownership more complicated

Kindle displaying Nature/Getty Images

In 2025, Amazon removed the “Download and Transfer via USB” option from its reading platform. That feature lets users download purchased books on Kindle to a computer and manually transfer them to another device. Additionally, before Wi-Fi was introduced in those gadgets, that was the main way to load content into your device. Many users also used this option to have a backup of their libraries in local copies, but that isn’t possible anymore.

Part of what makes that loss significant is how Kindle’s DRM works. Every book you purchase is encrypted and locked to devices registered under your Amazon account. This means you can’t open the same file on another Kindle alternative outside Amazon’s ecosystem. So even if you saved a local copy before the USB option was removed, that file would still be unreadable anywhere else other than Kindle apps or devices.

In the end, the answer to whether you own books on Kindle or not depends on what owning actually means to you. If it means having regular access to a title through your account, then Kindle purchases work like ownership in most situations. But if it means having full control of the file, those digital books never worked like a physical copy, something physical book lovers who switched to Kindle have had to come to terms with.

Source

Posted on

Roku And TCL Are Facing A Lawsuit Over Smart TV

Close-up of a judge's gavel resting on a block labeled Alexander Sikov/Getty Images

Electronic devices can be expensive, especially if you want the best of the best. That said, there are ways to be frugal when buying electronics, and once you get your gadget, you expect it to meet your needs without a fuss. Unfortunately, for some TCL and Roku smart TV owners, that hasn’t been the case, which has resulted in the two companies being sued recently in a class action lawsuit filed by a consumer named Terri Else. The class action lawsuit against Roku Inc. and TTE Technology Inc. (which trades in the U.S. as TCL North America) was filed in the U.S. District Court for the Central District of California. 

According to the lawsuit, the plaintiff accuses both companies of selling smart TVs that become unusable due to “software defects”. The lawsuit claims that the software updates released by Roku are “repetitively defective.” It alleges that they materially impair the functionality, “rendering many consumers’ televisions either entirely unusable (‘bricked’), blacked out, or otherwise substantially degraded in terms of device performance.” The reason why the lawsuit targets both companies is because of their partnership, in which some TVs from TCL — a major smart TV brand — run Roku’s smart TV operating system, dubbed Roku OS, which is a major smart TV OS.

The lawsuit mentions several smart TV models that were purchased by users between December 16, 2024, and the present, including the Roku Select Series and Roku Plus Series. It also mentions TCL’s 3, 4, 5, and 6 Series TV models that are powered by Roku’s smart TV software. In the lawsuit, the plaintiff, together with members of the class action, demands a jury trial and seeks compensation for the damages they have suffered. They also request “declaratory and injunctive relief, restitution, and disgorgement of Defendants’ ill-gotten gains.”

The lawsuit highlights a variety of issues with Roku and TCL TVs

A TCL TV powered by Roku OS on display Eric Broder Van Dyke/Shutterstock

The word “software defect” is mentioned in the lawsuit over 30 times. Additionally, the lawsuit didn’t shy away from giving examples of the various issues that some users have run into that have negatively affected the user experience. Some of the bugs mentioned include screen blackouts, the display flashing on and off, and loss of video — all of which “corrupts the user experience to the point of inoperability.” It also mentions repeated restarts, the set entering recovery mode after an update, freezing, and even loss of video while audio continues to work. 

Included in the lawsuit are examples of user complaints posted in Roku’s community forum, where multiple users highlight the various problems they’ve run into as a result of a software update. One says an automatic update was installed on their Roku streaming stick, leading to distorted lines on the image and a cracking sound. Another complaint in the lawsuit concerns a TCL Roku TV user who experienced flickering after turning on the TV, after which it went black while continuing to play audio. The issue persisted despite the person trying different troubleshooting methods.

Lawsuit alleges Roku and TCL failed to fix TV bugs

A Roku TV on display PJ McDonnell/Shutterstock

The lawsuit claims that both companies are aware of the various alleged software defects that have been highlighted. However, the plaintiff says that the two companies have offered no solution so far despite “persistent complaints of repeated system failures,” which is said to be “inconsistent with representations made in express warranties, which promise to repair, correct, or otherwise remediate the software defect.” The plaintiff also raises concerns about the companies’ failure to disclose these issues to consumers before they purchased their sets.

Instead, Roku-powered TVs have continued to be marketed as “reliable smart TVs” that improve as time goes by due to automatic updates. Tom’s Guide reached out to both TCL and Roku, but only the latter had responded at the time of publication. A Roku spokesperson told the tech site that it believes “the claims are meritless.” The lawsuit was filed on March 27, 2026, so it’s still early in the process, and you’ll probably have to wait for months before a resolution is reached. The two companies will likely fight back as they might have to pay up a good sum if found liable.

Source

Posted on

5 Of The Best Vertical Monitors For Your PC Setup

Person pointing at code on a vertical monitor in a programming workspace. Athvisions/Getty Images

We may receive a commission on purchases made from links.

Vertical monitors have seen a steep rise in popularity in recent times. And that makes perfect sense once you consider the benefits of using a monitor in a vertical alignment. They are not only good for working with documents, scrolling through web pages, or running communication apps such as Discord or Slack, but also for editing Reels or other vertical video formats. Moreover, mobile UX designers can more accurately preview the final layout of what they’re building.

Of course, vertical monitors are also widely popular as a secondary display in gaming PC setups. Gamers often use one on the side to keep a cheat sheet, map, Discord, or livestream chat open while playing. While you can technically use a VESA mount to turn almost any compatible monitor into a vertical monitor, it is far more convenient to opt for a monitor with built-in pivot adjustment up to 90 degrees, ideally in both directions.

That said, given that even the best monitors in the industry do not openly advertise themselves as vertical monitors, it can be difficult to single out the right one for your specific needs. To help you out, we’ve done the hard yards, looked through dozens of options and narrowed it down to the five best choices across a wide range of budgets.

Dell UltraSharp U2725QE 27-inch

The Dell UltraSharp U2725QE is hands down one of the best monitors available right now, and the fact that it comes with a full 90-degree pivot adjustment made it an easy pick for the top spot in this guide. Not only does it enjoy a healthy 4.4 rating on Amazon after over 200 reviews, but several expert outlets, including RTINGS and Windows Central, have also praised it. RTINGS ranked it as the best vertical monitor, while testers at Windows Central called it “the single best display for productivity.” Priced at $643, this 27-inch IPS display comes with a full 4K resolution, a 120Hz refresh rate, and an anti-reflective screen.

However, easily the biggest perk of this monitor is its built-in USB hub, which, excluding the power port, offers a whopping 15 ports. You get two DisplayPort connections, a Thunderbolt 4 upstream port, a Thunderbolt 4 downstream port, five USB Type-A ports, three USB Type-C ports, a 3.5mm audio jack, and an Ethernet port. Surely you’ll have a few left to plug in some cool USB gadgets. Even better, the Thunderbolt 4 upstream port is capable of delivering up to 140W of power, meaning you can easily charge your laptop from the monitor itself.

Another feature users love is the monitor’s KVM (keyboard, video, mouse) switch, which allows you to connect your accessories and peripherals to the monitor and use them across multiple systems, such as your desktop PC and a laptop. You can use the monitor’s USB ports to connect additional 4K displays to the Dell UltraSharp U2725QE. However, the monitor is more than just its USB hub. It’s still an excellent display, with the IPS panel being especially well-suited for vertical work setups, thanks to its better brightness.

Dell 27 Plus 4K S2725QS

If you’re not fully convinced about spending $600+ on the Dell U2725QE, but still want a 4K monitor for work that also pivots into a vertical orientation, the Dell S2725QS, currently priced at just $279.99, is a great choice. Sure, it doesn’t come with a built-in USB hub, but you still get two HDMI ports along with a DisplayPort, so you can easily connect multiple devices to the monitor and switch between them with the click of a button. The monitor has a solid 4.5 rating on Amazon after nearly 800 reviews, with several users highlighting the good value for money it offers.

As you would expect from a high-quality Dell 4K IPS display, the S2725QS offers a crisp, bright screen with great viewing angles. RTINGS says the monitor is sharp and large enough that you can comfortably stack two windows side by side on the 27-inch screen without things feeling cramped. Moreover, its sleek and minimal look has earned some praise as well, with one user saying, “the monitor’s appearance is awesome.”

Plus, thanks to its 99% sRGB color coverage and HDR support, it works just as well for viewing content and visual work such as photo or video editing. Better yet, according to expert reviewers at Creative Bloq, the default color accuracy is more than good enough, so you likely will not need to tweak it. The Dell S2725QS also comes with built-in speakers: two 5W ones. Agreed, they’re not the most powerful, but they can prove handy in a pinch, and you can always turn to your trusted headphones.

Samsung 24-inch Odyssey G30D

The Samsung 24-inch Odyssey G30D is the most affordable option on this list and one of the best budget vertical monitors you can buy right now. Priced at $149.99, it enjoys a solid 4.6 rating on Amazon after nearly 1,700 reviews. Right off the bat, you’ll see that many of this monitor’s features are designed to make it gaming-friendly. This includes a 1-millisecond response time, a high refresh rate of up to 180Hz, and AMD FreeSync. However, both actual user reviews on Amazon and industry experts (for example, testers at Root Nation) have concluded that the monitor is just as excellent for work and productivity purposes as well.

One reviewer on Amazon said that the monitor is “exceptional for general use.” It boasts a full HD 1080p resolution and comes with a dedicated Eye Saver Mode, which reduces the amount of blue light from the monitor’s VA panel, helping to lower eye strain and fatigue. The effectiveness of this built-in eye protection was confirmed by a user who said that the monitor is “easy on the eyes for spreadsheets.”

Also, even though VA panels generally have slower pixel response times, which often cause motion smearing, Root Nation found that the Odyssey G30D has minimal smearing with the Extreme setting turned on. This makes it excellent for text-based tasks such as viewing dark-colored text on a white background. We also like the customizability this monitor offers. It comes with a single control button (at the bottom of the screen), which lets you access just about everything, from the source input (one HDMI input and one DisplayPort), brightness, contrast, refresh rate, sharpness, and more.

Asus ProArt Display PA278QV

The Asus ProArt Display PA278QV, like the entire ProArt lineup, has been built with a clear focus on creative professionals and accurate color output. This WQHD 2560×1440 IPS pivot-friendly monitor boasts an impressive 4.6 rating on Amazon after over 3,000 reviews. It’s currently priced at $199, around $80 less than the PA278CV, which you may prefer if you want USB-C with 65W power delivery. Speaking of ports, this model does not feel lacking. It comes with a full USB hub, including an HDMI port, a DisplayPort, four USB 3.2 Gen 1 Type-A ports, and a Mini DisplayPort.

While it also has a DVI port, several experts, including those at Photography Life, have pointed out that it misses the Thunderbolt port that would make the monitor more future-proof and ideal for Mac users. Where the monitor really shines, though, is its color accuracy. It comes with 100% sRGB and 100% Rec.709 color gamut coverage right out of the box. Additionally, you get several pre-calibrated presets, as well as advanced image customization tools, which you can access using the five buttons at the bottom of the monitor.

Even general users have praised the screen, with one reviewer highlighting that they experienced “no dead pixels” after more than a year of use, while another remarked that “the screen is very consistent, with no visible glow or bleeding from the edges.” Although the monitor does not compete with the higher refresh rate models mentioned above, the 75Hz refresh rate should be enough for webpages and documents, and even photo/video editing tasks.

Lg 27GL83A-B Ultragear

Agreed, the Lg 27GL83A-B Ultragear is an out-and-out gaming monitor, but its pivot-friendly design, combined with the QHD 2560 x 1440 IPS display, a good bang-for-buck price tag of $266, and near-borderless bezels on three sides, makes it a great option to use as a vertical monitor in your setup. It has been reviewed over 12,500 times on Amazon, where it holds a 4.6-star rating, with heaps of praise for its smooth and lag-free display – courtesy of the 144Hz refresh rate and 1ms response time.

Although connectivity is not its strongest suit, it’s still decent. You get two HDMI ports as well as a DisplayPort, so you can connect multiple devices. Moreover, hands-on testing at RTINGS found that the monitor’s sRGB mode delivers excellent color accuracy, covering up to 99% of the sRGB color space.

However, if you want to get the best from the panel, you will have to manually calibrate it. Another area where the monitor scores highly is image consistency. A user who has been using the monitor since November 2024 said that it still produces a “solid picture” with little to no color fading. Another reviewer on Amazon highlighted that they have not seen “any backlight bleed or dead pixels.”

How we selected these monitors

person looking at different type of screens Master1305/Shutterstock

Given that there are no monitors that offer a dedicated vertical-only alignment, we first looked for the best monitors in the industry that offer a full 90-degree pivot adjustment. We only looked at monitors from reputable brands such as Dell, Samsung, Asus, and Lg. We also only considered models that have been highly rated not only by experts such as RTINGS, but also by everyday users on Amazon.

Next, we made sure to include vertical monitors across a wide range of budgets so that there’s something for everyone. That said, you can rest assured that even the more affordable options on this list offer good value in their price bracket. Not only do these monitors offer native vertical alignment, but they also provide crisp, bright images, high refresh rates, plenty of screen real estate, solid connectivity, and useful extra features.

Source

Posted on

Will A 100W Charger Destroy Your iPhone’s Battery?

An iPhone charging with a USB-C cable José Adorno/BGR

Let’s cut straight to the chase – charging your iPhone with a 100W charger won’t destroy its battery. However, it’s important to use a certified accessory to ensure everything works appropriately. Besides that, using a 100W charger will not magically charge your iPhone at that power. Unlike some Chinese phones that have the fastest charging smartphone batteries of all time, the latest iPhone 17 Pro supports up to 40W of power, which means that the device will only use up to 40W to charge.

On several support pages, Apple says there’s no issue in using a more powerful charger. As a matter of fact, as long as you’re using a power adapter that complies with the USB-C standard and an equally good cable, like the one that comes with the iPhone, you’re good to go. Since Apple provides a 140W power adapter with the 16-inch MacBook Pro, and the brand says the adapter can fast-charge an iPhone, it’s safe to say that a 100W charger, even from a different brand, won’t destroy the phone’s battery.

Battery degradation is normal, but you should know this

A person holding an iPhone José Adorno/BGR

Apple says that the iPhone’s battery capacity degrades over time. New iPhones can last for up to 1,000 cycles before you might get a warning that the battery needs to be replaced. With today’s batteries, one charge cycle is when you use the complete 100% of the battery capacity. So you can use 70% in one day, charge it to 100%, and only when you use 30% more will it count as one charge cycle. When you set the battery charging limit to 95%, 90%, or even 80%, it will take longer to complete a full charging cycle, which means you can extend your iPhone’s battery life because you’re not using its full potential all the time.

That said, tests conducted by MacRumors show that setting a limit to how much you can charge your iPhone doesn’t have much impact on battery degradation after a few years. What matters the most is using certified accessories, whether from Apple or third-party makers. While theoretically, charging your iPhone with a slower charger could improve battery life in the long term, a test suggests that fast charging doesn’t hurt your phone’s battery life.

Source