Posted on

4 Places You Should Never Store Your Phone

Smartphone in car glove compartment vin.rusanov/Shutterstock

A smartphone is a significant investment and protecting that investment takes a variety of forms. For example, a durable phone case and phone insurance, such as AppleCare+, are obvious ways to protect your phone, but it’s important to account for solutions that might be a little easier to overlook when seeking to minimize phone damage. Specifically, it’s vital to be aware of the types of spaces and locations where you should never store your phone.

How and where you store your phone can not only have a major impact on the functionality and lifespan of your device, but it can affect your own health, too. Other than guarding against physical damage from water and impacts, you should also store and charge your phone in a manner that protects it against environmental damage, and make sure you’re not keeping the phone too close to your own body for a long time. While learning about where not to store your phone, you may also want to research other habits and behaviors you should avoid that will help maximize your phone’s performance and safety.

Never store (or charge) your phone near heat sources

Phone and tablet charging on bed near pillows and blanket FotoHelin/Shutterstock

One of the most important considerations to account for when deciding where to safely store your phone is the way heat can damage it. However, it’s easy to forget that various appliances, devices, and surfaces can also give off the type of heat that may damage a phone. You should also make a point of not storing or charging your phone near these potential heat sources.

Naturally, this means not storing or charging the phone near appliances that obviously emit heat, such as ovens, microwaves, and even televisions. In addition to these areas, also consider how seemingly benign surfaces can become sources of heat in various situations or circumstances. For example, if you’re charging your phone overnight, you shouldn’t do so in a way that leaves it covered by blankets or a pillow. Along with potentially leading to phone damage, there’s evidence to suggest this could even be a fire hazard. Instead, it’s best to charge a phone uncovered on a hard surface with good airflow.

Don’t store your phone in your car

Phone sitting on dashboard of car Bitsandsplits/Getty Images

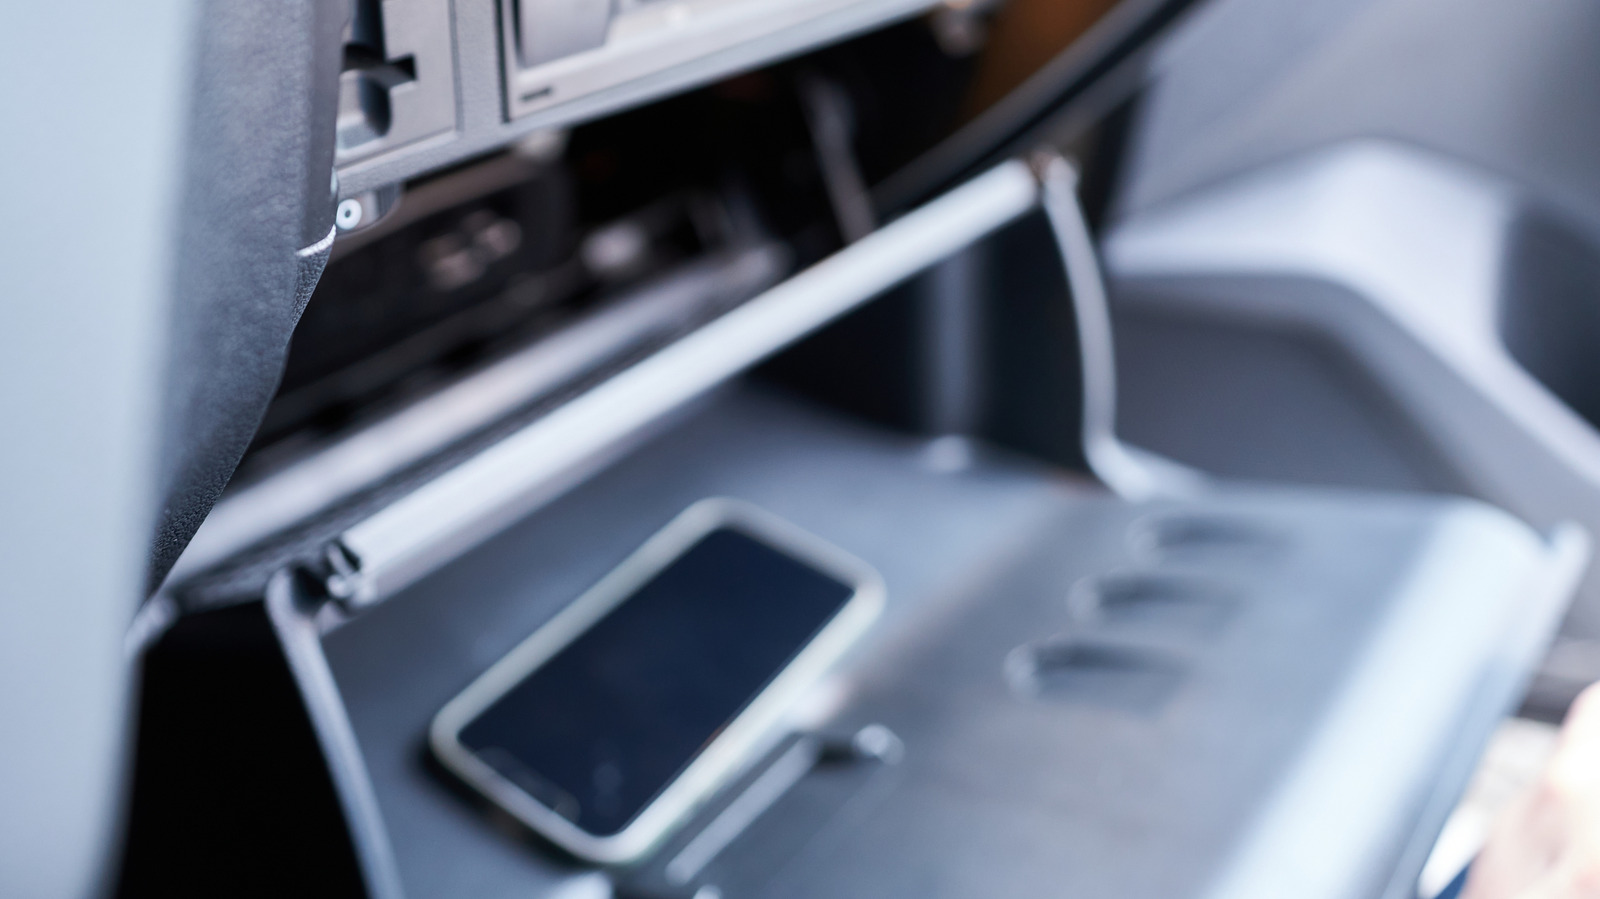
It may be common sense to keep your phone away from heat sources around the house, but don’t forget that your car’s interior can get surprisingly hot, especially on a sunny, summer day. This is one reason why you should never store your phone (or any device) inside your car.  Even if a car is parked in the shade, while it might not get as hot as a vehicle parked in the sun, it can still get hot enough to pose a risk to a phone stored inside of it. Exposing a phone to excessive heat can damage its internal parts, potentially leading to a range of issues.

Research shows that cars often function like greenhouses in warm weather. They can trap heat easily, leading to rising temperatures in short periods of time. Keep in mind that the temperature may fluctuate throughout the day, so even if the car doesn’t seem like it will get too warm when you park it, that could change over the course of a few hours. In addition to the heat your phone will be exposed to when stored in a vehicle, leaving any valuables unattended in a car also opens the possibility of theft.

Don’t put your phone in a security bin at the airport

Phone with other valuable items in airport security bin Chalabala/Getty Images

Knowing where not to store your phone also requires knowing where you should try to avoid keeping it even for short periods. For instance, travel experts discourage storing a phone in a TSA bin when proceeding through security at an airport. They point out that leaving your phone out of sight in a TSA bin puts it at risk of theft. In addition, when you’re in a hurry, it’s easy to forget to grab your phone from out of the bin as you gather your belongings.

Instead, experts suggest keeping a phone (as well as other valuable items, like wallets) inside a zippered section of a bag or item of clothing when going through security. They also recommend checking to confirm your valuables are still in those zippered sections right away when gathering your belongings, just to ensure you don’t accidentally walk off without your phone. That’s a mistake you might not realize you’ve made until it’s too late to correct it. Points like these serve as a reminder that potential damage isn’t the only factor to keep in mind when choosing where (and where not) to keep a phone. 

Limit how often you store your phone in your pocket

Close-up of person putting phone in pocket Alfonso Soler/Shutterstock

Keeping your phone in your pocket for extended periods could involve exposing it to the type of heat that leads to damage. Perhaps more importantly, you’re also exposing your body to radiofrequency waves, which technically represent a form of electromagnetic radiation. It may be tricky to keep your phone easily accessible without storing it in your pocket, but it’s worth exploring other options — not only for your device’s safety but your safety, too.

Although health experts admit there’s still limited research and evidence to indicate precisely how dangerous this type of radiation can be, there may be some reason to believe it could contribute to health issues ranging from infertility to cancer. The aim is to minimize direct exposure to the device. On a side note, using your phone too often in general can be bad for your mental and emotional health. Taking these steps can reduce your exposure to radiation and your phone’s exposure to excessive heat.

You may have to adjust some of your phone usage habits if you’ve been storing it improperly. Making these changes is worthwhile, though. By heeding the advice here, you’ll keep both you and your phone safe.

Source

Posted on

Is It Safe To Use Your PC Without A UPS?

A man plugging his PC cables into a UPS AYO Production/Shutterstock

An Uninterruptible Power Supply (UPS) is exactly what it sounds like: When your home’s electricity service gets interrupted — either due to a blackout or a tripped breaker – the device continues supplying power to your PC, monitor, or even that laptop you’re using without a battery. Since abrupt computer shutdowns can cause damage to both your hardware and software, a UPS has a battery that isn’t immediately cut when the power goes out. Your computer switches to this battery in the event of a power outage without turning off, and it continues functioning for a short period of time.

A UPS can certainly be helpful, but do you actually need one to keep your PC safe? For most people, it’s a great way to protect against several risks, but it isn’t a necessary purchase. If you live in a place that rarely suffers from power outages and generally doesn’t deal with things like brownouts or electricity surges, you can get by just fine without a UPS, unless you get extremely unlucky with a big power surge. We still recommend using a UPS, though, as the up-front cost is much cheaper than getting your pricey GPU replaced on the off chance that power issues do indeed damage it.

Apart from giving you backup electricity for a few minutes, certain kinds of UPS units have additional benefits as well. A line-interactive UPS, for example, can monitor and control the incoming electrical current being supplied to your PC. This can save your hardware from being damaged by “dirty power” conditions like undervoltage or power surges, even if there’s no blackout.

How blackouts and power surges damage your PC

A person holding a candle and pressing a button in the case of a blackout

As with any other electrical appliance, each computer component that consumes power is susceptible to harm if power suddenly goes out, flickers, or surges. In the case of a blackout, an old HDD’s mechanical read and write heads suddenly stop. This can result in them physically crashing into the platter, resulting in bad sectors and permanent damage to the drive. There’s no risk of this with modern SSDs that have PLP, but older models can still be susceptible to data loss in other ways.

Hardware aside, the files inside your computer are also incredibly prone to data loss or corruption if your PC abruptly turns off. This is true if you lose power without saving an important file, but it goes beyond that as well. If your PC is updating or installing files, a sudden power outage can corrupt your data. The harm this does is much more severe if this happens when you’re performing a system update, in which case the sudden power cut can corrupt your entire OS.

With all this in mind, it’s also important to note that a power outage by itself usually doesn’t harm any of your more important PC components — your GPU, power supply, and motherboard — but electrical power surges do. It’s not uncommon for a power surge or flickering electricity to follow after a sudden blackout, and if this happens often, it can fry pretty much anything inside your computer. It might not be as flashy as many other cheap ways to upgrade your gaming setup, but a UPS (or even a simple surge protector) is a wise purchase for pretty much anyone, especially now that AI data centers might be triggering more electrical surges and outages.

When does a UPS become necessary?

A person working at a PC in the dark Tempura/Getty Images

A UPS might be necessary for your PC’s safety if you live in an area that experiences constant power outages or brownouts. This could be regions prone to extreme weather conditions or areas with overhead power lines. While a sudden grid failure or power cut every few months might only have a low chance of doing any significant damage, frequent blackouts can severely shorten your rig’s lifespan. The same is true for electrical brownouts or when dealing with dirty power — your PC might survive a short period of being connected to uneven voltage, but if you’re constantly running it on dirty power, the prolonged exposure can speed up its decay.

Furthermore, when you’re asking if it’s safe to use a PC without a UPS, it isn’t just about the potential risk to your hardware components. If you’re a freelancer who has spent hours on a project, a college student cramming right before a deadline, or even a casual gamer playing a title where you don’t get an opportunity to save often, the risk of data loss is severe. For work or documents, a cheap UPS that doesn’t have a huge battery can give you the two or three minutes you need to save your work. For gamers who might need more time to reach the next save point, a more expensive UPS with a bigger battery might be needed. Either way, it’s better to have a backup and not need it than to need one and not have it.

Source

Posted on

Why USB-C Ports Aren’t Color-Coded (But USB-A Ports Are)

An image of a hand holding various USB cables Iaroslav Bushuev/Getty Images

I’ll admit, a big part of my motivation for writing this explainer is self-serving. As someone who has been using and reviewing tech for decades, USB color coding is one of those bits of trivia that has flitted in and out of my consciousness multiple times through the years, but never found enough purchase to really stick. It’s not something that sticks like knowing what type of USB port you have. Here’s hoping that a dedicated article to why most USB-A ports are color-coded and why most USB-C ports aren’t will help lodge it in the old grey matter.

The TL;DR is that USB-A ports are largely color-coded to denote the generation of USB they support. You might then assume, especially considering its simple, reversible form factor, that USB-C doesn’t require color coding because of some universal, standardized capacities. Unfortunately, the exact opposite is actually the case: USB-C lacks color coding because there are too many variables to easily indicate with a single color.

What the colors mean (and why USB-C lacks them)

A number of dangling USB cables ScaniaZ/Shutterstock

Despite the veritable painter’s palette of colors, things are easier on the USB-A side. Here’s what the various colors indicate:

  • White is the OG, which, in this case, means original generation. White indicates USB 1.X version devices.
  • Black covers the 2.0 generation of USB-A.
  • Yellow is the first split color, meaning it can support either 2.0 or the newer 3.0 standard. It also indicates an “always on” port, which can supply power even when the device it belongs to is powered down.
  • Orange means a purely 3.0 port or device, and is also “always on.”
  • Blue is also a USB 3.0 connection, but without the always on functionality.
  • Teal is for USB 3.1.
  • Red indicates a USB 3.1 Generation 2 and USB 3.2 port or device, the latest USB-A versions.

USB-C causes trouble for this kind of simple categorization system because a single USB connection can support USB 2.0, 3.x, or USB4 data speeds, DisplayPort or HDMI video output, Thunderbolt 3, 4, or 5, and power delivery ranging anywhere from a few watts up to 240W. You’d need a dizzying rainbow of colors to indicate which amalgam of speed, power, video capability, and protocol support a single USB port or device delivers.

Why it matters

Someone plugging a USB-A flash drive into a laptop Eza_Nanda/Shutterstock

On the USB-A side, colors mostly designate generation. This is primarily important because each generation supports different transfer speeds. USB 1.X (white) tops out at 12 Mbps, USB 2.0 (black or yellow) gets up to 480 Mbps, USB 3.0 (yellow, orange, or blue) up to 5 Gbps, USB 3.1 (teal) also maxes out at 5 Gbps, USB 3.1 Gen 2 (red) can get up to 10 Gbps, and USB 3.2 (red) can get a maximum of 20 Gbps. USB-C, on the other hand, is capable of much faster speeds.

The Thunderbolt protocol, which runs over USB-C, for instance, can hit transfer rates of up to 40 Gbps, while the new USB 4.0 reaches even higher, up to 120 Gbps. The issue with the lack of color coding on USB-C can cause downstream confusion. You may plug a brand new external SSD into your laptop and wonder why speeds are pinned at USB 2.0, or wonder why you can’t get a monitor that requires DisplayPort Alt Mode to work on some ports. Luckily, Thunderbolt and USB4 are looking to remedy some of these headaches by unifying capabilities.

Source

Posted on

3 Hidden Instagram Features You Need To Start Using

Close-up of a smartphone with the Instagram logo miss.cabul/Shutterstock

Instagram remains one of the most popular social media apps in the world, thanks in many ways to its intuitive features. Consistent updates to the app also continue to expand how users can share and engage with content (such as a recent update that finally gives users the option to edit comments). However, beyond the core features and functionalities, Instagram offers various hidden features that even seasoned users might not be aware of.

These lesser-known capabilities don’t just improve the experience of using this popular social media platform. In some cases, they turn Instagram into a separate photo editing app, showcasing how it can be a helpful tool even when not being used to share content with followers. Even if you’ve been active on Instagram for years now, there’s a good chance the app can do a lot more than you realized. Experiment with the features here to get a better sense of just how powerful and customizable the Instagram experience can really be. On a side note, while the information here provides general tips for how to leverage these features, the specific steps involved can sometimes vary depending on whether a user has an iOS or Android device. The Instagram Help Center can be a valuable resource to learn more about the proper ways to use these features with your device.

Block content you find offensive

Close-up of a person checking an Instagram account Charles-McClintock Wilson/Shutterstock

Using a social media platform can theoretically involve exposing yourself to content you don’t want to see. Luckily, certain lesser-known Instagram features can help you at least minimize the degree to which this happens. Specifically, a user can navigate to their profile and click on the three horizontal lines stacked on top of one another to access the “Settings and activity” menu. From here, a user can scroll down to the “How others can interact with you” header and select “Hidden Words.”

Next, the user can select “Manage custom words and phrases” at the bottom of the menu. This opens a feature allowing a user to type words, phrases, numbers, and emojis they don’t want to see in comments or messages. All a user has to do is type the words or phrases they find offensive into the field, separating each by a comma. It’s a simple but effective way to make the experience of using Instagram just a little more pleasant.

Turn Instagram into a photo editor without posting to your account

Close-up of hands taking picture a with a phone Peopleimages/Getty Images

Maybe you’re a fan of Instagram’s filters and general photo editing features. That doesn’t necessarily mean you’ll always want to post every photo you edit via Instagram to your Instagram account. Perhaps you want the option of posting these photos to your other social media accounts without sharing them on Instagram, maybe you’d like to add these images to your website, or maybe you just want to save them to your device for personal use.

An easy trick lets users accomplish these goals, turning Instagram into a photo editor app. You can start by, as above, selecting the three lines that will bring you to the “Settings and activity” menu. Then scroll down to “Your app and media” and select “Archiving and downloading.” Finally, confirm that the option “Save original photos” is toggled on. After confirming this, go back to the main screen and select the plus (+) symbol to post a new picture. Take a photo using Instagram itself or select an image from your camera roll. Once you’re done editing the picture using Instagram’s editing tools, make sure your device is in airplane mode.

Then try posting the picture. Naturally, in airplane mode, that action will be unsuccessful. However, if you’ve followed these steps, the edited image should nevertheless show up as saved to your camera roll. We’ve tried this ourselves and can confirm it works, but it’s worth noting that, upon turning airplane mode off, the picture may finish posting, so you might have to delete it when you’re finished.

Reset your Instagram algorithm to get a fresh start with suggested content

Instagram’s algorithm may theoretically serve to offer up the kind of content you find engaging, whether that’s cat videos, millennial memes, or inspirational quotes that famous figures never actually said. However, maybe your tastes have changed since you first started using Instagram, resulting in an algorithm that suggests content you now cringe at. Or maybe you simply feel the algorithm has gone astray, and you want a fresh start accordingly.

As with the other tricks here, a user looking to start anew with the Insta algo can navigate to the “Settings and activity” menu, where they may then scroll down to the “What you see” header. The user can then select “Content preferences,” followed by “Reset suggested content,” where they may then follow the prompts to start off with a clean slate. Within the “Content preferences” menu, users also have the option to modify the algorithm without resetting it entirely by selecting “Your algorithm” and making adjustments.

Again, these are just a few noteworthy Instagram features you might have overlooked. Other options users may wish to explore include using Vanish mode and experimenting with the relatively new Instagram for iPad. Of course, as the app continues to evolve, new features are also likely to emerge. Instagram users who know how to take advantage of both new and hidden features can truly leverage the app’s full potential.

Source

Posted on

3D Printing Safety: The Health Risks Nobody Talks About

A 3D printer in operation with an observer in the background. Ethamphoto/Getty Images

3D printers allow you to create pretty much anything you can think of. They work from digital blueprints, so even if you’re not good at modeling your own stuff, you can find dozens of websites and communities that share models for printing. But in order to create those items, you feed various materials into the printer as filament — namely polylactic acid (PLA) or acrylonitrile butadiene styrene (ABS) — to be melted or molded. Studies by the Environmental Protection Agency have found that printers release gases and harmful particulates during the printing process from these materials and how they are handled. Without proper ventilation or safety equipment, exposure to these contaminants can be harmful to your health.

Particularly, 3D printers release something called volatile organic compounds (VOC). To put it simply, VOCs are gases released from certain solids or liquids, sometimes under specific conditions, that can be harmful in great concentrations. Paints, strong chemicals, glues or adhesives are common examples. But 3D printers and the different filaments used can also release these, which is why proper ventilation is always recommended for 3D printers.

Unfortunately, that’s not the only safety hazard associated with modern 3D printers. During operation, they may also release ultrafine particles that can enter the body and cause further health problems. If they make it into the lungs, for example, they can cause inflammation, asthma, headaches, coughing, and other ailments. Depending on the type of filament, those health problems could be exacerbated.

How do you prevent exposure to these contaminants?

A man getting interacting with the control panel of a 3D printer. Stenko Vlad/Shutterstock

More studies are being conducted, and are probably necessary, for understanding the hazards related to 3D printers and the related materials. However, some of the more prominent hazards are relatively well-known, like microscopic dust exposure and VOC emissions. Another concern is the toxicity of the materials or resins used and how they react when exposed to UV light or lasers — some 3D printers use concentrated light to manipulate the materials. PLA is viewed as risk-free by many because it’s made from natural and renewable materials and is said to be biodegradable and environmentally-friendly. But it, too, releases ultrafine potentially harmful particles, as does ABS.

The best way to deal with these issues is to ensure proper ventilation before doing any prints. Make sure the printer is located in a room with plenty of space and exhaust. It’s also not a bad idea to install an air purification system with high-efficiency particulate air (HEPA) filtration to help remove the VOCs, dust, and other particles. It may also be wise to choose a closed versus open-air printer depending on the environment. It’s not a cost-exclusive problem, either, as these hazards can come from the cheap 3D printers you can buy to the most expensive models. Personal protective equipment is something else to look into. You should wear gloves, safety glasses or goggles, cover most of your skin with longer clothing, and wear a respirator if the space is confined or small.

Understand the risks and protect yourself accordingly

A 3D printer creating a yellow bowl model in a dark environment. Stenko Vlad/Shutterstock

Ultimately, the goal of this article isn’t to frighten anyone away from using a 3D printer. They’re excellent pieces of technology and highly useful tools when used appropriately. It’s more about being cautious with the potential dangers and ensuring you have a proper way to mitigate exposure before you come into contact with anything harmful. This is especially important to remember for 3D printers used in classrooms, educational settings, and wherever else children and younger users may be exposed. Children are more vulnerable, so it’s best to reduce their exposure as much as possible and keep them a safe distance away from any 3D printers in operation.

Before you install one of these printers in your home, office, or workshop, understand the risks, and do your due diligence about improving overall safety. Take breaks, wear protective equipment, keep the ventilation running, install an air purification system, and maybe avoid running the 3D printer all night. Moreover, if you are thinking of buying a 3D printer and don’t have one already, there are some other things you need to know first. For example, they’re not a plug-and-play experience, and you will need to do some fiddling and troubleshooting nearly every time you plan a print. You’ll also need to store the filament and materials properly, and with the knowledge of their potential toxicity, that might inform your storage decisions further.

Source

Posted on

What Happened To Sharp TVs?

A Sharp TV display area at a store. Opasbbb/Shutterstock

TV manufacturers can go through a lot of ebb and flow when it comes to market presence. There are eras where one or two TV brands reign supreme over a particular type of picture tech (e.g., Panasonic for plasma TVs), but there can also be long stretches of time where a popular TV maker is radio silent, only to make a surprise comeback. Then, there are companies like Sharp. Back in the 2010s, Sharp was one of the main players in LCD TV production and was renowned for its big-screen Aquos and Quattron sets.

However, as the years passed by, Sharp’s North American presence became more and more fragmented. Between 2015 and 2018, Sharp actually licensed its TV brand to Hisense, until the former was purchased by Foxconn in 2019; at which point, Sharp began producing and selling its own TVs once more. It might sound like Sharp has been thriving ever since, but the reality is a bit more of a mixed bag.

In March 2024, Sharp announced that it was completely shutting down its big-screen LCD panel production and would convert its massive manufacturing plant in Sakai, Japan, to a data center. At the same time, Sharp also announced that it would be pulling back on smaller panel production across its other global facilities.

Sharp still sells TVs in North America, but the availability and quality aren’t what they used to be

Nowadays, you’ll actually be able to find 4K HDR TVs made by Sharp, and there are several Mini LED sets — and even a couple of OLED models – to choose from. That said, you won’t just be able to waltz into your local Best Buy or Walmart and expect to take home a Sharp TV. Instead, you’ll need to order newer Sharp sets like the Aquos XLED FV1 4K Mini LED, and C55FS1UR 4K OLED from underdog retailers like BrandsMart USA and Walt’s TV.

Sharp is also more on par with value-oriented TV brands like Hisense, TCL, and Vizio, rather than sharing prestige with leading screen titans like Samsung and LG. That’s not to say that buying a new Sharp TV is a bad idea, but it pays to be as educated as possible when you’re shopping for a new TV. Here’s hoping Sharp doesn’t fully stop making TVs like Panasonic TVs, a once-lauded plasma TV leader that fell off the North American market for several years, had an OLED comeback for two years, and then ceased production all over again.

Source

Posted on

5 Powerful YouTube Features You Need To Start Using

A close up shot of YouTube on a phone in the foreground and on a desktop in the background Reyanaska/Shutterstock

YouTube has become the go-to entertainment hub for billions of users online. However, people barely scratch the surface of what they can do on the platform. It’s quite easy to watch a video, subscribe to your favorite content creators, and miss out on features that help improve the experience. Sure, some of the best tools are locked behind YouTube Premium. But even if you don’t subscribe, YouTube has some powerful features that you may never know you needed. You can make your viewing experience easier, smarter, and more personalized without paying a single cent.

For instance, if you tend to go down the rabbit hole that is the infinite feed, you can tell the YouTube mobile app to remind you to take a break. If others in your household are fond of using your YouTube account, you can disable history so they don’t mess up your recommendations. There are even several shortcuts that allow you to better control playback when watching videos on a desktop. These features are all so easy to use and can even make the YouTube experience a little more enjoyable if you give them a try.

Set reminders to take frequent breaks

The Chiifundo Kasiya/BGR

It happens to everyone. You decide to take a break from work, or you’re lying in bed, shutting down for the night, and you decide to watch a YouTube video or two. Besides the fact that using your phone before bedtime is a terrible idea since the blue light from screens can disrupt your sleep, by the time you realize you’ve watched enough of YouTube, an hour or more could have gone by. YouTube has fine-tuned its algorithm to keep you scrolling, and it doesn’t care if you need to get back to work or go to sleep. Luckily, it also allows you to set reminders that snap you out of mindless watching.

To set a break time reminder in the YouTube app, follow the steps below:

  1. Tap your profile picture icon in the bottom-right corner of the screen.

  2. Tap the gear icon in the top-right corner to enter Settings.

  3. Tap “General” or “Time Management.”

  4. Tap “Remind me to take a break.”

  5. Choose between “Every 30 minutes,” “Every 45 minutes,” “Every hour,” or “Customize.”

You can also tell YouTube when your bedtime is. You’ll have to set a start time and end time, and if you’re viewing YouTube within these times, you’ll get a reminder that it’s time to go to sleep.

Follow the steps below:

  1. Navigate to the General or Time Management screen.

  2. Tap “Remind me when it’s bedtime.”

  3. Set the “Start time” and “End time.”

  4. Tap “OK.”

Pause your YouTube watch history

The Chifundo Kasiya/BGR

One of the metrics YouTube uses to recommend videos is your watch history. But sometimes, all it can do is create a lot of noise and feel intrusive. Furthermore, if someone else uses your phone to watch YouTube videos, particularly if you have little ones (PS: turn on Restricted mode to protect them from adult content), you’ll suddenly have your feed littered with recommendations you’re never going to watch, such as “Paw Patrol” or “Miss Rachel.”

To stop YouTube from using your watch history to make recommendations moving forward, do the following:

  1. Tap your profile picture icon in the bottom-right corner of the screen.

  2. Tap the gear icon in the top-right corner to enter Settings.

  3. Tap “Manage all history.”

  4. Tap “Saving your YouTube history.”

  5. Tap “Turn off.”

  6. Tap “Pause.”

YouTube will no longer save new history on your device. If you ever miss those recommendations, you can turn them back on. But if you want them all to briefly disappear, you can try using incognito mode. While pausing history will still show you recommendations based on your past activity, incognito mode offers a blank session unaffected by anything from your account.

Here’s how to turn on incognito mode:

  1. Open YouTube settings again.

  2. Tap “Accounts” or “Switch or manage account.”

  3. Tap “Turn on incognito.”

You will get a cleaner and distraction-free YouTube experience. When you’re done, tap “Turn off incognito,” and your account and all its activity will be restored.

Use YouTube shortcuts

YouTube on a computer RSL_89/Shutterstock

On a desktop, shortcuts save you unnecessary clicks and make navigation easier. For instance, if you are playing a video and need to quickly pause, you will have to reach for the mouse, navigate it to the “Pause” button, and then click it. But you can also just skip all these steps by pressing K or the Space bar to start and stop playback. If you want to rewind or forward a video by 10 seconds, you can simply press J or L, respectively. The Left and Right arrow keys do the same, but in five-second intervals. This can be faster than fiddling with the seek bar if you want to rewind or forward videos a little, even if it’s a bit imprecise.

It’s actions like these that make your YouTube viewing experience more efficient and enjoyable. Other YouTube shortcuts you need to know include pressing M to mute a video, F to enter full-screen mode, and C to toggle captions on and off. If you want to skip to the next video, press Shift + N, and pressing Shift + P will go to the previous video. If the video is split into chapters (something good content creators do to respect your time), pressing Ctrl/Command + Left arrow goes to the previous chapter, while Ctrl/Command + Right arrow skips to the next one.

Use search filters

Search filters on YouTube Chifundo Kasiya/BGR

YouTube’s basic search function is great if you have time to explore the search results. But if you don’t have any tolerance for irrelevant results that you have to scroll through, you can use filters. This can help if, for example, you want a Short instead of a video, something that is less than three minutes, or a video that was uploaded this month.

To use search filters on YouTube, do the following:

  1. Type “allintitle:” and then the title of the video you want in the search — this brings up exact matches.

  2. If you’re on a desktop, click “Filters” in the top-right corner of the screen.

  3. If you’re using the mobile app, tap the three-dot icon in the top-right corner and select “Search filters.”

  4. In the pop-up, choose the filter(s) you want under “Type,” “Duration,” “Upload Date,” “Feature,” and “Prioritize.”

On mobile, you can select multiple filters at once (one of each type). On the desktop, once you select a filter, the pop-up will close. You can open it again and select another filter, but keep in mind that it will be added to the existing one already applied. That means if you first select “Video” under “Type” and then “Today” under “Upload Date,” it will only show you videos that were uploaded on that day. If you don’t want that to happen, remove the filters you don’t want by clicking the “X” button next to them in the pop-up.

Go through a video frame-by-frame

Watching a Chifundo Kasiya/BGR

When you hit the play button, YouTube moves through the frames in the video in sequence. A frame is an individual still image, and the speed at which YouTube plays them (frame rate) is measured in frames per second (FPS). That is why when you see a video with “720p60” or “1080p60HD” in the “Quality” menu, it means the video is 60FPS. The more frames per second, the smoother the video will look. So when we say going frame by frame, we mean viewing these frames one by one, and the higher the FPS, the more frames you have to go through.

To go through a video frame-by-frame, press “.” to move to the next frame and “,” comma to move to the previous one. Doing this can allow for deep analysis of a video, and it’s different from looking at the video second-by-second. The frames go by so fast that it’s easy to miss important details at normal speed, such as fast-moving objects or fast-paced action scenes that only appear for a split second.

Source

Posted on

Before You Buy A New Laptop, Check For These Ports

Person working on a laptop. Farknot Architect/Shutterstock

It’s hardly the sexiest quality of any piece of hardware, and in the era of sleek aesthetics and hyperportability, port selection is often a forgotten afterthought. That said, disregard ports at your own peril. That sleek, glossy clamshell may dazzle you at first, but after the first week or two with a new laptop, I promise you’ll care far less about how pretty the color of the chassis is than how easy it is to plug it in to your favorite accessories (and charge it, and load up additional storage, and hook it up to a TV, etc.). Even the best laptops available in 2026 can benefit mightily from a generous allotment of ports.

I speak from experience when I say it’s wildly annoying to buy an ultraportable specifically because I wanted something with a svelte silhouette that could disappear into a backpack or courier bag, but then had to buy a bulky dock to get the connectivity I needed. In an era where USB-C is king, it’s easy to forget that a lot of accessories and peripherals require older/different ports to attach to modern hardware. Many will still need at least one USB-A port for backward compatibility, and optimally a handful; HDMI is also still vital for connecting to many displays, especially if you ever use your laptop as a media/streaming center attached to a TV. Let’s dive into which ports I consider absolute necessities, which are optional, and which you may actually want to avoid.

The must-have ports for everyday use

Side view of a laptop, showing its ports. odecam/Shutterstock

The necessities boil down to a handful of common use cases: flexible charging options, connecting peripherals, and outputting to external displays. Personally, I’m not a huge fan of carrying around a massive charging brick if I can help it, and luckily, a lot of modern machines give you the option to charge (albeit more slowly) through a simple USB-C cable. USB-C ports are an industry standard on new laptops, but you’ll want to take note of their number before you lay out your hard-earned cash.

An unfortunate number of machines still skimp on USB-C, only including three or fewer. In some rare instances, you’ll only find a single, lonely USB-C. As someone who frequently charges through USB and also attaches monitors, microphones, external storage, mice, mechanical keyboards, and more, three USB-Cs is the bare minimum. I also strongly recommend looking for a machine with at least two USB-A ports. Older peripherals, including things like printers, often connect via USB-A, so unless you’re living in a hypermodern environment where older devices have been totally phased out, USB-A remains an unfortunate requirement.

As someone who frequently uses my laptop as a media streaming platform, I’d also never buy a machine without an HDMI port. I frequently hook my laptop up to my TV to watch movies or live sports events, so at least one HDMI output is non-negotiable. In a perfect world, I’d also like a DisplayPort output, mostly for monitor connections, though those are significantly rarer than HDMI.

The bonus ports I love (and the ones that are a waste of real estate)

Somebody plugging an Ethernet cable into a laptop. junpiiiiiiiiiii/Shutterstock

There are also some bonus ports I look for, one of which is a headphone jack. Anytime I’m working in public, I’ve got earbuds in or headphones on. While they’re usually wireless, on the (sadly frequent) occasions when I forget to charge up before I leave the house, having a jack to hardwire a pair of cans to my machine is a huge boon.

I also love a microSD or full-size SD slot for adding some quick, fast storage. Beyond that, a Thunderbolt 4/USB4 port is always a welcome luxury. Beyond the extra bandwidth, it opens up the possibility of connecting an 8K display, or even daisy chaining external GPUs. USB4 will increasingly shift from a nice bonus to a practical necessity as the rest of the hardware world starts to catch up with connection protocols.

On the other hand, things like a dedicated Ethernet port or legacy display ports (like mini DisplayPort or even VGA) are a waste of valuable space. I’m not typically transferring such huge amounts of data on my laptop that I need to wire it up to Ethernet, and none of the displays I use require those old-school ports. I’d only endorse shopping for a niche connection like this if you have a specific piece of hardware you can’t live without, or, in the case of an Ethernet port, if you mostly use your laptop in one specific spot at home and it’s an overpowered desktop replacement.

Source

Posted on

Smart Plug Vs. Smart Bulb: Which Is Better For Upgrading

Person adjusting smart lighting color and brightness through mobile app Andreypopov/Getty Images

If you are planning to modernize your house, it is likely that you have thought about comparing smart plugs vs. smart bulbs for your room lamps. As the names suggest, both are great products if you are trying to build a smart home, and these two devices can be seen as the gateway products into this segment. Both solutions allow you to remotely operate and manage the lighting inside a room, but deciding if smart bulbs are worth it will vary depending on your preferences.

For instance, by having a smart light bulb, you not only manage to automate this task but get a personalized experience as well. In contrast to this, smart plugs are quite straightforward and lack the personalization that you might get by buying a smart light bulb. Both products make it easier and more convenient to turn on lights and devices in your house, but, ultimately, knowing how each device works and the respective strong and weak points is the best way to find a solution for your home. Some extra factors may play into your choice, as well, such as the cost of each item, how many rooms you want to upgrade, and compatibility with other gadgets.

Smart bulbs are a great choice if you like customization

Person controlling smart home app on smartphone to adjust lights and temperature Natee Meepian/Shutterstock

Smart bulbs connect to your home’s Wi-Fi, making it possible to manage everything through your smartphone or even your voice assistants. Besides the ability to control your lights remotely, another advantage of using these bulbs lies in their features. Some smart bulbs offer the option to choose between several temperatures of light that can be selected according to how comfortable you want to feel or how good you want the environment for reading to be. Furthermore, if you invest a bit more, you can buy some smart bulbs with RGB that offer millions of color combinations and even more automation. In this case, it means that you could program the system to turn off the lights after a certain period or change the color. 

Although these unique features are what attract many users, smart bulbs do come with some disadvantages. First of all, this type of device is relatively expensive, both in up-front costs and in utility costs as smart bulbs use more electricity than traditional bulbs. Secondly, while the bulb itself is smart, it still requires power, so turning off the lamp or wall switch negates all of the device’s smart functions.

Smart plugs are cheaper and more versatile

Smart plug and European power adapters placed on white surface Simpson33/Getty Images

Only having the ability to turn devices on and off, smart plugs don’t offer the same level of customization as smart bulbs, but unlike bulbs, you can use smart plugs on a variety of devices — not just lamps. There are certain devices that you should never connect to a smart plug (such as high-wattage appliances and medical equipment), but there are plenty of “dumb” devices that you can make smart, including room fans, small kitchen appliances, dehumidifiers, and more.   

In addition to convenience, customization, and versatility, value can play into your decision when choosing smart plugs vs. smart bulbs. Some smart bulbs can be over than $29 each, but a good smart plug will generally be less than $10 and still offer good automation features via voice assistants and scheduled routines. But for things like dimming and color control, smart bulbs are still the best option.

Source

Posted on

4 Files To Never Store On A Hard Drive

an exposed hdd drive sitting on a circuit board Remitski/Getty Images

Reformatting your hard drive or having it suddenly die on you is pretty horrific. You can lose the most important documents in just seconds, especially if you haven’t backed up your desktop in a while. All your essentials should get priority for storage and backup, but you should also consider separating any suspicious, unsafe, or exploitable items into another physical storage solution. Moreover, vulnerable executables are sometimes a no-go, as they can compromise your files’ safety and even the drive’s performance.

In general, you want to prioritize keeping your hard drive focused on documents, photos, and some videos. So then you need to decide what’s worth leaving on your hard drive, and what’s worth storing in the cloud — as certain kinds of files shouldn’t be kept in the cloud either. Normally, it comes down to privacy, which ones might ruin you if you accidentally lose them forever, and the general technical reliability of your long-term storage solution. But if you are ever worried about losing anything permanently, the 3-2-1 rule for handling digital backups is usually pretty foolproof.

Intellectual property files

the copyright symbol in holographic form hovering over a person's hands on a keyboard Digineer Station/Shutterstock

Anything corporate or work-related (unless permitted) should not be stored on a personal hard drive. This is because it can create legal issues if the company no longer employs you and you still hold intellectual property on your computer. Usually, this isn’t something you should worry about too often, as most companies have a controlled process for keeping intellectual property files digitized and a very clear policy for handling them.

But if you are ever uncertain about work-sensitive files that are saved onto a local, personal hard drive, it is best to delete them so you can avoid any legal consequences that may come in case you have them, or for some reason, they end up in the wrong hands (like, say, someone got a hold of your external hard drive and it was stored there). But if you are not sure, just ask yourself: “Is this file owned by you or owned by someone else (like your work)?” and if it is the latter, do not leave it in cold storage.

Active project files or live documents

a person working on a project using multiple monitors Andrey_Popov/Shutterstock

Active files, such as project data files, are live files that are edited, used, and collaboratively maintained over time. Examples of active files or live documents may include Excel, Google Sheets, and CAD. There are three main reasons not to store active files on your hard drive:

HDDs may offer latency and slower save and load times, which can make the experience feel really laggy and awkward. If you need to set up a collaboration with those specific documents, leaving it locally saved can lead to trickier situations, since you’d need to either set something up more portably, like swapping a physical external HDD, or consider using a network-sharing solution. Either way, there are downsides to doing this, so it’s better to keep those files synced in the cloud rather than keeping them solely stored in the HDD — as some secure cloud storage solutions, like Proton, offer built-in online file sharing already.

Lastly, long-term degradation. Every time you access and save a file on the HDD, you generate heat (due to the rotating inner platters inside). Since those files aren’t usually archived until the end, you would need to constantly overwrite the current version to keep the file up to date. This has an added effect of potentially producing multiple copies of the file with dated stamps, which can sometimes mess up the workflow if you accidentally mix them up. So, in summary, it just isn’t practical to leave those frequently accessed or updated files stored on an HDD.

Downloadable and frequently used applications

a person touching microsoft edge on a windows computer Wachiwit/Getty Images

Applications, such as your games, don’t need to be stored on your primary hard drive (the one that acts as cold storage). They take up a lot of space and sometimes make it harder for you to back up your most crucial files due to storage constraints and the time it takes to properly back up everything. It then becomes much easier to just re-download those applications from the manufacturer’s or developer’s website, or from the Microsoft Store or Mac App Store.

Plus, if you’re playing a game that requires a lot of loading, such as an MMORPG like “Final Fantasy XIV,” you’ll want to consider storing it on an SSD rather than an HDD, since it’s often the case that these files need to be quickly recalled and accessed while you’re playing (it helps reduce latency). All in all, you’re better off separating out the frequently used updated applications onto an SSD if possible to avoid the technical hiccups that come with a slow HDD.

The installed operating system

a computer showing the windows 11 logo with a person sitting infront of it Alex Photo Stock/Shutterstock

If you have the choice between an internal SSD and an HDD for your operating system, you should always put it on the SSD. Placing the operating system on your HDD could be a problem because HDDs are unfortunately slower and can bottleneck your PC’s performance. As such, system applications on an SSD load faster and open almost instantly, and files stored on the operating system are accessed quicker, too. Plus, one inherent weakness of HDDs is their durability.

This is because they store data differently, with SSDs using flash memory and HDDs using magnetic disks. So, HDDs using moving parts to store and access data, and if it’s dropped, bumped, or impacted in the wrong way, you can essentially damage them. Ideally, something very important, such as your operating system, should not be stored on the HDD if you can help it; not only does it functionally perform worse when running, but you can also accidentally lose the data on it (having a loss of data or corruption can really mess with your system).

Source