Posted on

3 Reasons Why Your VR Headset Is Collecting Dust

A VR headset siting on white desk Pressmaster/Getty Images

Not too long ago, it may have been possible to reasonably argue that virtual reality (VR) headsets were poised for a breakthrough in popularity. However, it now seems any initial enthusiasm about these devices has worn off. As Business Insider reports, while sales of lighter tech-enabled smart glasses may be increasing, in 2025, shipments of heavier VR headsets appear to have dropped by about 43%. As a VR headset owner, I can personally speak to factors that may be driving this trend.

In early 2020, looking for a device that would let me escape the confines of my apartment with a pandemic quickly approaching, I purchased an Oculus Go. I was impressed enough at the time to purchase an Oculus Quest (now called Meta Quest) shortly after. For a few months, I used the Quest almost daily. Games like “The Climb” allowed me to simulate an extreme sports experience, “Superhot VR” almost convinced me I was in “The Matrix,” and VR apps like “Mission: ISS” leveraged the technology to offer a small glimpse of what space travel might actually look like from an astronaut’s perspective.

From where I’m typing this, I can look directly at the closet where I keep my Meta Quest. It’s been there for four years. While the novelty of VR kept me engaged at first, it’s been a while since I’ve felt the need to strap on the headset. The reasons why might shed some light on the waning popularity of these devices.

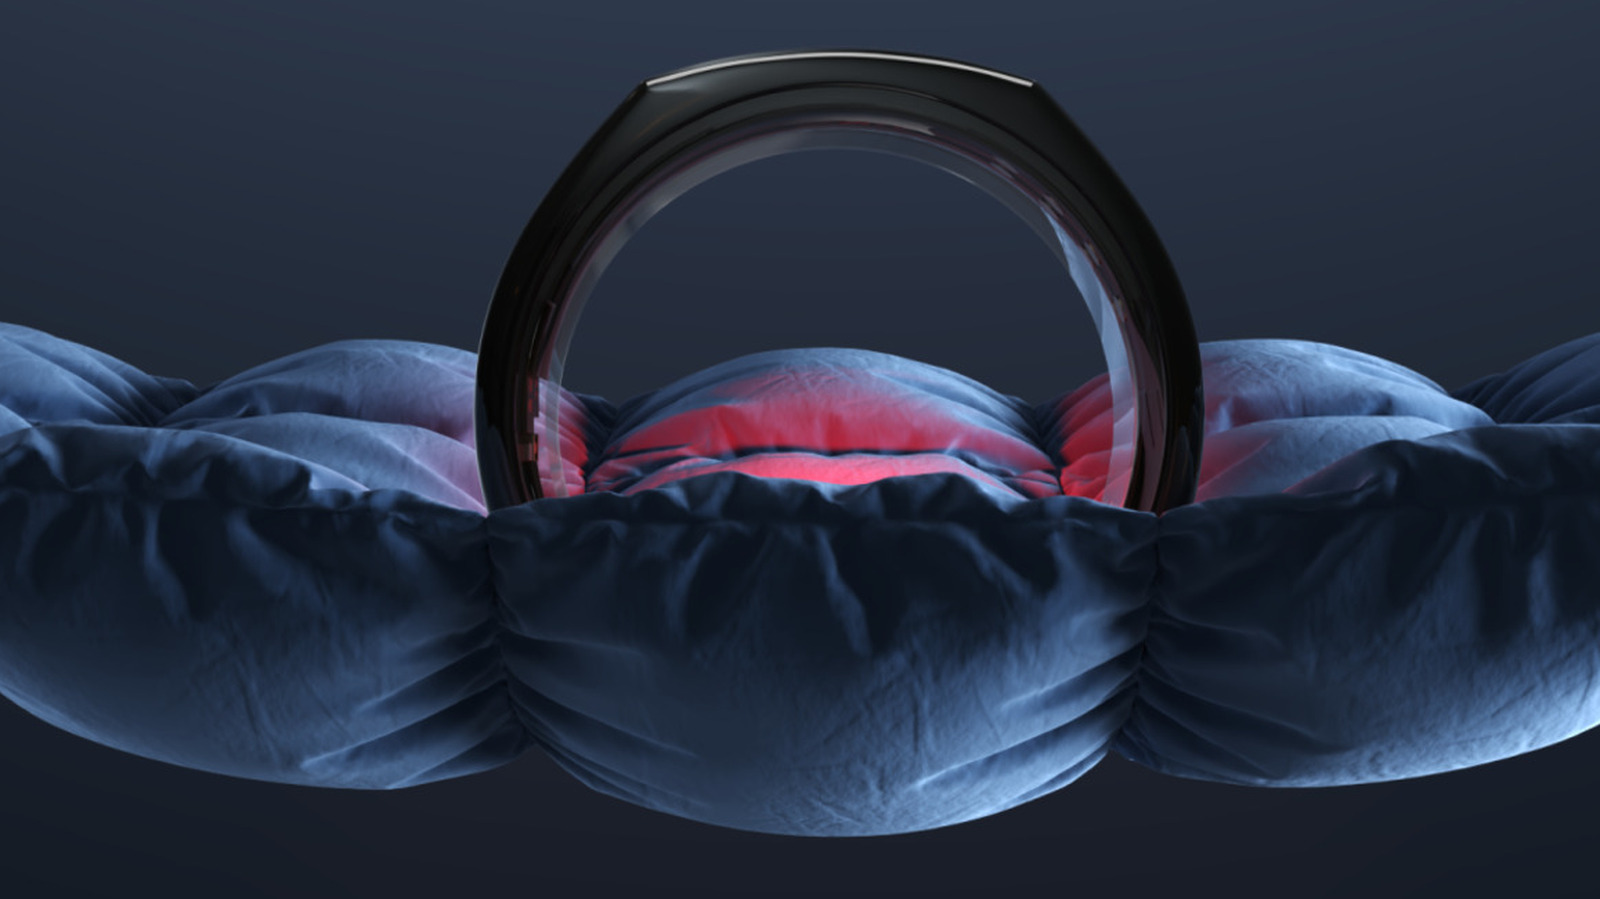
Wearing a VR headset isn’t actually convenient

A person using laptop with a VR headset next to them on a white desk Seacalm/Shutterstock

As immersive as VR worlds can be, it’s worth addressing a basic point right off the bat: Actually accessing those worlds isn’t exactly comfortable or convenient. Research indicates that, while it’s not necessarily a major problem, discomfort isn’t particularly uncommon among users of VR headsets. I can attest to the fact that these devices certainly never felt like they were designed with ergonomics in mind. The headset is noticeably heavy, and to ensure a seamless VR experience, you have to wear it fairly tightly. This caused me headaches on more than one occasion.

Now, I remember my Quest allowed me to “draw” an invisible perimeter around my body before I started playing any games or opening up any experiences. The perimeter was meant to ensure I didn’t bump into anything or trip over anything in the real world while the VR headset’s screen dominated my visual field. If I stepped outside of the perimeter, the device would alert me.

On the one hand, this basic safety feature allowed me to indulge in VR experiences ranging from simulated fitness classes (“Supernatural”) to boxing (“Creed: Rise to Glory”) without worrying about accidentally punching a hole in the wall. On the other hand, it’s still difficult to fully relax into that kind of experience when you can’t see (and to some extent, can’t hear) what’s actually going on around you. No doubt, spending more than half an hour or so isolating your senses from the real world with an uncomfortable device strapped to your head can start to feel disorienting and unnatural.

VR isn’t ideal for extended usage

A person wearing a VR headset and expressing surprise Hiroba Studio/Shutterstock

My personal experience isn’t the only evidence to suggest that VR headsets suffer from a “This is fun, but in limited doses” effect. According to a report from AR Insider, the vast majority of VR headset users spend a maximum of six hours a week in VR. About 30% of users spend less than an hour a week using their devices.

In a World Economic Forum editorial, Jeremy Bailenson, the founding director of Stanford University’s Virtual Human Interaction Lab, speaks to the strengths of this technology while admitting that spending more than half an hour in a virtual world probably isn’t advisable. Bailenson explains that VR can have productive uses that include training firefighters, offering “field trips” to help users learn about climate change, and even promoting empathy by letting users inhabit other bodies. I can personally state that the “Anne Frank House VR” experience brought me to tears by giving me a peek into the experience of hiding from oppression in a small attic.

That said, as Bailenson points out, VR environments don’t perfectly resemble ours. This alone can fatigue the senses. In addition, there’s something that feels inherently “bad for you” about spending hours cut off from what’s actually happening around you. These are certainly reasons my VR sessions were never that long. The problem is, starting up the device and navigating to an app takes a few minutes on its own. After a while, without making a conscious decision, I started to silently decide that using VR for half an hour wasn’t worth the hassle of starting a session.

In my experience, VR games offer quick hits of novelty

A person wearing a VR headset against a background with an abstract light graphic Choreograph (konstantin Yuganov)/Getty Images

Thinking back on how much fun VR was when I first bought my devices, only to realize that writing this article has done nothing to make me want to take the Quest down from the closet shelf to jump back in, VR starts to feel like, well, a gimmick. At least, that’s my impression from an average consumer’s perspective. Here’s the main problem I’m remembering: While the coolest VR games and experiences felt new and exciting, they didn’t offer much beyond that.

For example, one of the most popular VR experiences from my time using the Quest was “Richie’s Plank Experience.” I’ll admit, this was fun to play and even more fun to use as a way of introducing others to VR. The game/app simulates walking a plank off a skyscraper. Even though you know it’s VR, it’s hard to convince yourself to take the plunge.

But once you do, the experience is over in five seconds. On the other hand, while “Supernatural VR” may be the gold standard for showcasing the unique features a VR game can offer, as someone who always struggled to complete video games, I finished that one up in a weekend consisting of multiple short gaming sessions. Once I got used to the gimmick, the replay value dropped off a cliff. After a while, it didn’t seem worth it to spend money on games and apps that offered nothing more than a few moments of “Wow, this is cool!” excitement.

VR does have its benefits

An elderly man looking excited while wearing a VR headset Antonio_diaz/Getty Images

None of this is meant to suggest that VR is a useless technology. While I might not have donned my headset in almost half a decade, I can’t say I’m unhappy I ever bought one. For close to a year, the Go and Quest delivered enough entertainment to justify their costs.

That said, some of their most rewarding experiences ended up being lesser versions of experiences I could have had in the real world. Sure, I could burn some calories while pseudo-dancing to classic tunes with “Supernatural,” but working out in the real world is more convenient. I enjoyed using VR to simulate hikes, but doing so often reminded me that, hey, I might be better off just going on an actual hike.

What’s worth noting is that VR’s real value may be found outside of the consumer gaming and recreational spaces. For instance, VR can be a resource-friendly tool for training surgeons, truck drivers, and others. VR can also enhance the effectiveness of exposure therapy programs for people with PTSD. After all, when we take a step back, we should remember that VR is a relatively new technology. It makes perfect sense that it hasn’t come close to realizing its true potential yet. In the meantime, if, like me, you own one of these devices, it’s worth exploring some productive and fun uses for an old VR headset. If you’re just getting started with the Quest, you should also learn more about the essential Quest VR apps you may want to download first.

Source

Posted on

What Does The Red Light Mean On Your Oura Ring?

Health and fitness wearables are experiencing something of a renaissance at the moment, like the Oura Ring and smart watches. In the case of Oura, it’s a sleek, lightweight smart ring capable of tracking all kinds of health metrics, from sleep to heart rate to temperature. In fact, it includes so many advanced features, sometimes it can be a challenge to keep track of what the various indicators actually mean — including a red light. 

A red light on a health tracking device may seem alarming, but don’t worry: If you grabbed an Oura Ring 4, one of our favorite smart rings, and it’s displaying a red light, that just means it’s actively measuring your blood oxygen levels (SpO2) while you’re asleep. The sensor keeps an eye on variations in those levels, which can be important indicators for your overall health. Most people’s blood oxygen saturation level should measure between 95% and 100%; a reading too far below that may indicate a potential issue. Be aware that this feature isn’t available on Gen2 or older Oura Rings.

How the Oura Ring detects blood oxygen levels

An image of the Oura app on a smart phone in front of a screen displaying some of the smart rings bella1105/Shutterstock

While you’re asleep, the Oura Ring sends pulses of red and infrared light into your finger by way of it’s LEDs. Highly oxygenated blood reflects more red light than infrared light; inversely, low blood oxygenation levels mean more infrared light is reflected. The ring measures this and reports the data in the Oura app. You can find it on the Sleep screen, though you’ll want to ensure that your Oura Ring’s sleep tracking is working correctly first.

You can see your Average Blood Oxygen score, which is the percentage of oxygen in your blood over three hours of sleeping, as well as a graph of your Breathing Regularity. This will give you a sense of any irregularities in blood oxygen levels over time, and is not the same as respiratory rate, which is based on breaths per minute.

Normally, you won’t see those red LEDs light up during the day, but you may catch a glimpse of them anytime the ring detects sleeping. If you’re relaxing and your heart rate, BPM, and movement hit low levels, the Oura ring may think you’ve fallen asleep and begin reading your SpO2.

How to use Oura’s blood oxygen sensing features

Tracking of Breathing Regularity and Average Blood Oxygen needs to be manually enabled before the Oura ring will start measuring while you sleep. To do so, find the hamburger menu in the Oura App and select Blood Oxygen Sensing, then tap the button and toggle it on. To activate it, your ring will need to be connected to the app via Bluetooth. Next time you’re asleep for more than three hours, your scores should pop up on the app’s Sleep screen.

Breathing Regularity shows up in the app as a color-coded timeline with an optimal rating displaying no major variations. A good rating will display as dark blue vertical lines, while fair is rendered in light blue. Frequent variations in your blood oxygen levels, which show up as white lines, may indicate an issue with your breathing or oxygenation, so you’ll want to pay special attention in this case. There are also suggestions on how to improve your breathing regularity that can be accessed by tapping the information icon. 

Source

Posted on

5 Of The Worst Places To Set Up A 3D

Person working with a 3D printer inside a lab Cyano66/Getty Images

Buying a 3D printer is just the first step. You need to correctly set it up too. When it comes to placing a 3D printer, there are lots of factors at play, especially relating to aspects like health, safety, and convenience. That makes some areas of the house or workspace perfect for a 3D printer, while rendering others a major risk.

For instance, experts have long warned about setting up 3D printers in bedrooms, as prolonged exposure to harmful emissions from the printer puts your health at risk. Similarly, putting 3D printers in areas that see frequent changes in temperature, say near a window or air vent, impacts the print quality, as 3D printers operate best in spaces with stable temperatures.

Whether you’re working with quick prints or want to operate the 3D printer overnight, a proper setup is critical to ensuring high-quality prints, minimizing health and safety risks, and offering peace of mind. The placement is just as important as picking the best 3D printer or the right filament.

Your bedroom

3D printer and filament kept on a table inside a room with cabinets and a TV in the background SofikoS/Shutterstock

Your bedroom may seem like the perfect place to set up a 3D printer. It’ll always be right there, allowing easy access throughout the day. Whether you want to monitor an ongoing print or start a new one in the middle of the night, the 3D printer will be within arm’s reach. But your bedroom is the worst place to set up a 3D printer.

One of the things you must know about 3D printers is that they emit harmful fumes. And if you’re in close proximity to it for extended periods, it’s a major health risk. These emissions, to a certain degree, depend on the filament used. Studies suggest that the higher the temperature required to melt the filament, the more the emissions. This means that filaments like ABS will produce more emissions compared to PLA. Remember, they’re both toxic, though PLA is considered somewhat safer than ABS. So, whether you’re using ABS or PLA, it’s best to always place the 3D printer in a well-ventilated area. As for avoiding exposure to particles generated during the printing process, you can opt for 3D printers that feature enclosures.

Even if we were to ignore the health risks, setting up a 3D printer inside your bedroom impacts your sleep. That’s because 3D printers make noise and generate heat. When operated for extended hours at night, it becomes more than an inconvenience, affecting your comfort level. Of all the places inside your home, the bedroom should be the last to set up a 3D printer.

Kitchen

Wooden table top in a kitchen with cabinets, plants, and a window ArtPhoto21/Shutterstock

Your kitchen too might seem like a convenient area to place a 3D printer. It’s well-lit, has proper ventilation, and plenty of stable surfaces. But it’s another place you should never set up a 3D printer, and there are several reasons why.

First, harmful fumes and emissions from the printer can contaminate items around it. Similarly, the kitchen itself has airborne impurities like grease, food particles, and more, which can stick to components, affecting the normal functioning of your printer. You’ll also be forced to clean the 3D printer more frequently, a task that can simply be avoided by placing it in a relatively cleaner space.

Additionally, the kitchen has high moisture levels, and humidity affects the filaments. Even under normal conditions, it’s advised to store filaments in airtight containers with a few packets of silica gel to avoid moisture buildup. Then comes temperature fluctuation. While you’re cooking, the temperature rises quickly, and when you’re done, it falls back down just as fast. Your 3D printer can’t handle this well, and it shows up in the quality of prints.

Common areas with frequent movement

Working 3D printer with filament placed on a white table Sergiophoto84/Getty Images

When it comes to common areas, say, the living room or a hallway, these are again bad choices to place a 3D printer. That’s because these areas see a lot of movement throughout the day, which exposes your printer to continuous vibrations. When that happens, the prints may show signs of misalignment between layers. Keep in mind that 3D printing is supposed to be a precise operation, and ideally shouldn’t be exposed to external vibrations of any kind.

Other than that, if you have kids or pets in the house, placing it in common areas increases the risk of someone accidentally running into the 3D printer. While that will most certainly affect the ongoing job, there’s also the risk of damage to the printer itself in case of a major collision or if it topples.

You should ideally place the 3D printer in a garage, laundry room, or other place that doesn’t see a lot of movement. And make sure to install exhaust fans to remove ultrafine plastic particles and other harmful emissions. If you want to monitor the ongoing job, install a top-rated security camera. Or to save money, you can repurpose an old webcam into a security camera.

Near windows and vents

3D printer placed alongside a laptop on a wooden table next to a glass door SofikoS/Shutterstock

Placing your 3D printer near a window may seem like a smart move, given all the talk around ensuring proper ventilation. But it’s also not the right choice for three reasons. First, areas near windows are more susceptible to temperature changes. They will be warmer during the day and cooler at night, compared to the rest of the house, which makes it a bad place for 3D printers. It’s best to go with places where temperatures remain largely stable. Also, make sure that the printer is not sitting under sunlight.

Second, if the 3D printer is placed near an open window or an operational vent, the sudden gush of air may cause warping. That’s obviously something you don’t want. Lastly, the 3D printer must be kept away from dust, and that’s why it shouldn’t be placed near a window. Like any other device, dust accumulation will reduce the lifespan of your 3D printer, as well as lower the quality of prints.

While ventilation is important, uncontrolled airflow is not the solution to it. On the contrary, it creates more problems. That said, you don’t necessarily have to move the printer to another room, but just away from the window or vent.

Uneven, unstable, or small surfaces

3D printer placed on a large wooden table alongside a laptop and spools of filament SofikoS/Shutterstock

While this may feel obvious, it’s still one of the most common 3D printer mistakes. It’s vital to place the printer on a flat, even surface. Even a slight tilt can cause parts to shift during printing. The surface needs to be stable too. You should ideally go with heavy tables or desks that remain steady and don’t wobble. If there’s a lot of vibration or foot traffic, you can use dampening pads to minimize the effects. An uneven or unstable surface is also a safety risk, as the printer may fall due to sudden movements.

Additionally, the space needs to be sufficiently big. While most people aim for a surface big enough to house the printer, you also need space around it. This ensures easy cleaning, and prevents accidents. Besides, 3D printers often create lots of mess, and constrained spaces make cleaning all the more difficult.

If you’re actively using the printer, you’ll also need storage space for filaments or resins, along with other 3D printer essentials. It’s vital to plan all this in advance, or you run the risk of poor print quality, lots of frustration, and even accidentally damaging the 3D printer.

Source

Posted on

Do You Need To Take Off Your Headphones At A

A person placing headphones and other belongings into a bin at a TSA checkpoint. Frame Stock Footage/Shutterstock

Wireless headphones, including over-the-ear models and earbuds like Apple’s AirPods, are commonly seen in public, as many smartphone users rely on these accessories to listen to their favorite content and talk on the phone while they’re on the go. Some people may wear their headphones throughout the day, even when they’re not listening to music, to the point where they might forget to take them off when the situation calls for it.

TSA checkpoints are one scenario where some headphone users might not take off their devices while preparing for the security check and moving through the checkpoint, but that’s not the proper procedure. Instead of wearing the headphones while going through the TSA checkpoint, users should place them inside the bin with all their belongings for screening. The only exception concerns people who are deaf or hard of hearing, who may keep using their hearing devices while passing through the checkpoint. But even then, additional screening may be applied.

The TSA allows users to bring headphones on planes, including carry-on bags and checked bags. Most people will probably want to use the headphones during the flight, so they’ll have them with them, or in their carry-on. While TSA documentation notes the traveler’s right to carry these devices, it also says that it’s up to the TSA officer to decide whether the device is allowed through the checkpoint. The documentation does not say whether the user should place the headphones in the bin when passing through the checkpoint, but TSA agents may instruct users to do so. If they allow a user to pass through the checkpoint with headphones on, the metal components inside the device may sound an alarm, which can lead to additional screening.

It’s not just about the alarm going off

A person wearing headphones around the neck at an airport. DG FotoStock/Shutterstock

If the metal-detecting alarm sounds, a TSA officer can conduct an additional screening, which may include a pat-down and inspection of the headphones that may have triggered the alarm. Users may be required to pass through the checkpoint again, without wearing the headphones, which may be placed in a separate bin. The X-ray machine will not harm your headphones or other electronic devices, if you’re concerned about damage. But there’s another reason why travelers should avoid wearing headphones while passing through TSA checkpoints that has nothing to do with triggering an alarm and slowing down the queue. Former TSA agent Caleb Harmon-Marshall told Business Insider that he would never wear headphones while going through security checks because he wants to be “very mindful” of his surroundings.

TSA checks can be very stressful for both the traveler and the officer, especially in crowded airports. Wearing headphones can make it difficult to hear instructions from TSA agents, even if you stop playing music or podcasts while you approach your turn to go through the security check. You may be an experienced traveler who is very familiar with TSA screening, but if you can’t hear a particular instruction, you’ll slow the security check for yourself and others behind you. That’s why it’s a good idea to take off your headphones and place them in the bin or your bag while you pass through the checkpoint.

Removing the headphones at TSA checkpoints will give you another benefit if you wear AirPods or other headphones all day. You’ll give your ear a break from the headphones, allowing ventilation to the ear canal and helping to improve ear health.

The only exception

A person wearing AirPods Pro. TatianaKim/Shutterstock

The TSA online documentation has a section for deaf or hard-of-hearing users where it explains that people with hearing disabilities should inform the TSA officer that they’re “deaf or hard of hearing and require assistance with the screening process.” The same page says that hearing aids or cochlear implants should not be removed during the security check, warning that additional screening and inspection may follow.

Since Apple’s AirPods Pro also offer hearing aid functionality, the devices may qualify as hearing aids. However, unlike hearing aids and cochlear implants, which indicate a hearing problem, the AirPods Pro don’t signal that the wearer may have hearing difficulties. In this case, the user should inform the TSA agent that they’re using the AirPods Pro as a hearing aid. Even then, it’ll be up to the agent to allow the use of the wireless headphones during the security check. The same goes for other headphones that can offer hearing aid functionality.

The Canadian TSA (CATSA) says that people with hearing disabilities can be screened without removing hearing aids or devices, but these will be inspected visually. The agency notes that some hearing aids may be affected by X-ray and metal detectors, advising users to ask for full body scans or physical searches. The Australian Home Affairs office notes that travelers do not need to remove hearing aids (cochlear implants, external components for cochlear implants, and middle ear implants), and that the devices will not be affected by metal detectors and body scanners.

Source

Posted on

4 Places You Should Never Store Your Phone

Smartphone in car glove compartment vin.rusanov/Shutterstock

A smartphone is a significant investment and protecting that investment takes a variety of forms. For example, a durable phone case and phone insurance, such as AppleCare+, are obvious ways to protect your phone, but it’s important to account for solutions that might be a little easier to overlook when seeking to minimize phone damage. Specifically, it’s vital to be aware of the types of spaces and locations where you should never store your phone.

How and where you store your phone can not only have a major impact on the functionality and lifespan of your device, but it can affect your own health, too. Other than guarding against physical damage from water and impacts, you should also store and charge your phone in a manner that protects it against environmental damage, and make sure you’re not keeping the phone too close to your own body for a long time. While learning about where not to store your phone, you may also want to research other habits and behaviors you should avoid that will help maximize your phone’s performance and safety.

Never store (or charge) your phone near heat sources

Phone and tablet charging on bed near pillows and blanket FotoHelin/Shutterstock

One of the most important considerations to account for when deciding where to safely store your phone is the way heat can damage it. However, it’s easy to forget that various appliances, devices, and surfaces can also give off the type of heat that may damage a phone. You should also make a point of not storing or charging your phone near these potential heat sources.

Naturally, this means not storing or charging the phone near appliances that obviously emit heat, such as ovens, microwaves, and even televisions. In addition to these areas, also consider how seemingly benign surfaces can become sources of heat in various situations or circumstances. For example, if you’re charging your phone overnight, you shouldn’t do so in a way that leaves it covered by blankets or a pillow. Along with potentially leading to phone damage, there’s evidence to suggest this could even be a fire hazard. Instead, it’s best to charge a phone uncovered on a hard surface with good airflow.

Don’t store your phone in your car

Phone sitting on dashboard of car Bitsandsplits/Getty Images

It may be common sense to keep your phone away from heat sources around the house, but don’t forget that your car’s interior can get surprisingly hot, especially on a sunny, summer day. This is one reason why you should never store your phone (or any device) inside your car.  Even if a car is parked in the shade, while it might not get as hot as a vehicle parked in the sun, it can still get hot enough to pose a risk to a phone stored inside of it. Exposing a phone to excessive heat can damage its internal parts, potentially leading to a range of issues.

Research shows that cars often function like greenhouses in warm weather. They can trap heat easily, leading to rising temperatures in short periods of time. Keep in mind that the temperature may fluctuate throughout the day, so even if the car doesn’t seem like it will get too warm when you park it, that could change over the course of a few hours. In addition to the heat your phone will be exposed to when stored in a vehicle, leaving any valuables unattended in a car also opens the possibility of theft.

Don’t put your phone in a security bin at the airport

Phone with other valuable items in airport security bin Chalabala/Getty Images

Knowing where not to store your phone also requires knowing where you should try to avoid keeping it even for short periods. For instance, travel experts discourage storing a phone in a TSA bin when proceeding through security at an airport. They point out that leaving your phone out of sight in a TSA bin puts it at risk of theft. In addition, when you’re in a hurry, it’s easy to forget to grab your phone from out of the bin as you gather your belongings.

Instead, experts suggest keeping a phone (as well as other valuable items, like wallets) inside a zippered section of a bag or item of clothing when going through security. They also recommend checking to confirm your valuables are still in those zippered sections right away when gathering your belongings, just to ensure you don’t accidentally walk off without your phone. That’s a mistake you might not realize you’ve made until it’s too late to correct it. Points like these serve as a reminder that potential damage isn’t the only factor to keep in mind when choosing where (and where not) to keep a phone. 

Limit how often you store your phone in your pocket

Close-up of person putting phone in pocket Alfonso Soler/Shutterstock

Keeping your phone in your pocket for extended periods could involve exposing it to the type of heat that leads to damage. Perhaps more importantly, you’re also exposing your body to radiofrequency waves, which technically represent a form of electromagnetic radiation. It may be tricky to keep your phone easily accessible without storing it in your pocket, but it’s worth exploring other options — not only for your device’s safety but your safety, too.

Although health experts admit there’s still limited research and evidence to indicate precisely how dangerous this type of radiation can be, there may be some reason to believe it could contribute to health issues ranging from infertility to cancer. The aim is to minimize direct exposure to the device. On a side note, using your phone too often in general can be bad for your mental and emotional health. Taking these steps can reduce your exposure to radiation and your phone’s exposure to excessive heat.

You may have to adjust some of your phone usage habits if you’ve been storing it improperly. Making these changes is worthwhile, though. By heeding the advice here, you’ll keep both you and your phone safe.

Source

Posted on

Is It Safe To Use Your PC Without A UPS?

A man plugging his PC cables into a UPS AYO Production/Shutterstock

An Uninterruptible Power Supply (UPS) is exactly what it sounds like: When your home’s electricity service gets interrupted — either due to a blackout or a tripped breaker – the device continues supplying power to your PC, monitor, or even that laptop you’re using without a battery. Since abrupt computer shutdowns can cause damage to both your hardware and software, a UPS has a battery that isn’t immediately cut when the power goes out. Your computer switches to this battery in the event of a power outage without turning off, and it continues functioning for a short period of time.

A UPS can certainly be helpful, but do you actually need one to keep your PC safe? For most people, it’s a great way to protect against several risks, but it isn’t a necessary purchase. If you live in a place that rarely suffers from power outages and generally doesn’t deal with things like brownouts or electricity surges, you can get by just fine without a UPS, unless you get extremely unlucky with a big power surge. We still recommend using a UPS, though, as the up-front cost is much cheaper than getting your pricey GPU replaced on the off chance that power issues do indeed damage it.

Apart from giving you backup electricity for a few minutes, certain kinds of UPS units have additional benefits as well. A line-interactive UPS, for example, can monitor and control the incoming electrical current being supplied to your PC. This can save your hardware from being damaged by “dirty power” conditions like undervoltage or power surges, even if there’s no blackout.

How blackouts and power surges damage your PC

A person holding a candle and pressing a button in the case of a blackout

As with any other electrical appliance, each computer component that consumes power is susceptible to harm if power suddenly goes out, flickers, or surges. In the case of a blackout, an old HDD’s mechanical read and write heads suddenly stop. This can result in them physically crashing into the platter, resulting in bad sectors and permanent damage to the drive. There’s no risk of this with modern SSDs that have PLP, but older models can still be susceptible to data loss in other ways.

Hardware aside, the files inside your computer are also incredibly prone to data loss or corruption if your PC abruptly turns off. This is true if you lose power without saving an important file, but it goes beyond that as well. If your PC is updating or installing files, a sudden power outage can corrupt your data. The harm this does is much more severe if this happens when you’re performing a system update, in which case the sudden power cut can corrupt your entire OS.

With all this in mind, it’s also important to note that a power outage by itself usually doesn’t harm any of your more important PC components — your GPU, power supply, and motherboard — but electrical power surges do. It’s not uncommon for a power surge or flickering electricity to follow after a sudden blackout, and if this happens often, it can fry pretty much anything inside your computer. It might not be as flashy as many other cheap ways to upgrade your gaming setup, but a UPS (or even a simple surge protector) is a wise purchase for pretty much anyone, especially now that AI data centers might be triggering more electrical surges and outages.

When does a UPS become necessary?

A person working at a PC in the dark Tempura/Getty Images

A UPS might be necessary for your PC’s safety if you live in an area that experiences constant power outages or brownouts. This could be regions prone to extreme weather conditions or areas with overhead power lines. While a sudden grid failure or power cut every few months might only have a low chance of doing any significant damage, frequent blackouts can severely shorten your rig’s lifespan. The same is true for electrical brownouts or when dealing with dirty power — your PC might survive a short period of being connected to uneven voltage, but if you’re constantly running it on dirty power, the prolonged exposure can speed up its decay.

Furthermore, when you’re asking if it’s safe to use a PC without a UPS, it isn’t just about the potential risk to your hardware components. If you’re a freelancer who has spent hours on a project, a college student cramming right before a deadline, or even a casual gamer playing a title where you don’t get an opportunity to save often, the risk of data loss is severe. For work or documents, a cheap UPS that doesn’t have a huge battery can give you the two or three minutes you need to save your work. For gamers who might need more time to reach the next save point, a more expensive UPS with a bigger battery might be needed. Either way, it’s better to have a backup and not need it than to need one and not have it.

Source

Posted on

Why USB-C Ports Aren’t Color-Coded (But USB-A Ports Are)

An image of a hand holding various USB cables Iaroslav Bushuev/Getty Images

I’ll admit, a big part of my motivation for writing this explainer is self-serving. As someone who has been using and reviewing tech for decades, USB color coding is one of those bits of trivia that has flitted in and out of my consciousness multiple times through the years, but never found enough purchase to really stick. It’s not something that sticks like knowing what type of USB port you have. Here’s hoping that a dedicated article to why most USB-A ports are color-coded and why most USB-C ports aren’t will help lodge it in the old grey matter.

The TL;DR is that USB-A ports are largely color-coded to denote the generation of USB they support. You might then assume, especially considering its simple, reversible form factor, that USB-C doesn’t require color coding because of some universal, standardized capacities. Unfortunately, the exact opposite is actually the case: USB-C lacks color coding because there are too many variables to easily indicate with a single color.

What the colors mean (and why USB-C lacks them)

A number of dangling USB cables ScaniaZ/Shutterstock

Despite the veritable painter’s palette of colors, things are easier on the USB-A side. Here’s what the various colors indicate:

  • White is the OG, which, in this case, means original generation. White indicates USB 1.X version devices.
  • Black covers the 2.0 generation of USB-A.
  • Yellow is the first split color, meaning it can support either 2.0 or the newer 3.0 standard. It also indicates an “always on” port, which can supply power even when the device it belongs to is powered down.
  • Orange means a purely 3.0 port or device, and is also “always on.”
  • Blue is also a USB 3.0 connection, but without the always on functionality.
  • Teal is for USB 3.1.
  • Red indicates a USB 3.1 Generation 2 and USB 3.2 port or device, the latest USB-A versions.

USB-C causes trouble for this kind of simple categorization system because a single USB connection can support USB 2.0, 3.x, or USB4 data speeds, DisplayPort or HDMI video output, Thunderbolt 3, 4, or 5, and power delivery ranging anywhere from a few watts up to 240W. You’d need a dizzying rainbow of colors to indicate which amalgam of speed, power, video capability, and protocol support a single USB port or device delivers.

Why it matters

Someone plugging a USB-A flash drive into a laptop Eza_Nanda/Shutterstock

On the USB-A side, colors mostly designate generation. This is primarily important because each generation supports different transfer speeds. USB 1.X (white) tops out at 12 Mbps, USB 2.0 (black or yellow) gets up to 480 Mbps, USB 3.0 (yellow, orange, or blue) up to 5 Gbps, USB 3.1 (teal) also maxes out at 5 Gbps, USB 3.1 Gen 2 (red) can get up to 10 Gbps, and USB 3.2 (red) can get a maximum of 20 Gbps. USB-C, on the other hand, is capable of much faster speeds.

The Thunderbolt protocol, which runs over USB-C, for instance, can hit transfer rates of up to 40 Gbps, while the new USB 4.0 reaches even higher, up to 120 Gbps. The issue with the lack of color coding on USB-C can cause downstream confusion. You may plug a brand new external SSD into your laptop and wonder why speeds are pinned at USB 2.0, or wonder why you can’t get a monitor that requires DisplayPort Alt Mode to work on some ports. Luckily, Thunderbolt and USB4 are looking to remedy some of these headaches by unifying capabilities.

Source

Posted on

3 Hidden Instagram Features You Need To Start Using

Close-up of a smartphone with the Instagram logo miss.cabul/Shutterstock

Instagram remains one of the most popular social media apps in the world, thanks in many ways to its intuitive features. Consistent updates to the app also continue to expand how users can share and engage with content (such as a recent update that finally gives users the option to edit comments). However, beyond the core features and functionalities, Instagram offers various hidden features that even seasoned users might not be aware of.

These lesser-known capabilities don’t just improve the experience of using this popular social media platform. In some cases, they turn Instagram into a separate photo editing app, showcasing how it can be a helpful tool even when not being used to share content with followers. Even if you’ve been active on Instagram for years now, there’s a good chance the app can do a lot more than you realized. Experiment with the features here to get a better sense of just how powerful and customizable the Instagram experience can really be. On a side note, while the information here provides general tips for how to leverage these features, the specific steps involved can sometimes vary depending on whether a user has an iOS or Android device. The Instagram Help Center can be a valuable resource to learn more about the proper ways to use these features with your device.

Block content you find offensive

Close-up of a person checking an Instagram account Charles-McClintock Wilson/Shutterstock

Using a social media platform can theoretically involve exposing yourself to content you don’t want to see. Luckily, certain lesser-known Instagram features can help you at least minimize the degree to which this happens. Specifically, a user can navigate to their profile and click on the three horizontal lines stacked on top of one another to access the “Settings and activity” menu. From here, a user can scroll down to the “How others can interact with you” header and select “Hidden Words.”

Next, the user can select “Manage custom words and phrases” at the bottom of the menu. This opens a feature allowing a user to type words, phrases, numbers, and emojis they don’t want to see in comments or messages. All a user has to do is type the words or phrases they find offensive into the field, separating each by a comma. It’s a simple but effective way to make the experience of using Instagram just a little more pleasant.

Turn Instagram into a photo editor without posting to your account

Close-up of hands taking picture a with a phone Peopleimages/Getty Images

Maybe you’re a fan of Instagram’s filters and general photo editing features. That doesn’t necessarily mean you’ll always want to post every photo you edit via Instagram to your Instagram account. Perhaps you want the option of posting these photos to your other social media accounts without sharing them on Instagram, maybe you’d like to add these images to your website, or maybe you just want to save them to your device for personal use.

An easy trick lets users accomplish these goals, turning Instagram into a photo editor app. You can start by, as above, selecting the three lines that will bring you to the “Settings and activity” menu. Then scroll down to “Your app and media” and select “Archiving and downloading.” Finally, confirm that the option “Save original photos” is toggled on. After confirming this, go back to the main screen and select the plus (+) symbol to post a new picture. Take a photo using Instagram itself or select an image from your camera roll. Once you’re done editing the picture using Instagram’s editing tools, make sure your device is in airplane mode.

Then try posting the picture. Naturally, in airplane mode, that action will be unsuccessful. However, if you’ve followed these steps, the edited image should nevertheless show up as saved to your camera roll. We’ve tried this ourselves and can confirm it works, but it’s worth noting that, upon turning airplane mode off, the picture may finish posting, so you might have to delete it when you’re finished.

Reset your Instagram algorithm to get a fresh start with suggested content

Instagram’s algorithm may theoretically serve to offer up the kind of content you find engaging, whether that’s cat videos, millennial memes, or inspirational quotes that famous figures never actually said. However, maybe your tastes have changed since you first started using Instagram, resulting in an algorithm that suggests content you now cringe at. Or maybe you simply feel the algorithm has gone astray, and you want a fresh start accordingly.

As with the other tricks here, a user looking to start anew with the Insta algo can navigate to the “Settings and activity” menu, where they may then scroll down to the “What you see” header. The user can then select “Content preferences,” followed by “Reset suggested content,” where they may then follow the prompts to start off with a clean slate. Within the “Content preferences” menu, users also have the option to modify the algorithm without resetting it entirely by selecting “Your algorithm” and making adjustments.

Again, these are just a few noteworthy Instagram features you might have overlooked. Other options users may wish to explore include using Vanish mode and experimenting with the relatively new Instagram for iPad. Of course, as the app continues to evolve, new features are also likely to emerge. Instagram users who know how to take advantage of both new and hidden features can truly leverage the app’s full potential.

Source

Posted on

3D Printing Safety: The Health Risks Nobody Talks About

A 3D printer in operation with an observer in the background. Ethamphoto/Getty Images

3D printers allow you to create pretty much anything you can think of. They work from digital blueprints, so even if you’re not good at modeling your own stuff, you can find dozens of websites and communities that share models for printing. But in order to create those items, you feed various materials into the printer as filament — namely polylactic acid (PLA) or acrylonitrile butadiene styrene (ABS) — to be melted or molded. Studies by the Environmental Protection Agency have found that printers release gases and harmful particulates during the printing process from these materials and how they are handled. Without proper ventilation or safety equipment, exposure to these contaminants can be harmful to your health.

Particularly, 3D printers release something called volatile organic compounds (VOC). To put it simply, VOCs are gases released from certain solids or liquids, sometimes under specific conditions, that can be harmful in great concentrations. Paints, strong chemicals, glues or adhesives are common examples. But 3D printers and the different filaments used can also release these, which is why proper ventilation is always recommended for 3D printers.

Unfortunately, that’s not the only safety hazard associated with modern 3D printers. During operation, they may also release ultrafine particles that can enter the body and cause further health problems. If they make it into the lungs, for example, they can cause inflammation, asthma, headaches, coughing, and other ailments. Depending on the type of filament, those health problems could be exacerbated.

How do you prevent exposure to these contaminants?

A man getting interacting with the control panel of a 3D printer. Stenko Vlad/Shutterstock

More studies are being conducted, and are probably necessary, for understanding the hazards related to 3D printers and the related materials. However, some of the more prominent hazards are relatively well-known, like microscopic dust exposure and VOC emissions. Another concern is the toxicity of the materials or resins used and how they react when exposed to UV light or lasers — some 3D printers use concentrated light to manipulate the materials. PLA is viewed as risk-free by many because it’s made from natural and renewable materials and is said to be biodegradable and environmentally-friendly. But it, too, releases ultrafine potentially harmful particles, as does ABS.

The best way to deal with these issues is to ensure proper ventilation before doing any prints. Make sure the printer is located in a room with plenty of space and exhaust. It’s also not a bad idea to install an air purification system with high-efficiency particulate air (HEPA) filtration to help remove the VOCs, dust, and other particles. It may also be wise to choose a closed versus open-air printer depending on the environment. It’s not a cost-exclusive problem, either, as these hazards can come from the cheap 3D printers you can buy to the most expensive models. Personal protective equipment is something else to look into. You should wear gloves, safety glasses or goggles, cover most of your skin with longer clothing, and wear a respirator if the space is confined or small.

Understand the risks and protect yourself accordingly

A 3D printer creating a yellow bowl model in a dark environment. Stenko Vlad/Shutterstock

Ultimately, the goal of this article isn’t to frighten anyone away from using a 3D printer. They’re excellent pieces of technology and highly useful tools when used appropriately. It’s more about being cautious with the potential dangers and ensuring you have a proper way to mitigate exposure before you come into contact with anything harmful. This is especially important to remember for 3D printers used in classrooms, educational settings, and wherever else children and younger users may be exposed. Children are more vulnerable, so it’s best to reduce their exposure as much as possible and keep them a safe distance away from any 3D printers in operation.

Before you install one of these printers in your home, office, or workshop, understand the risks, and do your due diligence about improving overall safety. Take breaks, wear protective equipment, keep the ventilation running, install an air purification system, and maybe avoid running the 3D printer all night. Moreover, if you are thinking of buying a 3D printer and don’t have one already, there are some other things you need to know first. For example, they’re not a plug-and-play experience, and you will need to do some fiddling and troubleshooting nearly every time you plan a print. You’ll also need to store the filament and materials properly, and with the knowledge of their potential toxicity, that might inform your storage decisions further.

Source

Posted on

What Happened To Sharp TVs?

A Sharp TV display area at a store. Opasbbb/Shutterstock

TV manufacturers can go through a lot of ebb and flow when it comes to market presence. There are eras where one or two TV brands reign supreme over a particular type of picture tech (e.g., Panasonic for plasma TVs), but there can also be long stretches of time where a popular TV maker is radio silent, only to make a surprise comeback. Then, there are companies like Sharp. Back in the 2010s, Sharp was one of the main players in LCD TV production and was renowned for its big-screen Aquos and Quattron sets.

However, as the years passed by, Sharp’s North American presence became more and more fragmented. Between 2015 and 2018, Sharp actually licensed its TV brand to Hisense, until the former was purchased by Foxconn in 2019; at which point, Sharp began producing and selling its own TVs once more. It might sound like Sharp has been thriving ever since, but the reality is a bit more of a mixed bag.

In March 2024, Sharp announced that it was completely shutting down its big-screen LCD panel production and would convert its massive manufacturing plant in Sakai, Japan, to a data center. At the same time, Sharp also announced that it would be pulling back on smaller panel production across its other global facilities.

Sharp still sells TVs in North America, but the availability and quality aren’t what they used to be

Nowadays, you’ll actually be able to find 4K HDR TVs made by Sharp, and there are several Mini LED sets — and even a couple of OLED models – to choose from. That said, you won’t just be able to waltz into your local Best Buy or Walmart and expect to take home a Sharp TV. Instead, you’ll need to order newer Sharp sets like the Aquos XLED FV1 4K Mini LED, and C55FS1UR 4K OLED from underdog retailers like BrandsMart USA and Walt’s TV.

Sharp is also more on par with value-oriented TV brands like Hisense, TCL, and Vizio, rather than sharing prestige with leading screen titans like Samsung and LG. That’s not to say that buying a new Sharp TV is a bad idea, but it pays to be as educated as possible when you’re shopping for a new TV. Here’s hoping Sharp doesn’t fully stop making TVs like Panasonic TVs, a once-lauded plasma TV leader that fell off the North American market for several years, had an OLED comeback for two years, and then ceased production all over again.

Source